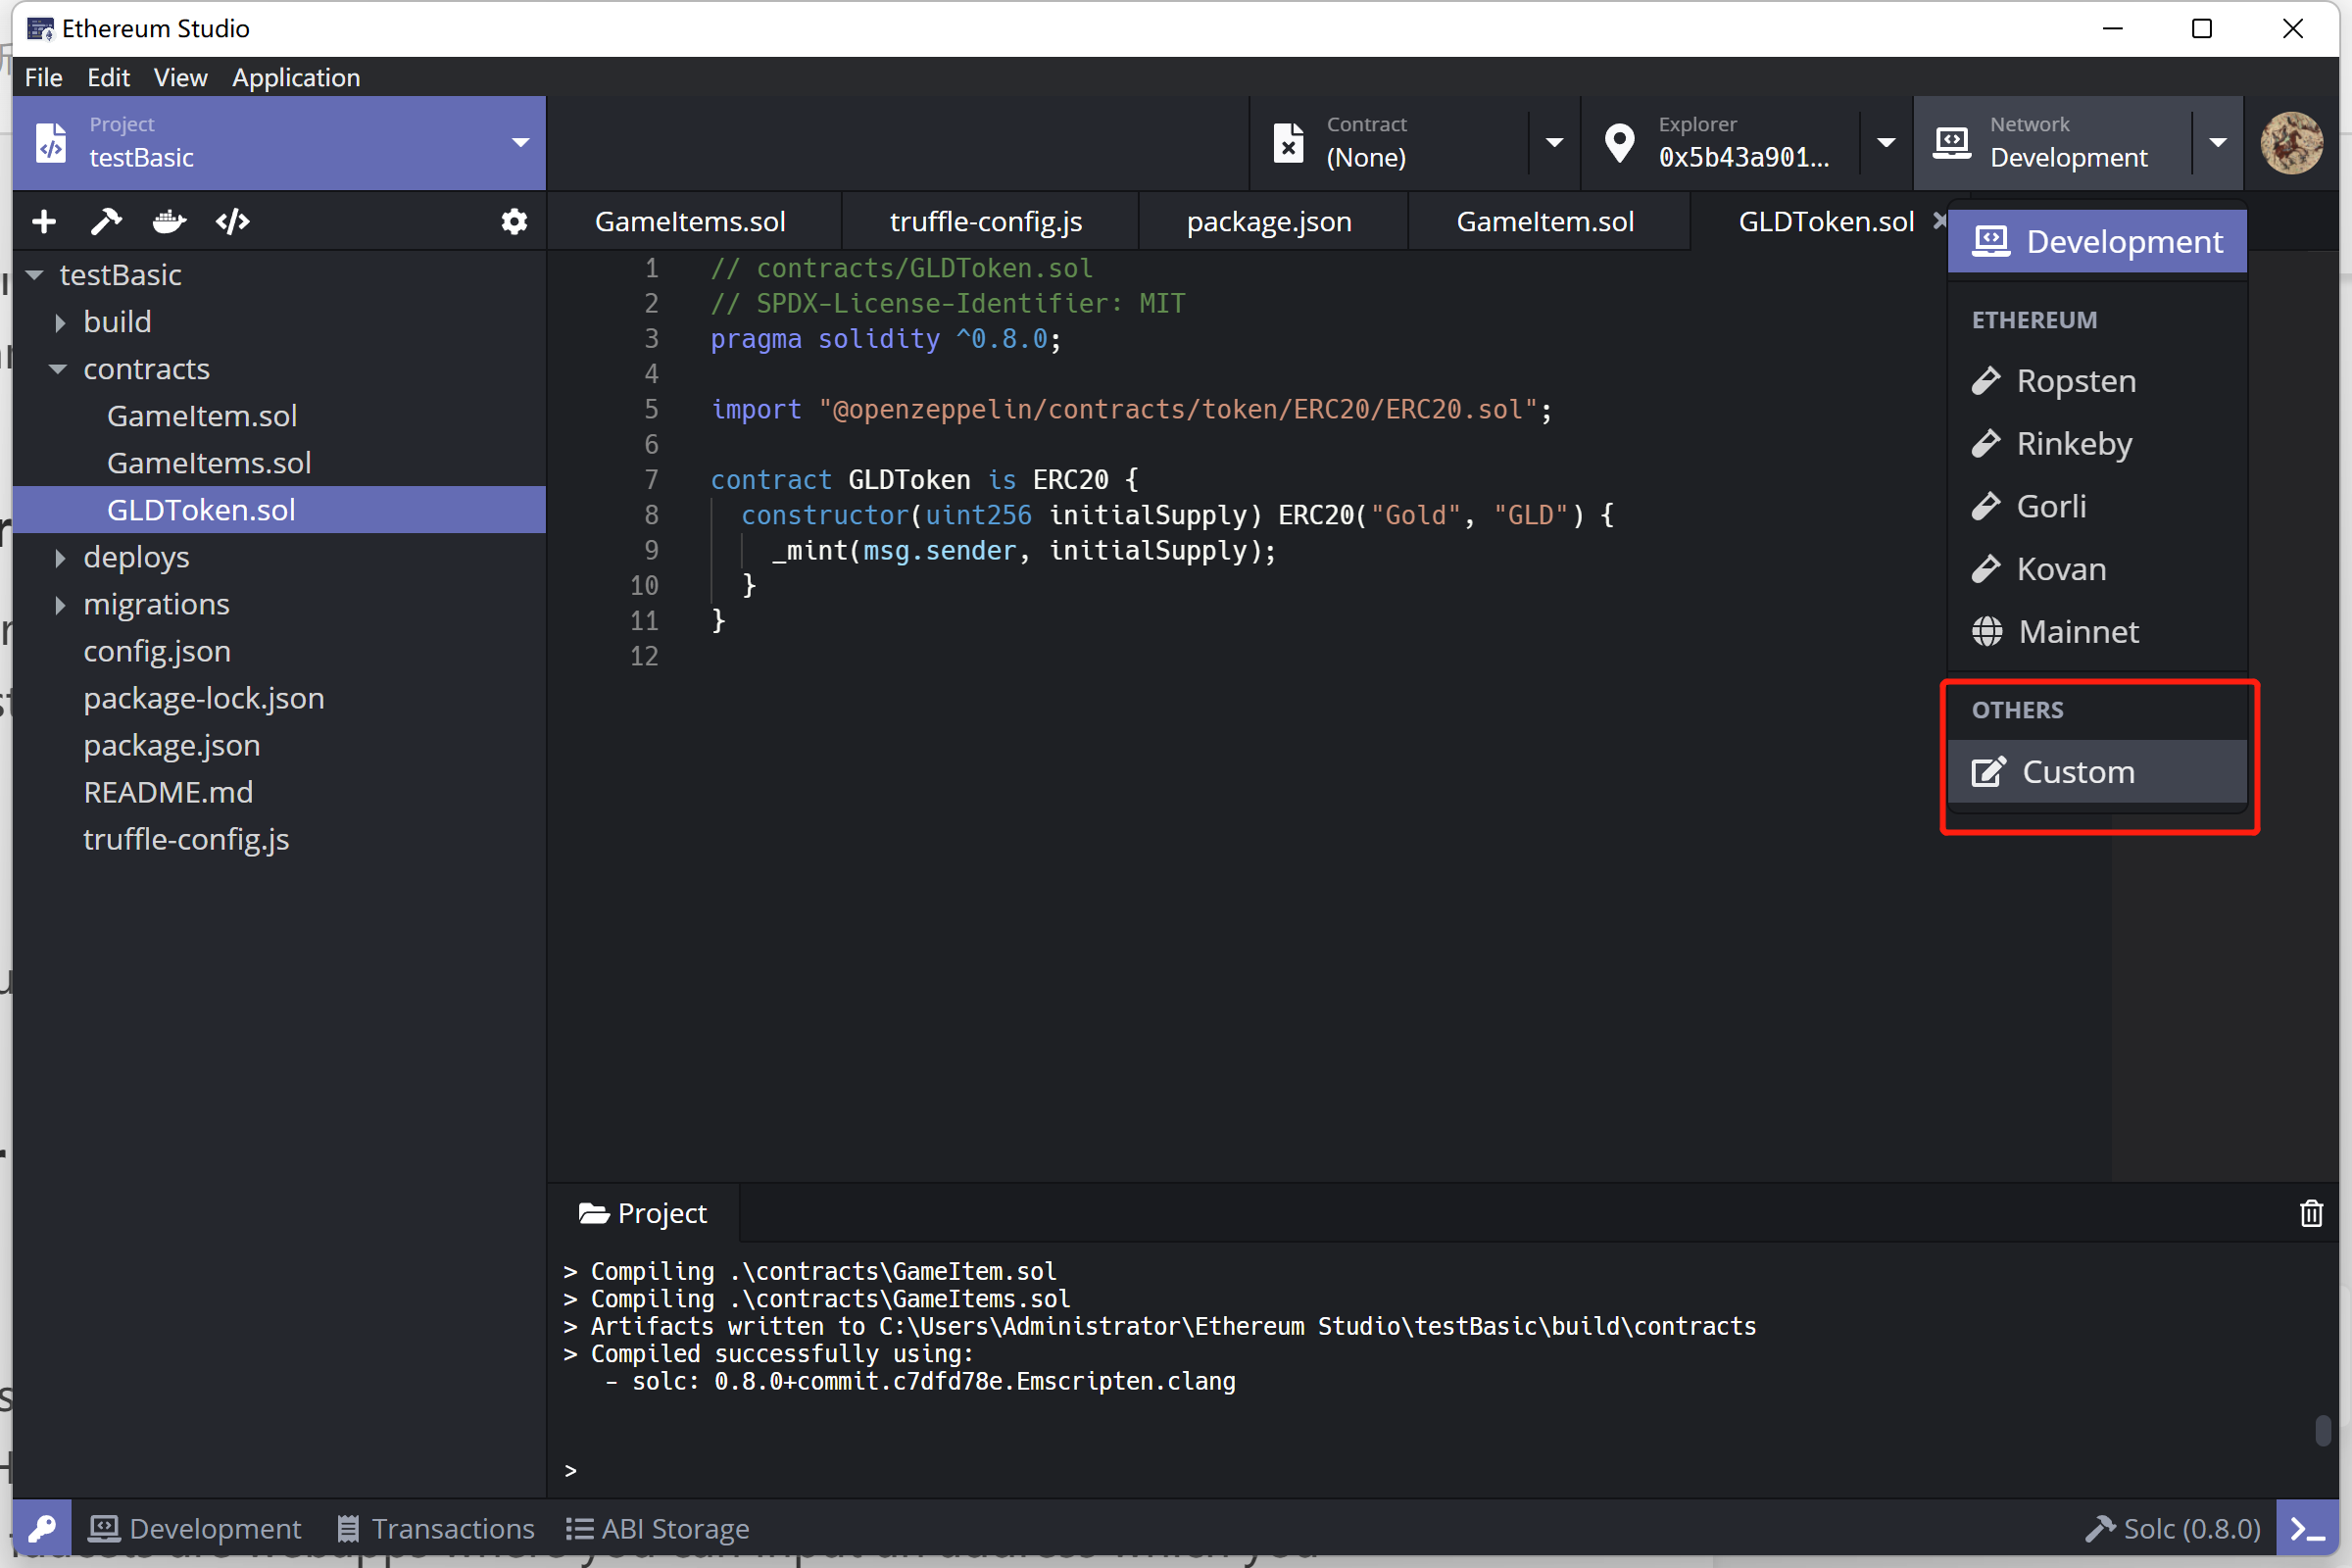
Network
Local Development
Developers may want to run a smart contract on a local network to see how it works before deploying. In Ethereum Studio, developers can create a local blockchain instance to test smart contracts inside the IDE. This local network provides much faster develop iteration than a public testnet(for instance, you don’t need to require test ETH from a testnet faucet).
Geth
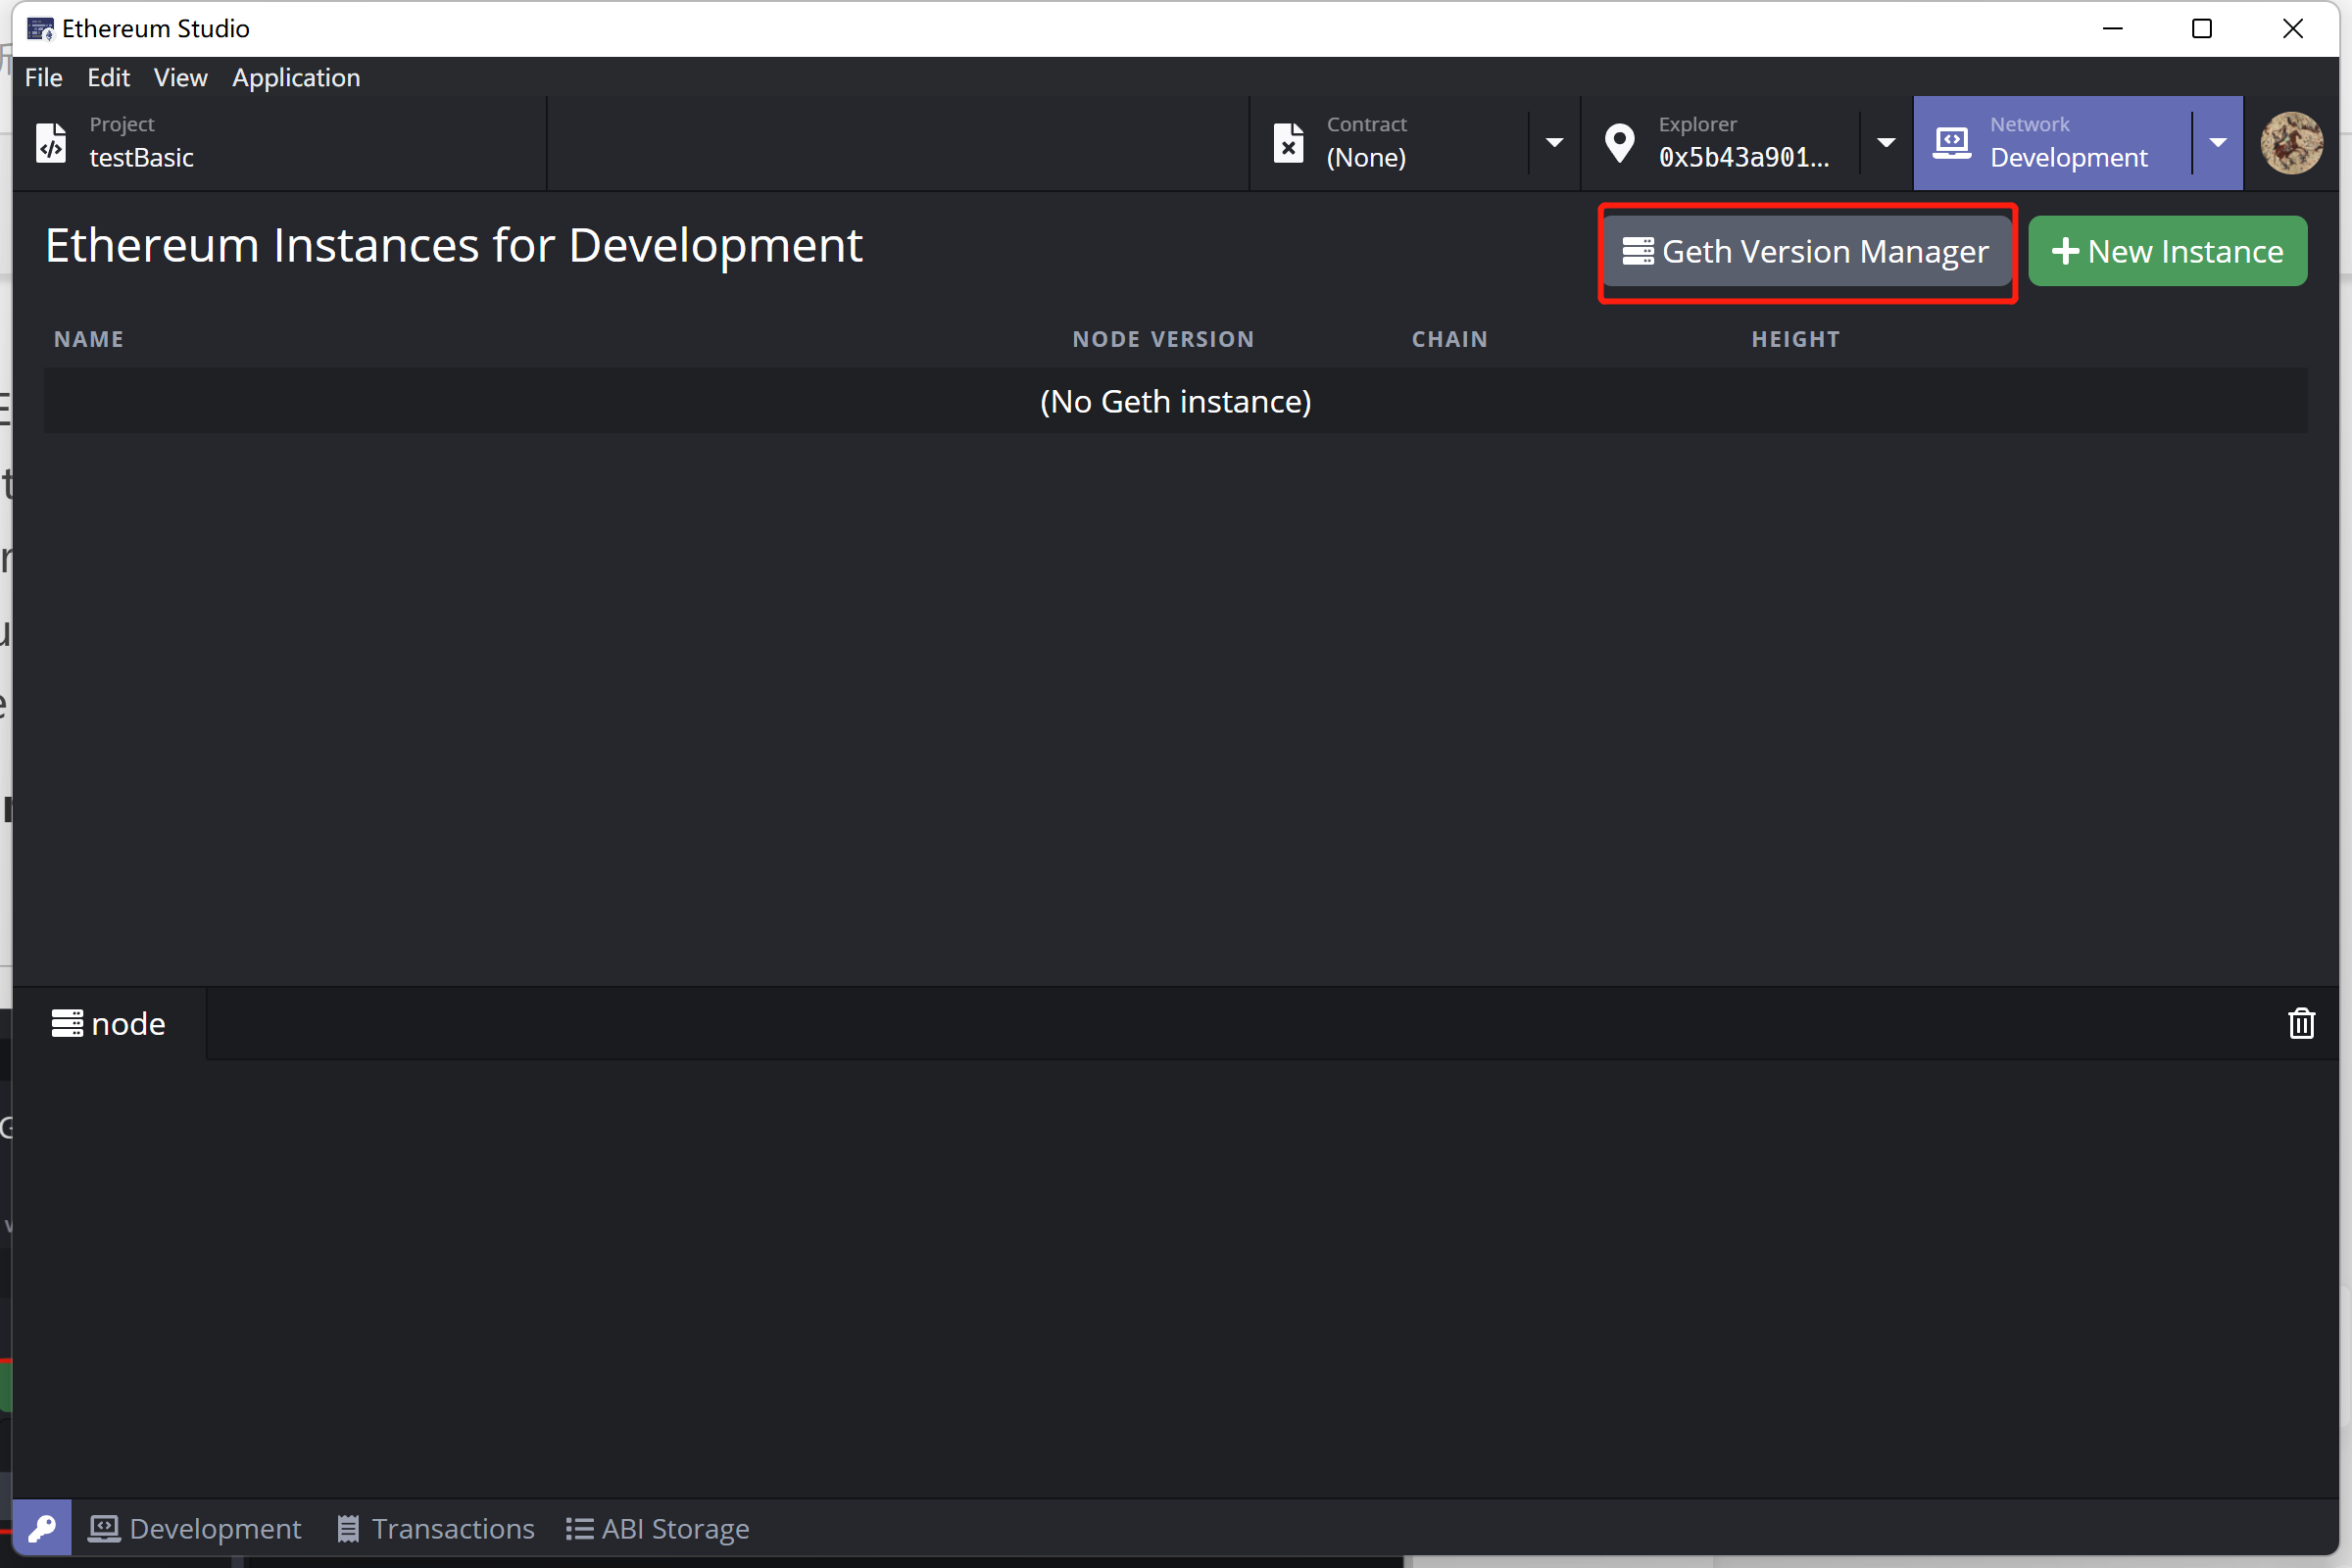
Geth Version Manager
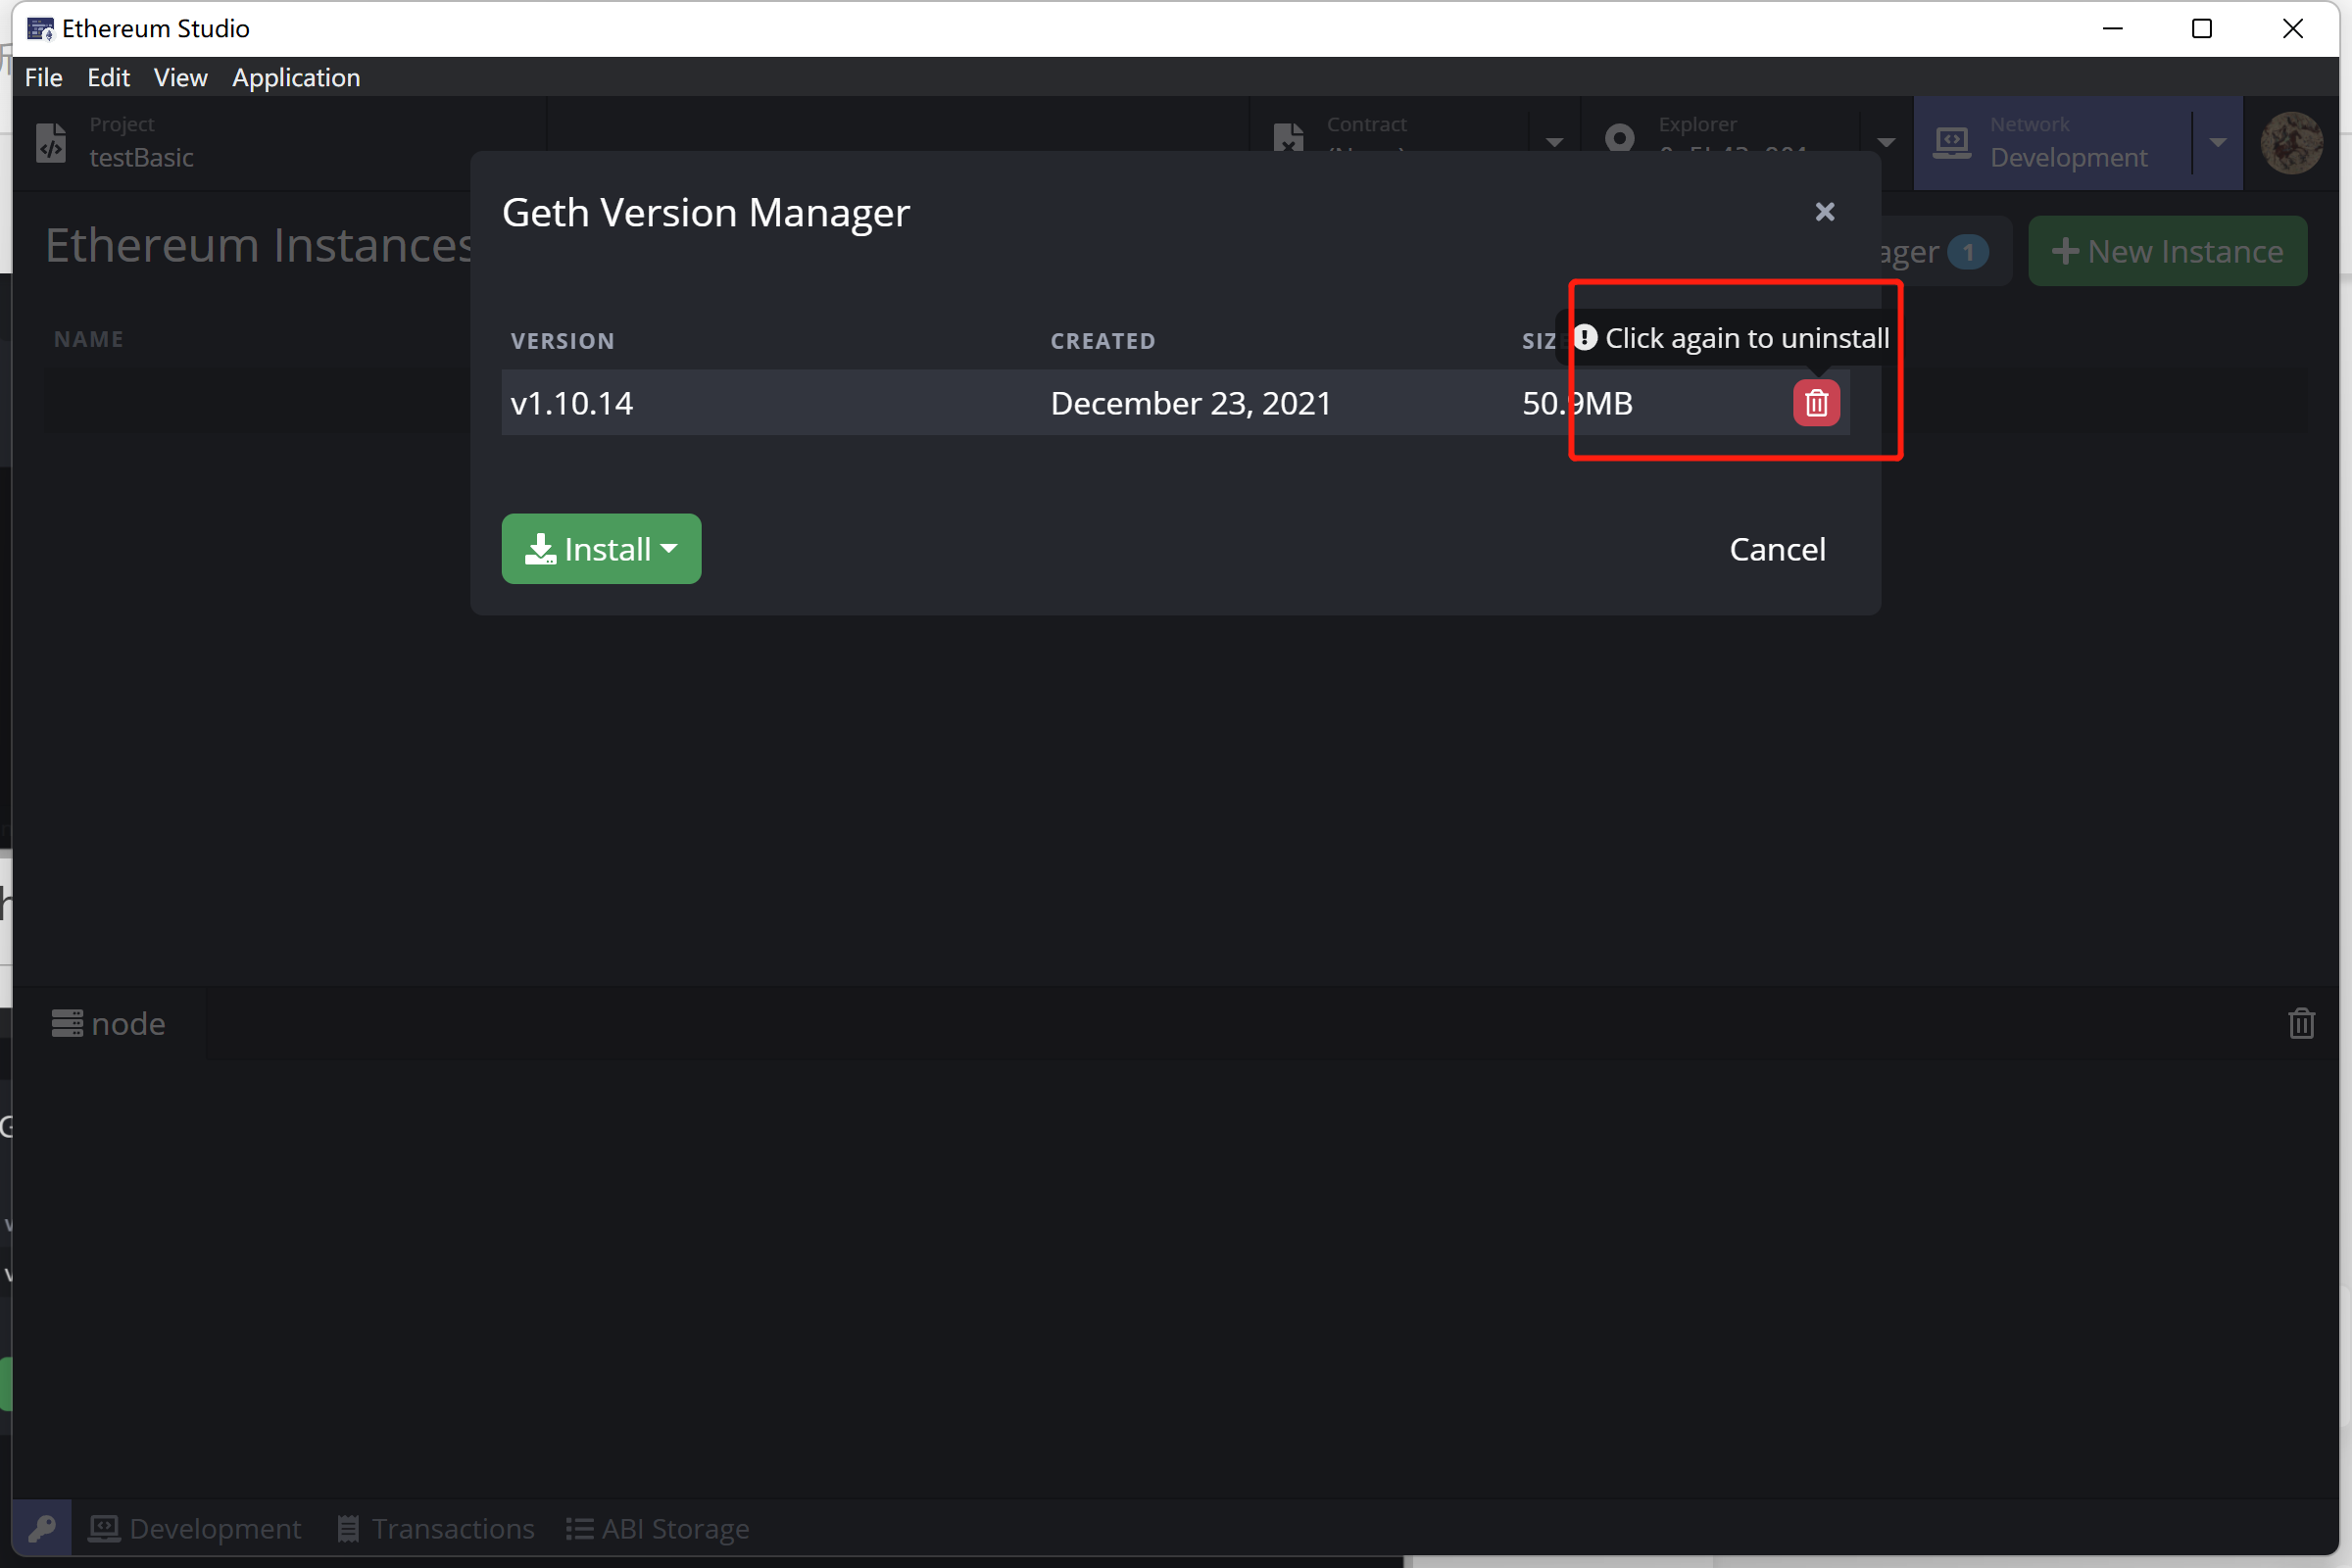
Click “Geth Version Manager” to set a specific version. Before first time launch of Ethereum Studio, developers had installed the Docker image of Geth, so there is a default version.
Developers can install a Geth version different to the default version.
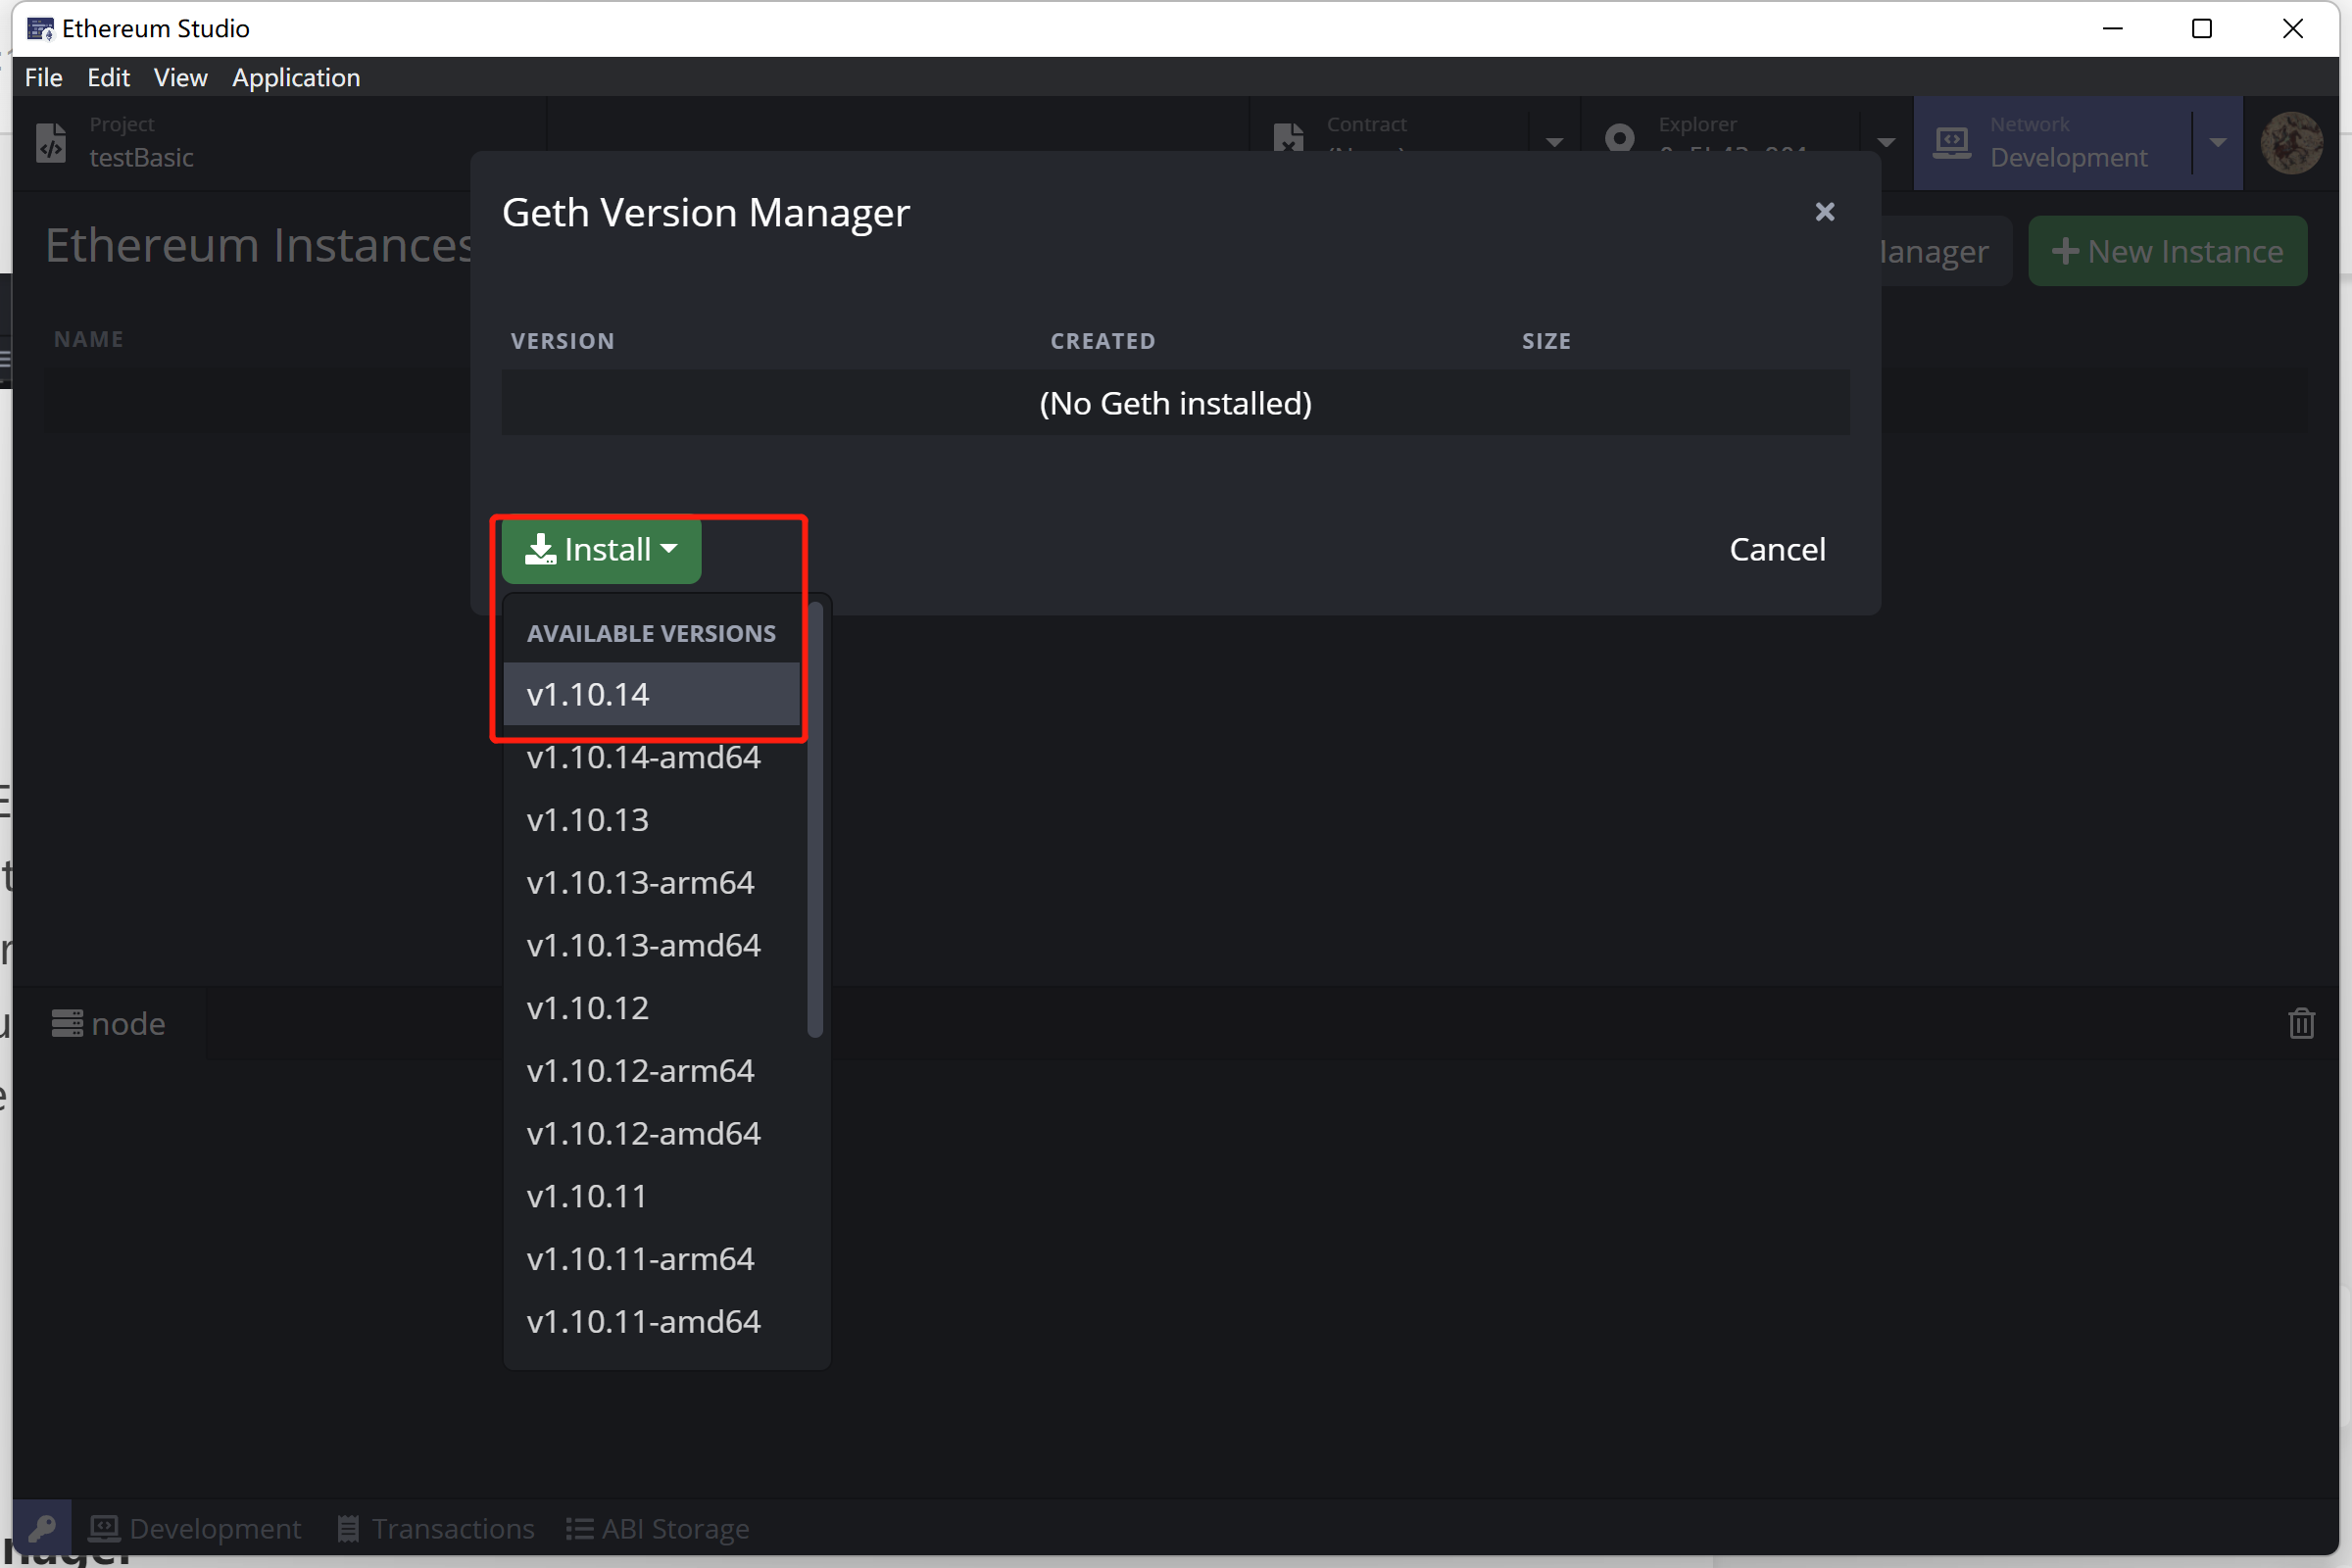
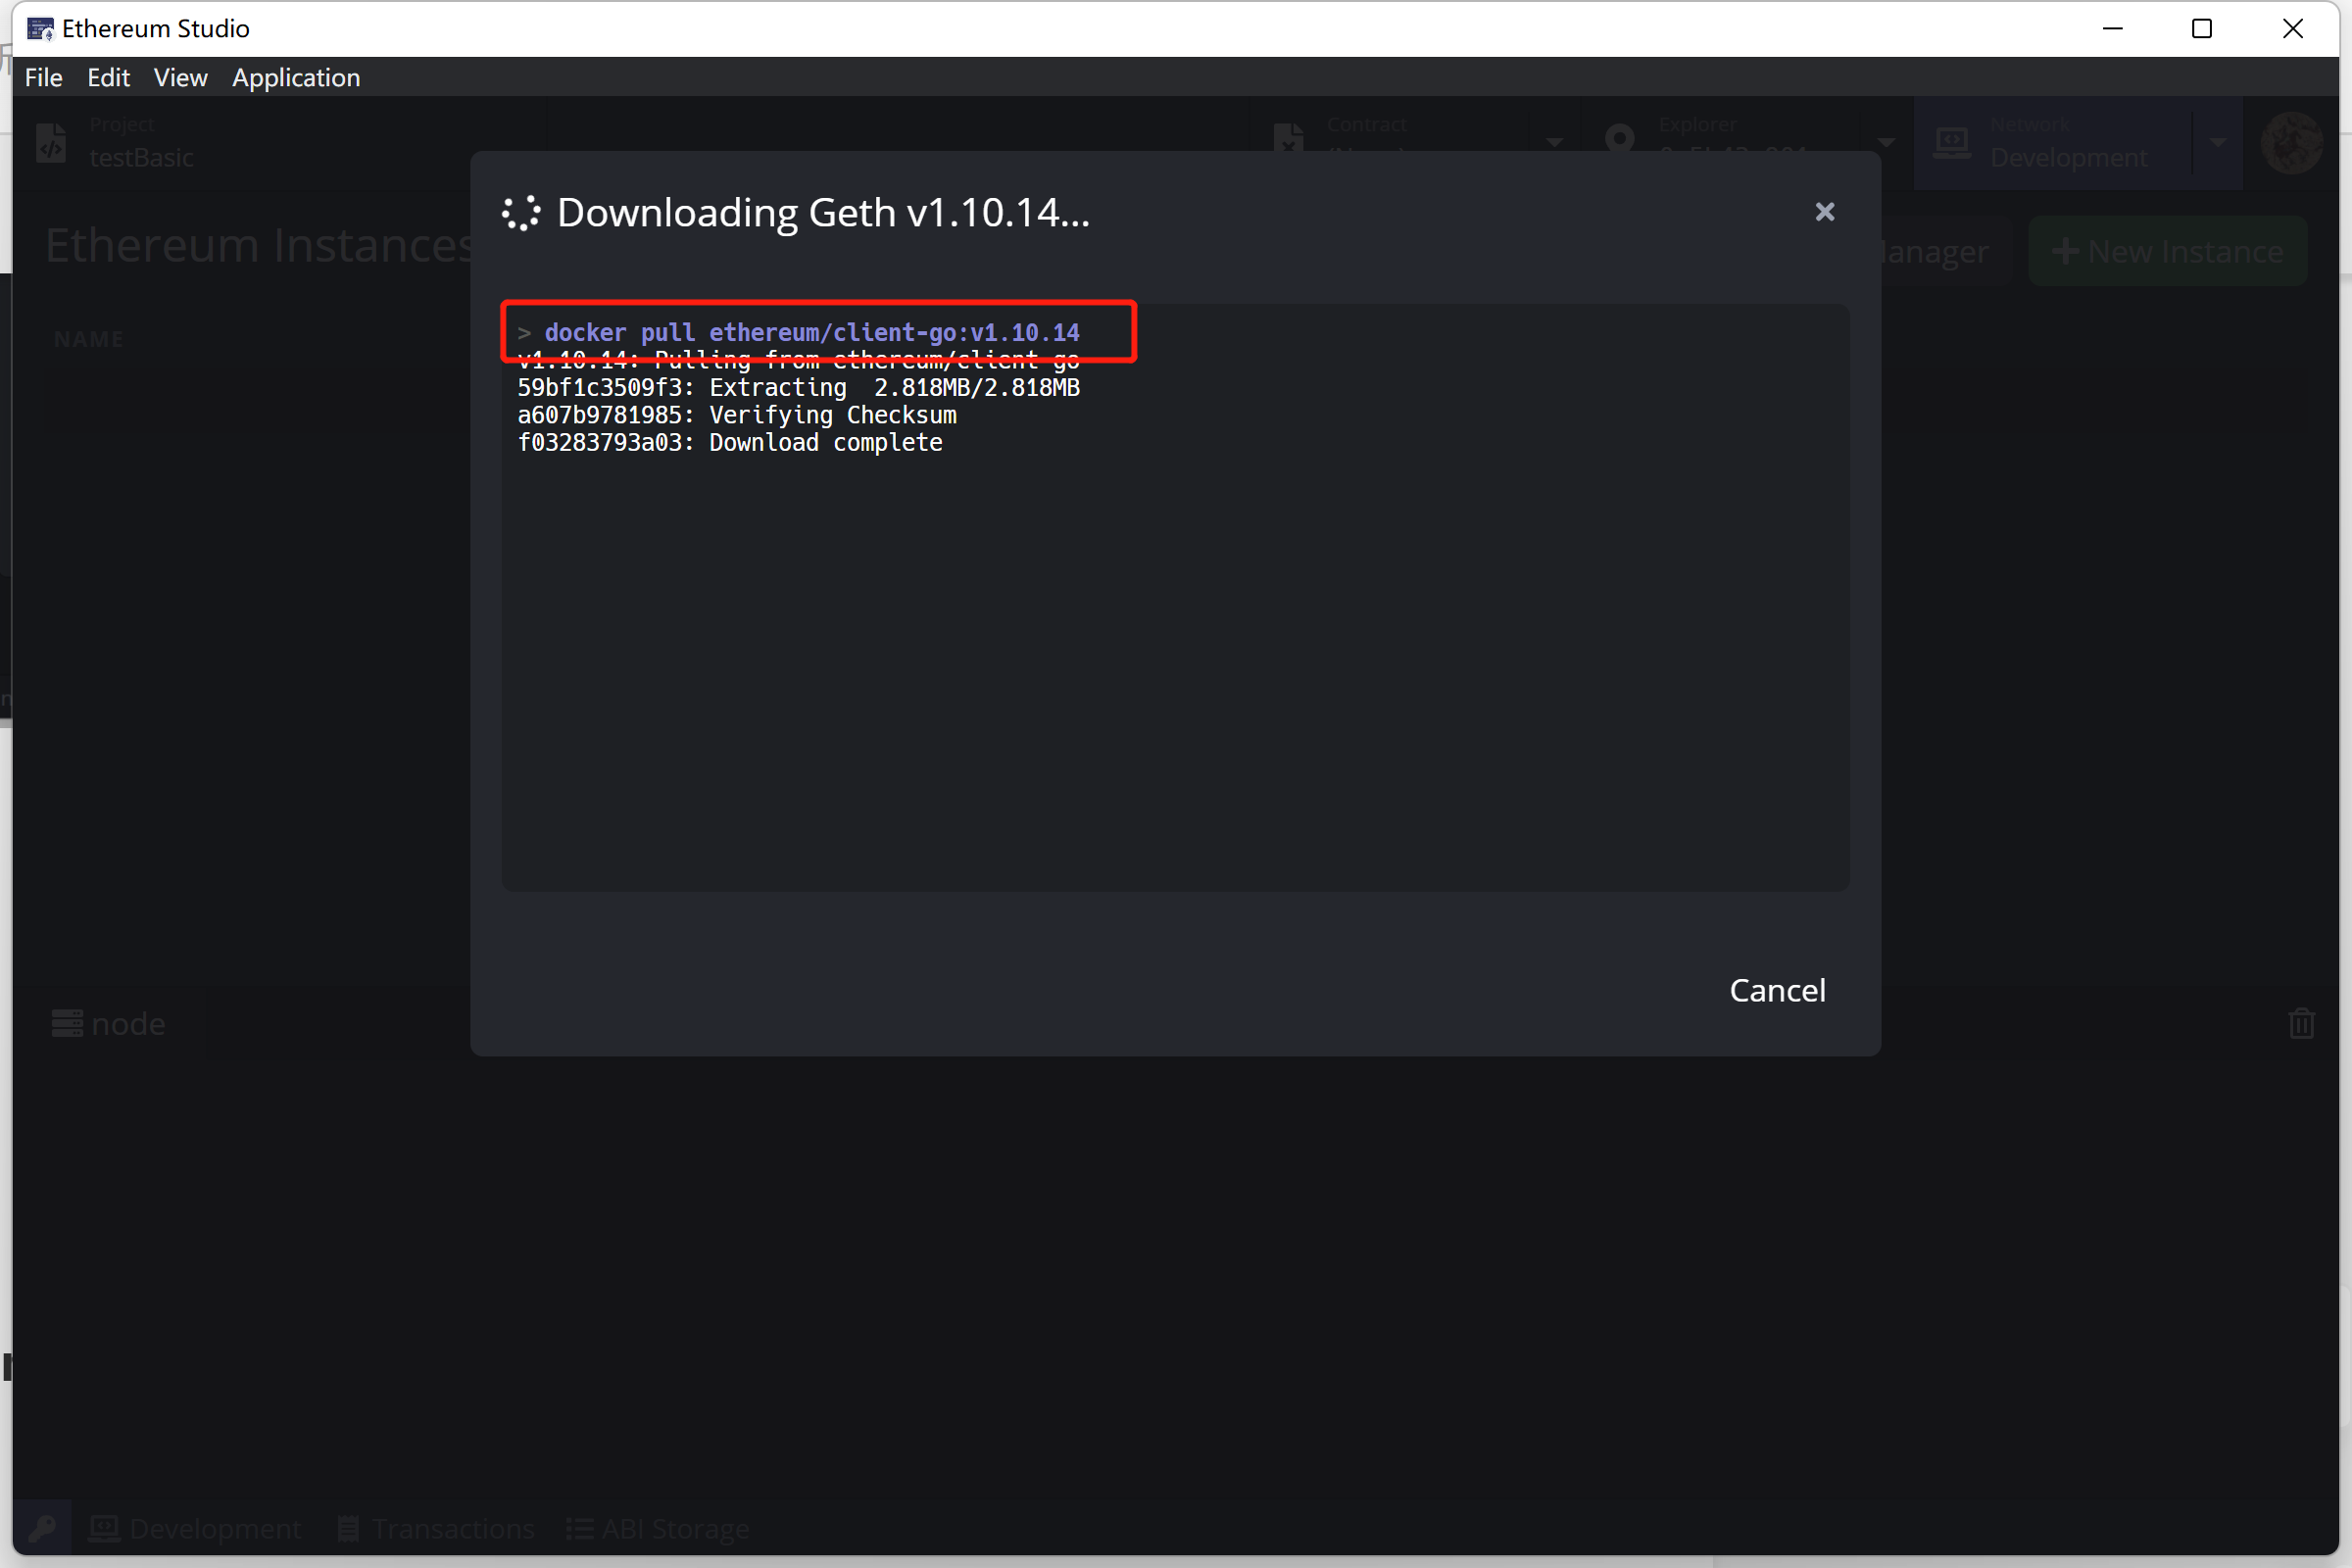
Geth is installed through Docker image. Developers has to start Docker before installing.
After Geth installed, developers can check Geth version in “Geth Version Manager”. There will be a blue number icon beside the “Geth Version Manager” button indicating how many versions are in the manager.
If developers want to remove the installed Geth, double-click the “trash can” icon. After the first click, the “trash can” icon will turn red, and developers can click it again to delete this Geth.
New Instance
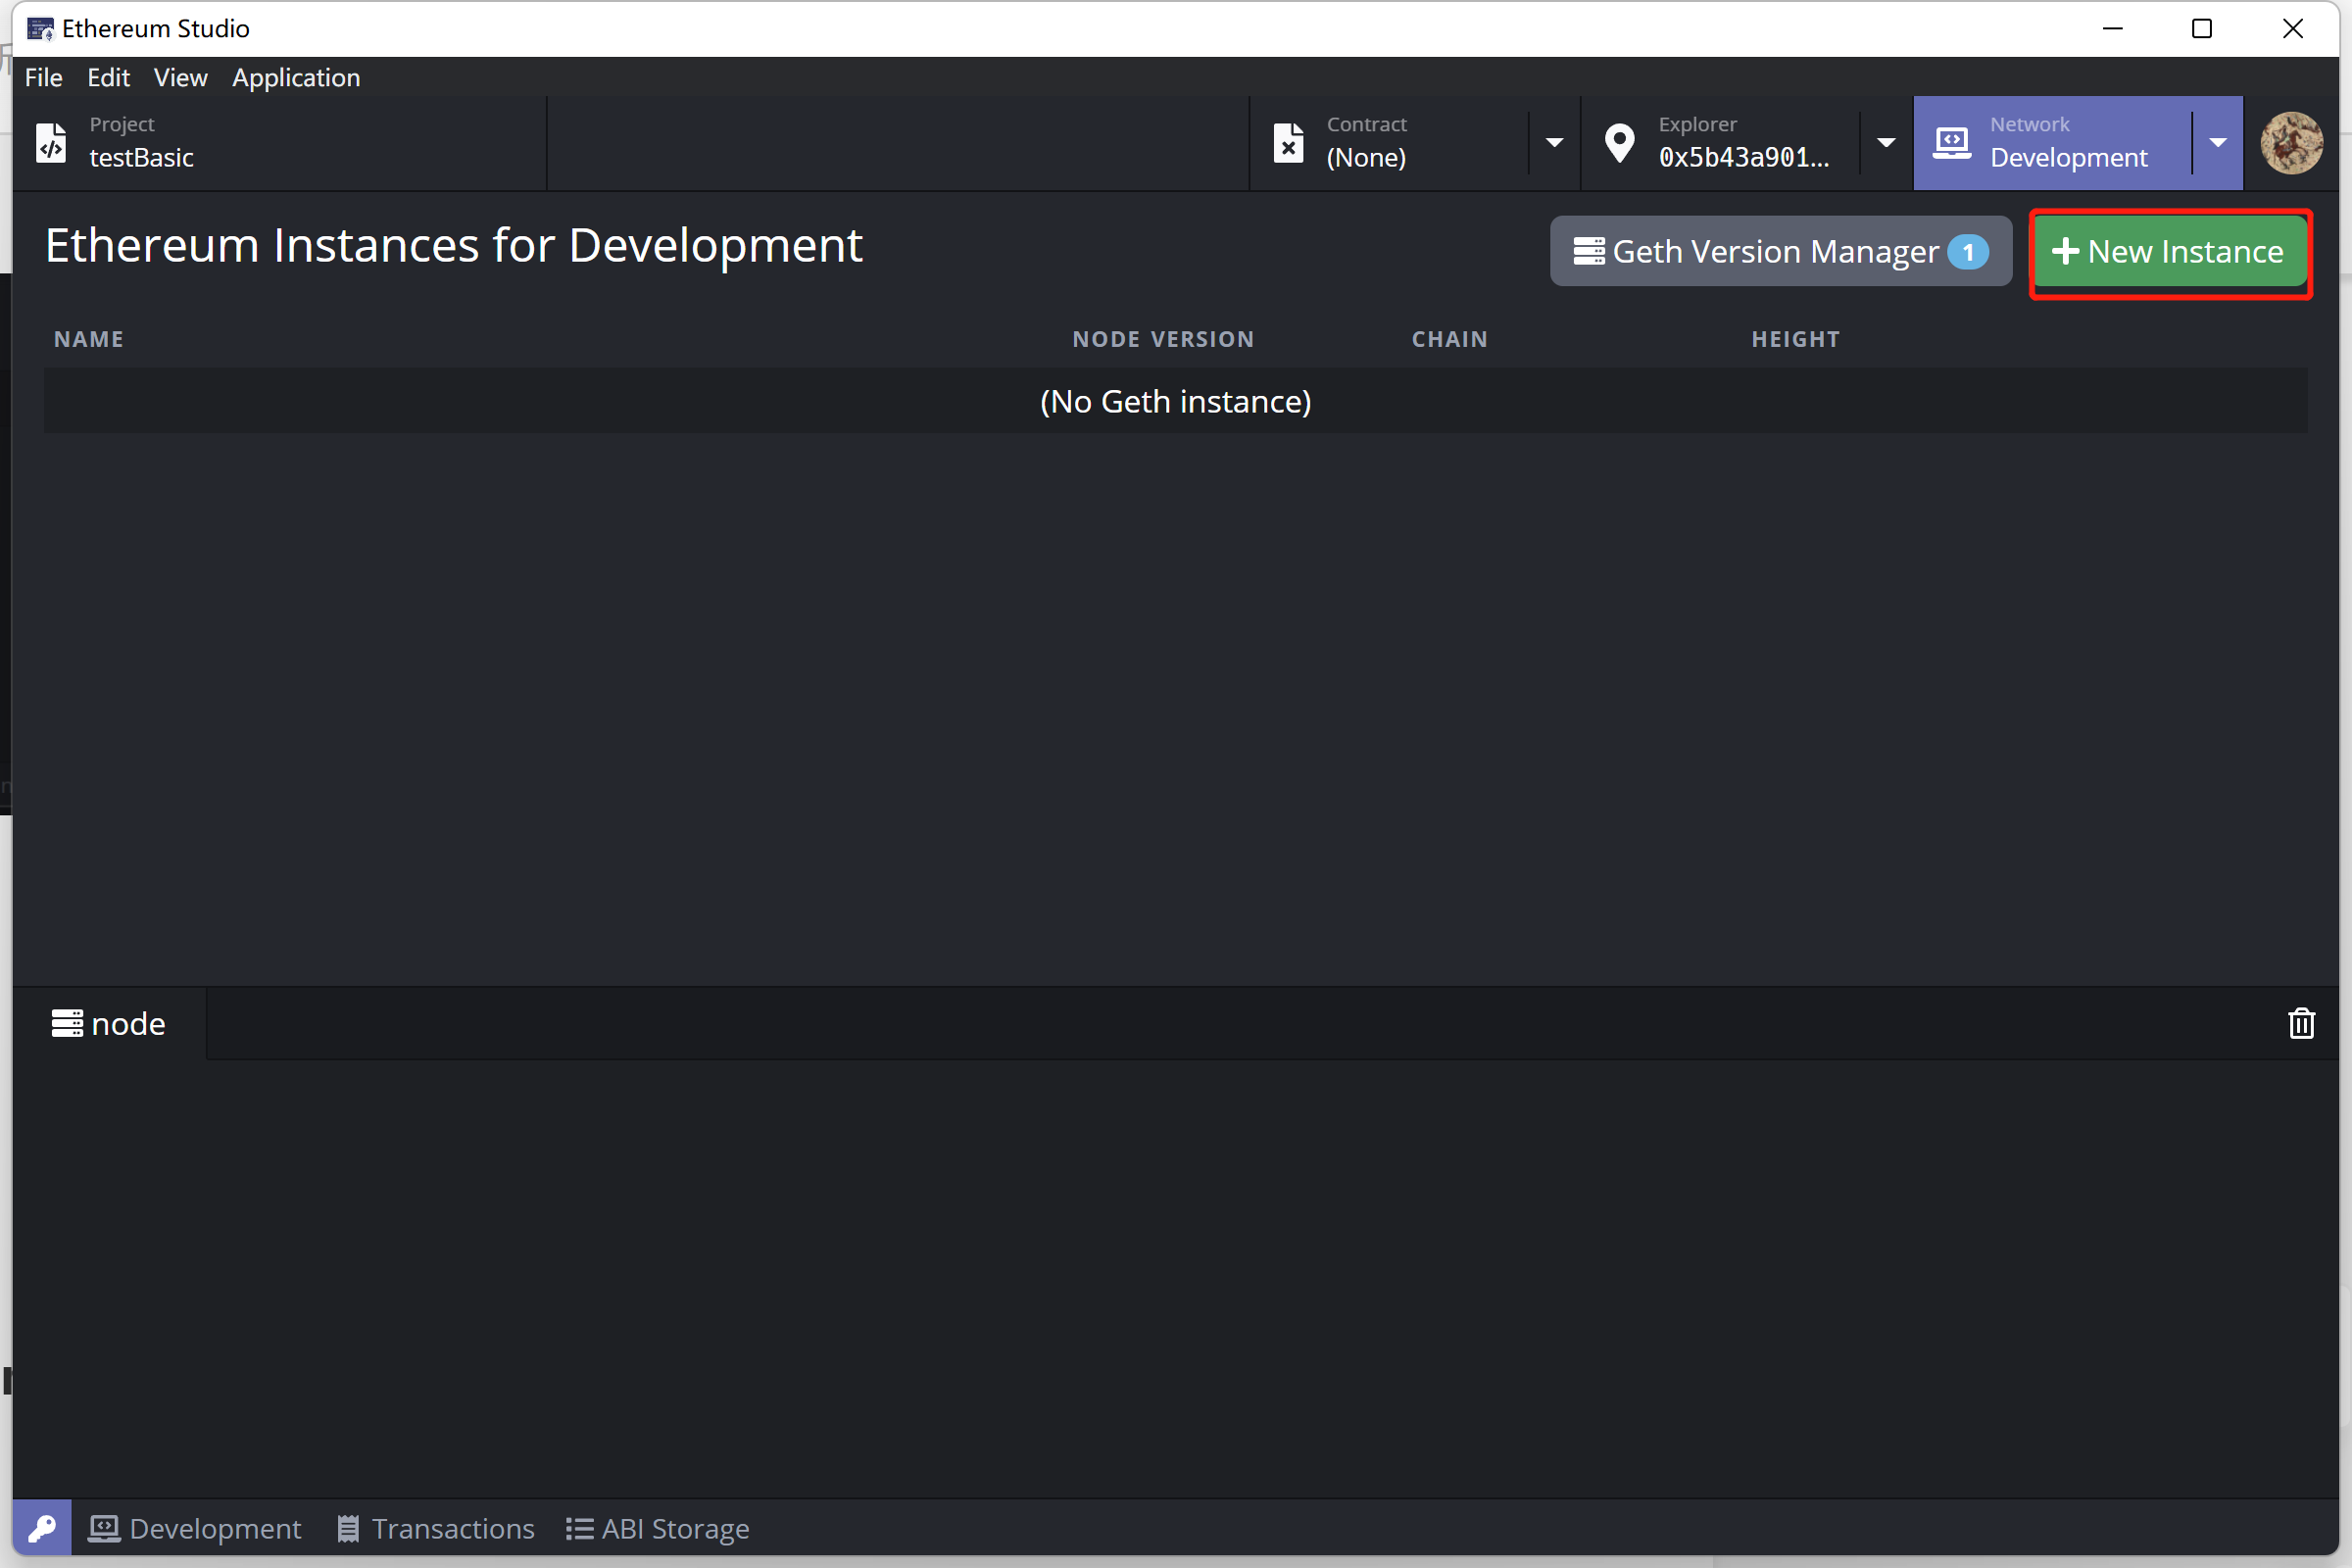
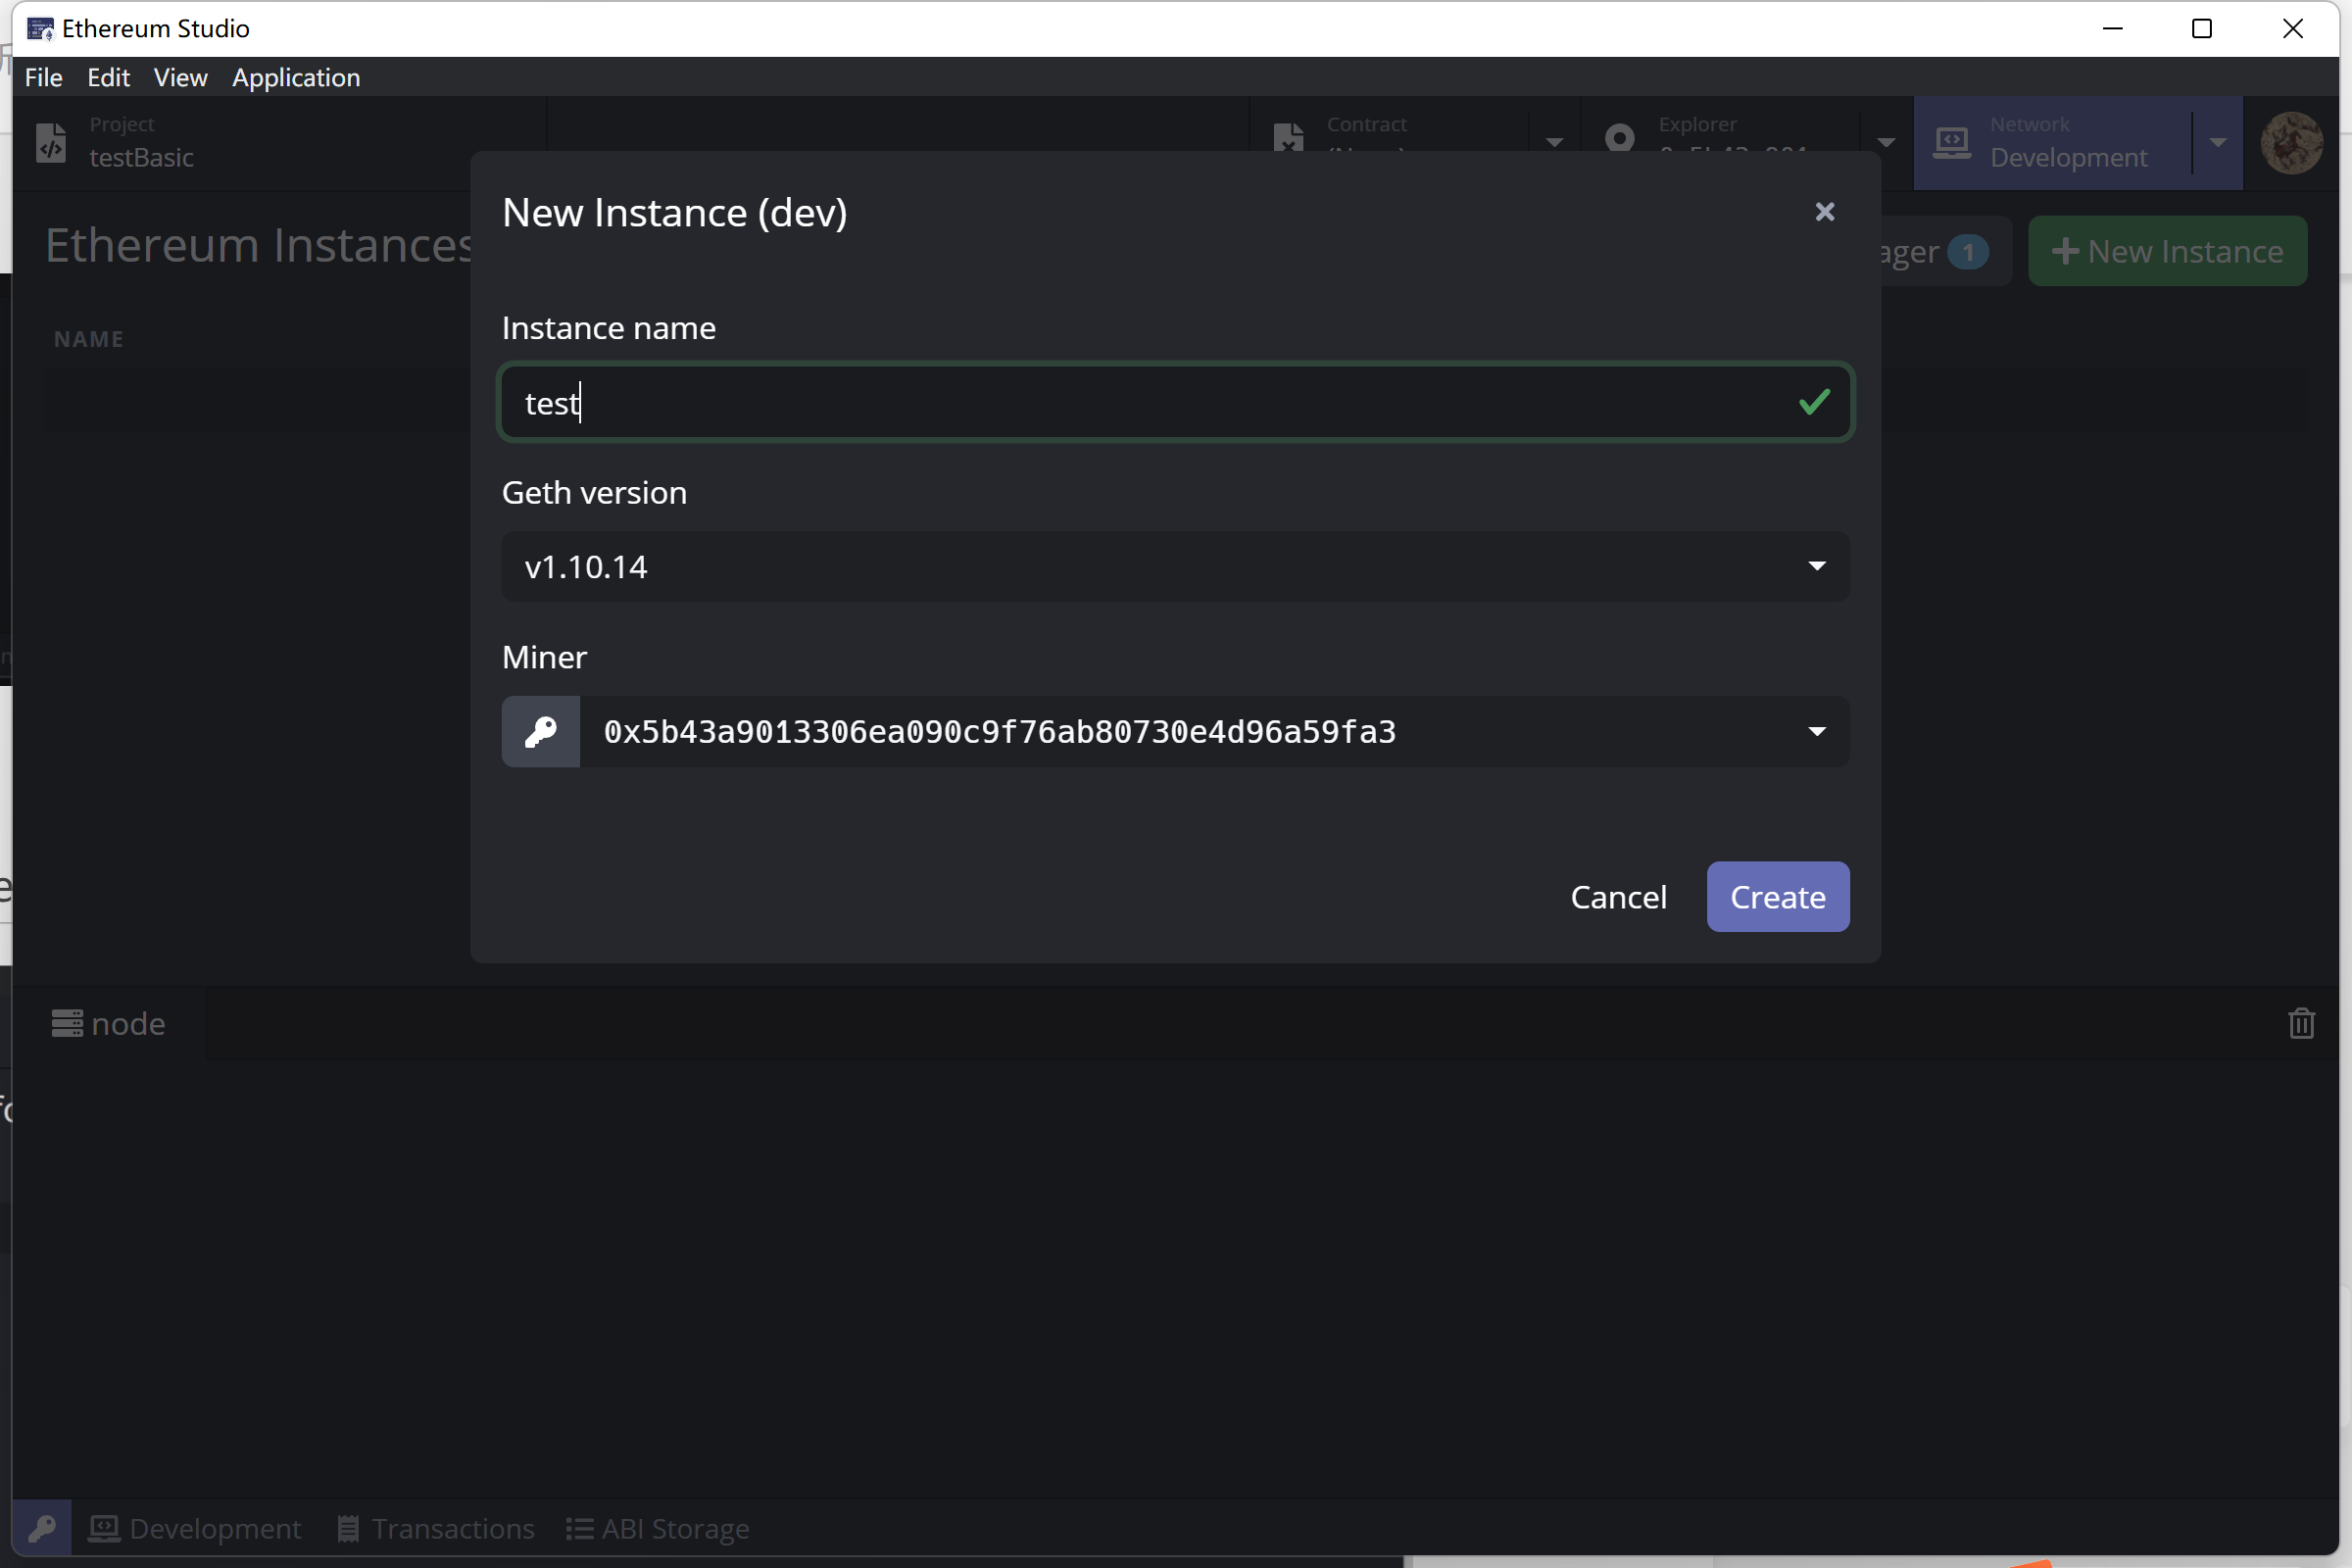
Click “New Instance” and a “New Instance (dev)” window will popup.
Developers can set “Instance name” in the window and change Geth version if there are different versions of Geth. Besides, developers can set “Miner” as the target account. Then click the “Create” button on the bottom right to make an instance.
After a new instance with target Geth version created, the instance will list on the panel. Click “Start” to run the development network. Developers can create an etheruem network and connect to it locally. This local ethereum network provides default 50 ETH for user.
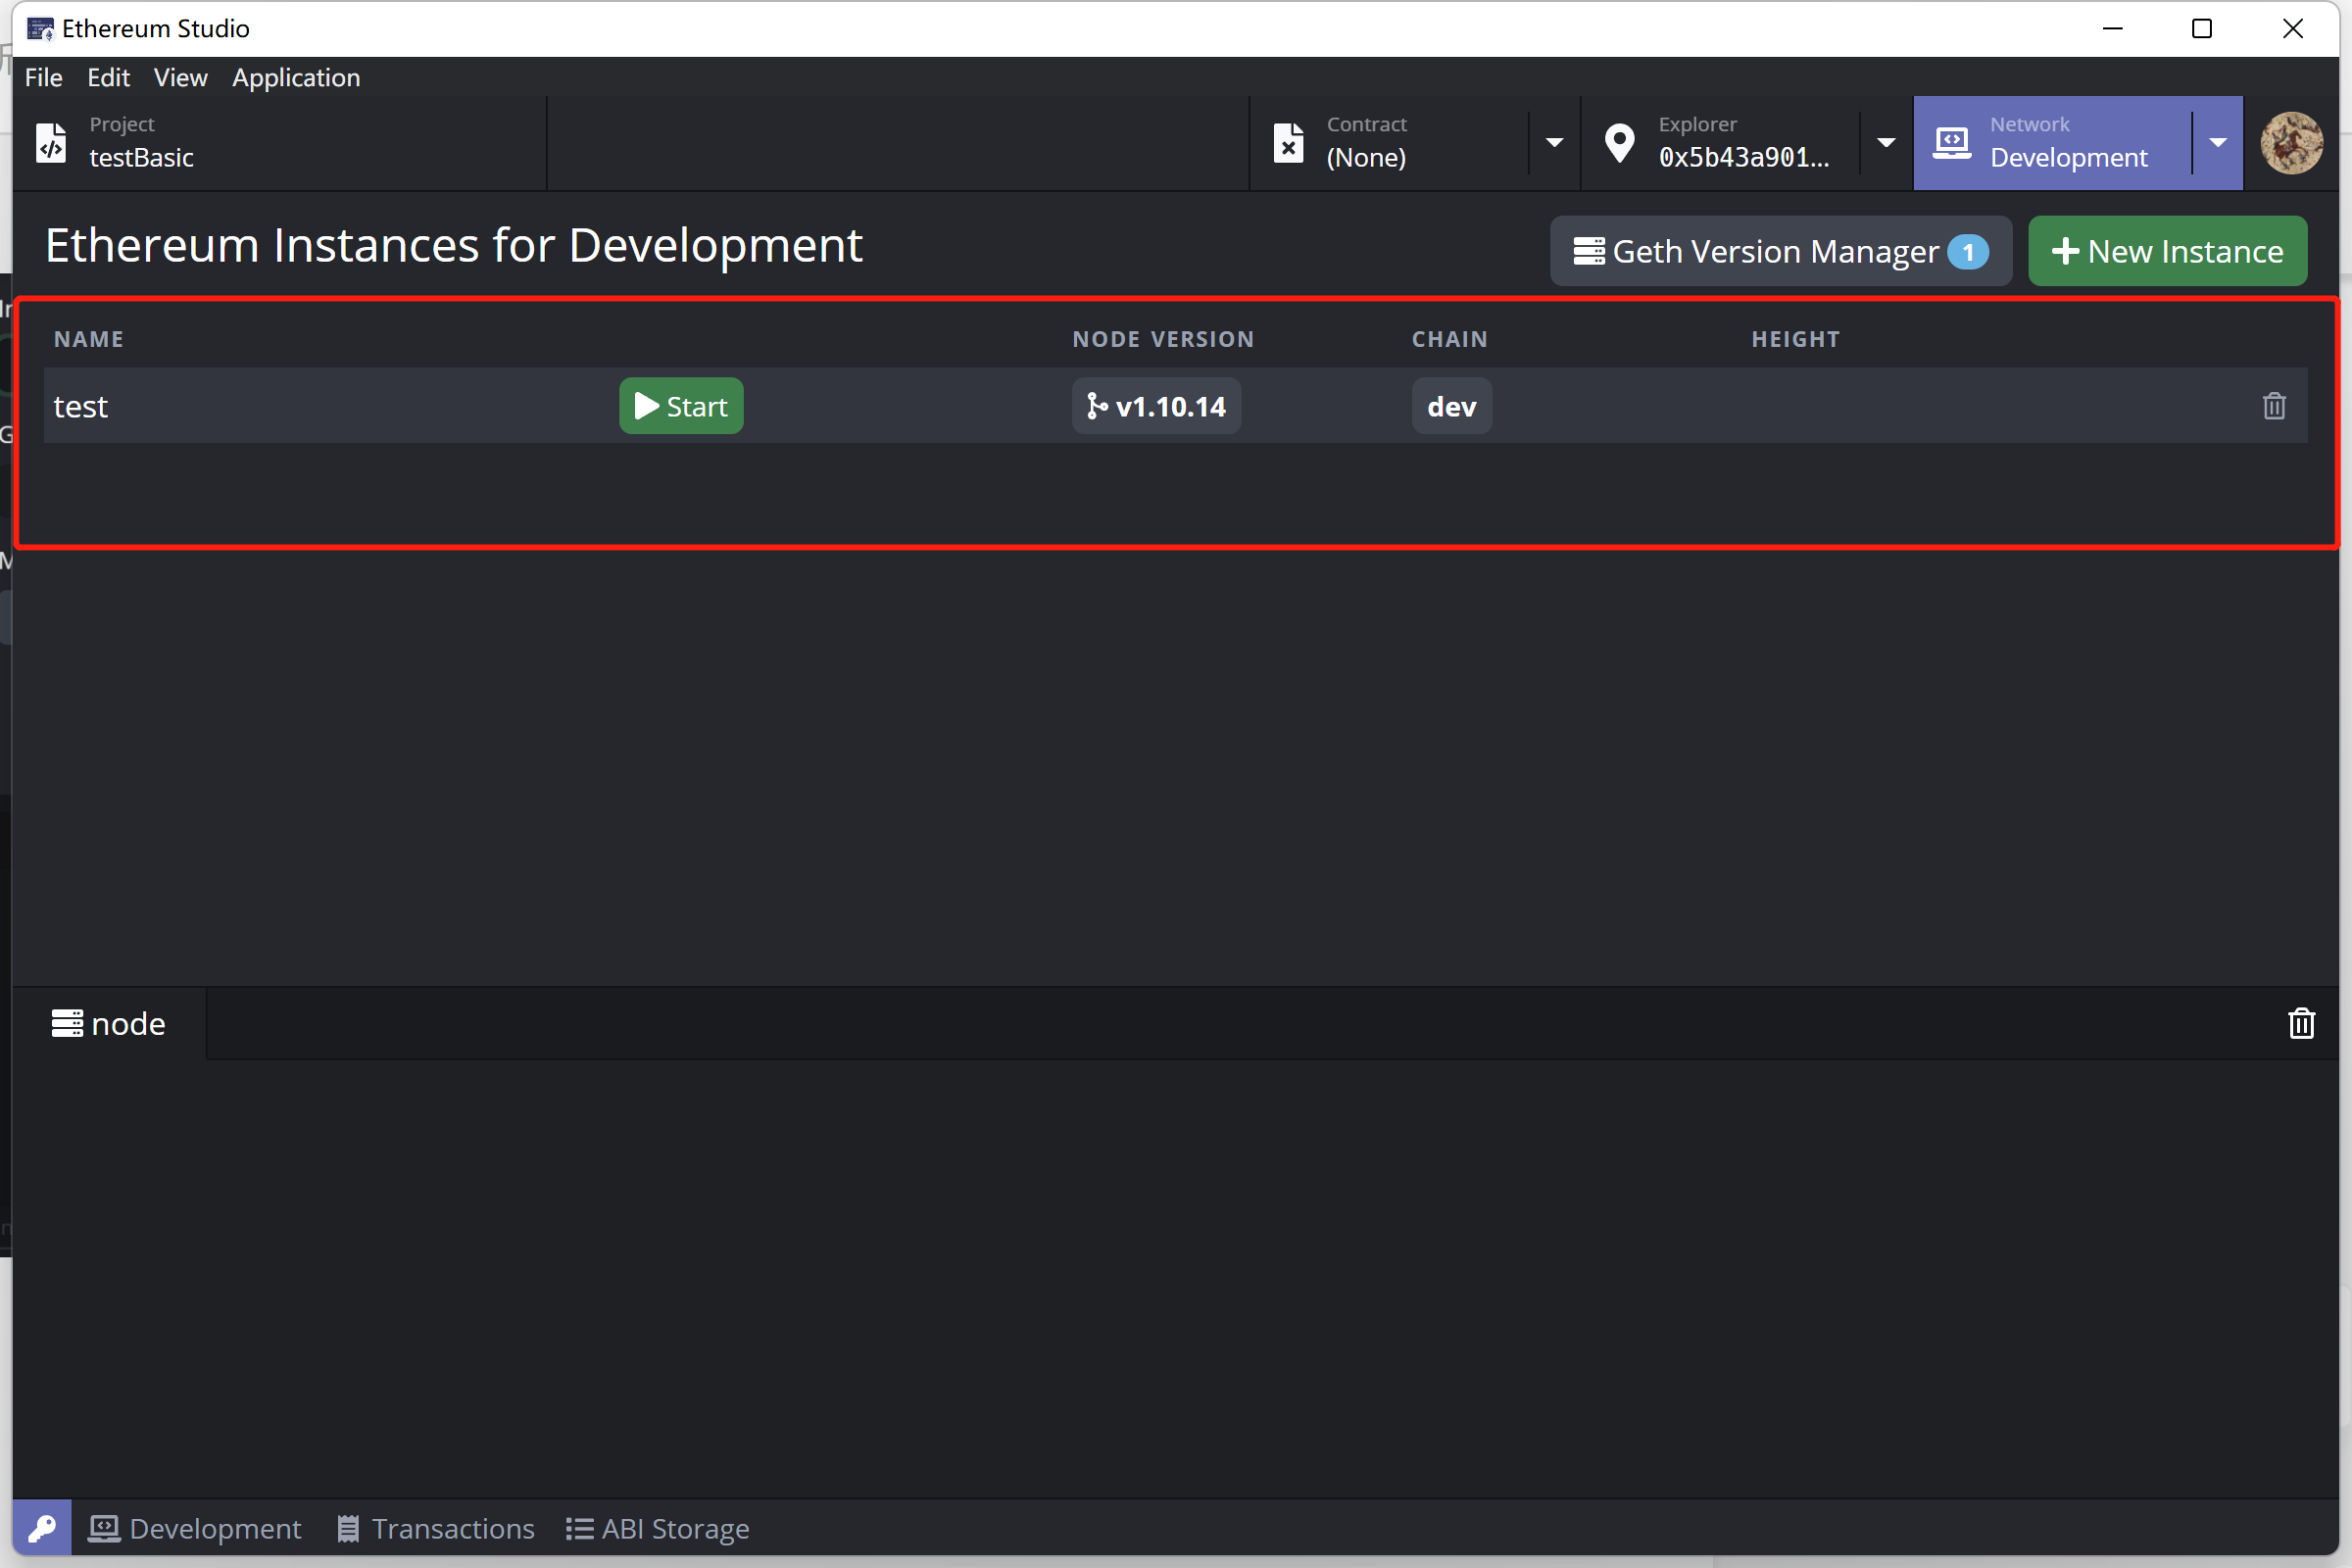
Node Panel
Click the green “Start” button on the Geth instance will start it. With information running on the node panel, the development network is prepared for developers to deploy a contract instantly. This local node cost only local ETH while users already have 50 since node running, so it is easy to test smart contracts on the private network.

Remote
Mainnet
A mainnet is an independent blockchain running its network with its technology and protocol. It is a live blockchain where its cryptocurrencies or tokens are in use, compared to a testnet or projects running on top of other popular networks such as Ethereum.
Ethereum Mainnet is the primary public Ethereum production blockchain, where actual-value transactions occur on the distributed ledger. Ethereum mainnet uses real ETH as currency to transfer assets and pay gas fees and tips. There are many different Ethereum testnets, and each testnet uses its own test ETH as currency, respectively. Developers may deploy and test contracts on at least one testnet before the final release on the mainnet.
Testnets
In addition to Mainnet, there are public testnets. These networks are used by protocol developers or smart contract developers to test both protocol upgrades and potential smart contracts in a production-like environment before deployment to Mainnet.
It’s generally essential to test all smart contracts code on a testnet before deploying it to the Mainnet. Suppose developers building a dapp that integrates with existing smart contracts. In that case, most projects have copies deployed to testnets that you can interact with it.
Most testnets use a proof-of-authority consensus mechanism. This means a small number of nodes are chosen to validate transactions and create new blocks – staking their identity in the process. It’s hard to incentivize mining on a proof-of-work testnet which can leave it vulnerable.
Ropsten is a proof-of-work testnet for those running Geth, Besu and all other Ethereum clients. This means it’s the best like-for-like representation of Ethereum. Ropsten started in November 2016 and it can be used with all clients.
Rinkeby is a proof-of-authority(clique) testnet for those running Geth, Besu, Nethermind, and OpenEthereum client. Rinkeby started in April 2017 and is immune to spam attacks(as Trusted parties control ether supply).
Goerli is a proof-of-authority testnet that works across clients. Goerli started in November 2018. Goerli doesn’t fully reproduce the current production environment as it uses PoA.
Kovan is a proof-of-authority testnet for those running OpenEthereum clients. Kovan started in March 2017 and is immune to spam attacks. Kovan doesn’t fully reproduce the current production environment as it uses PoA.
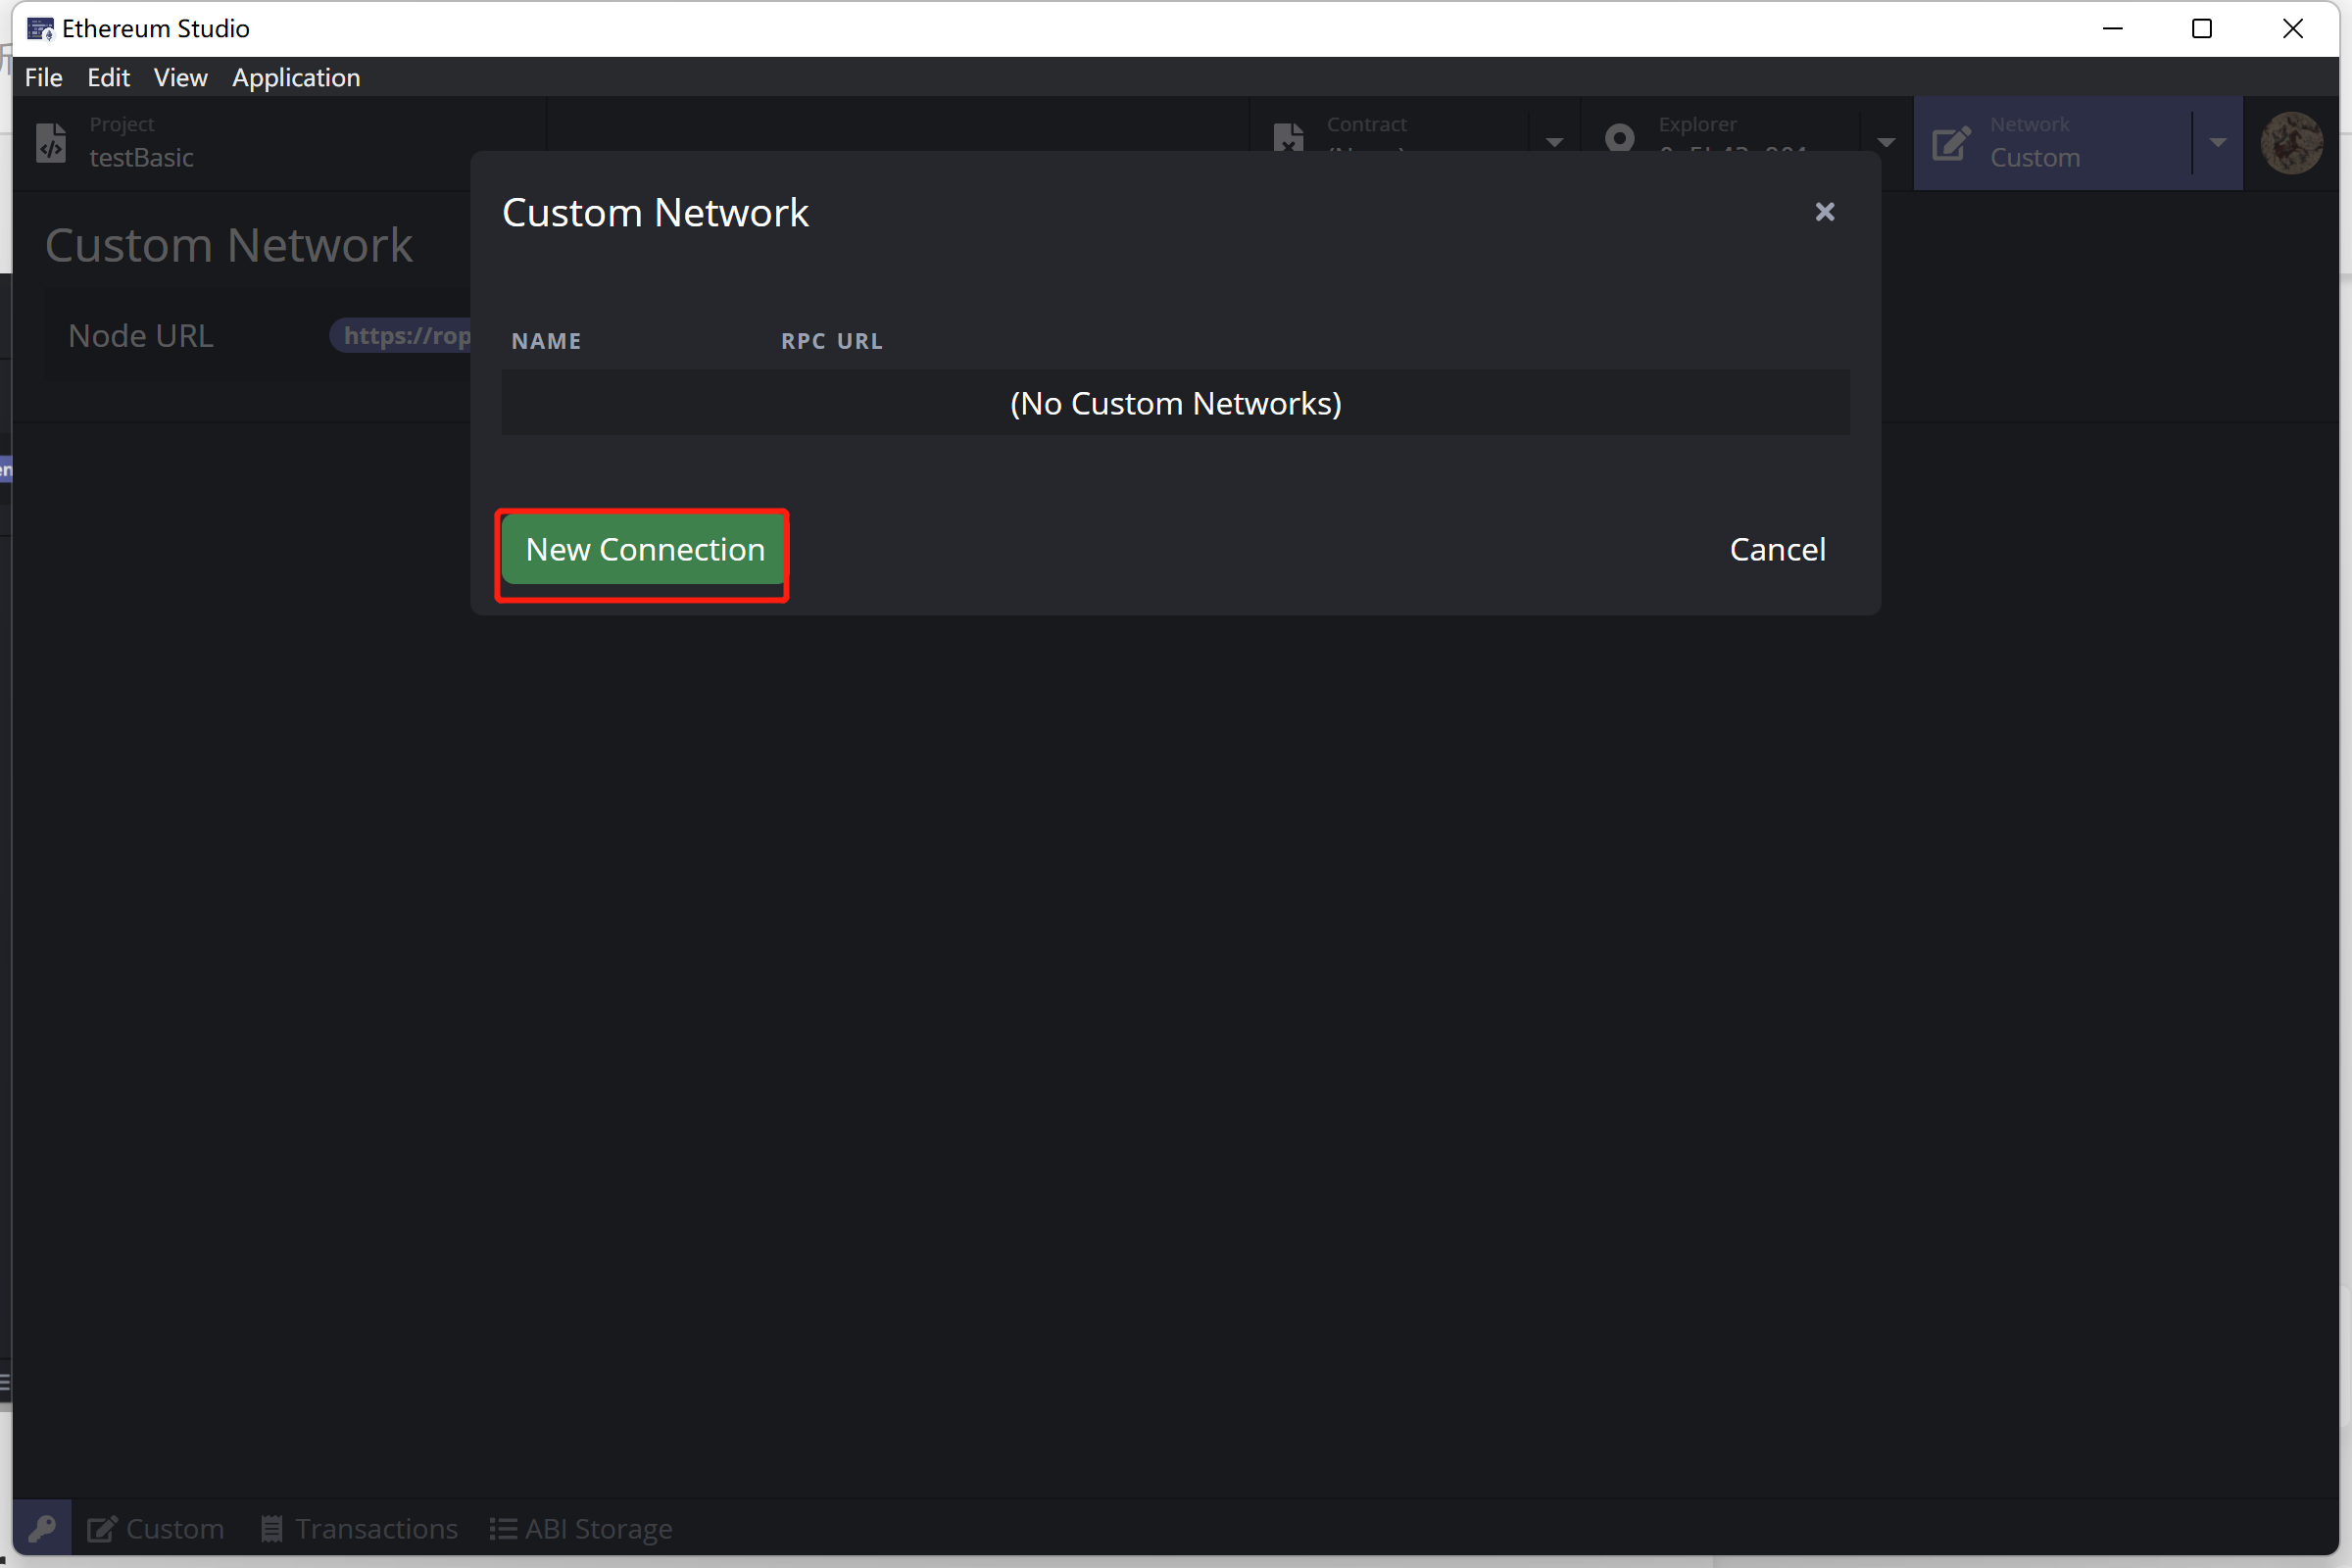
Custom Network
In the Ethereum network, there are private networks and public networks. The Ethereum Studio can set “Custom Network” to connect the target network. Connecting to a network, developers can join the network of other nodes instead of establishing a network by oneself. Especially, developers can use a company’s network service like Infura Link(https://infura.io/docs).
New Connection
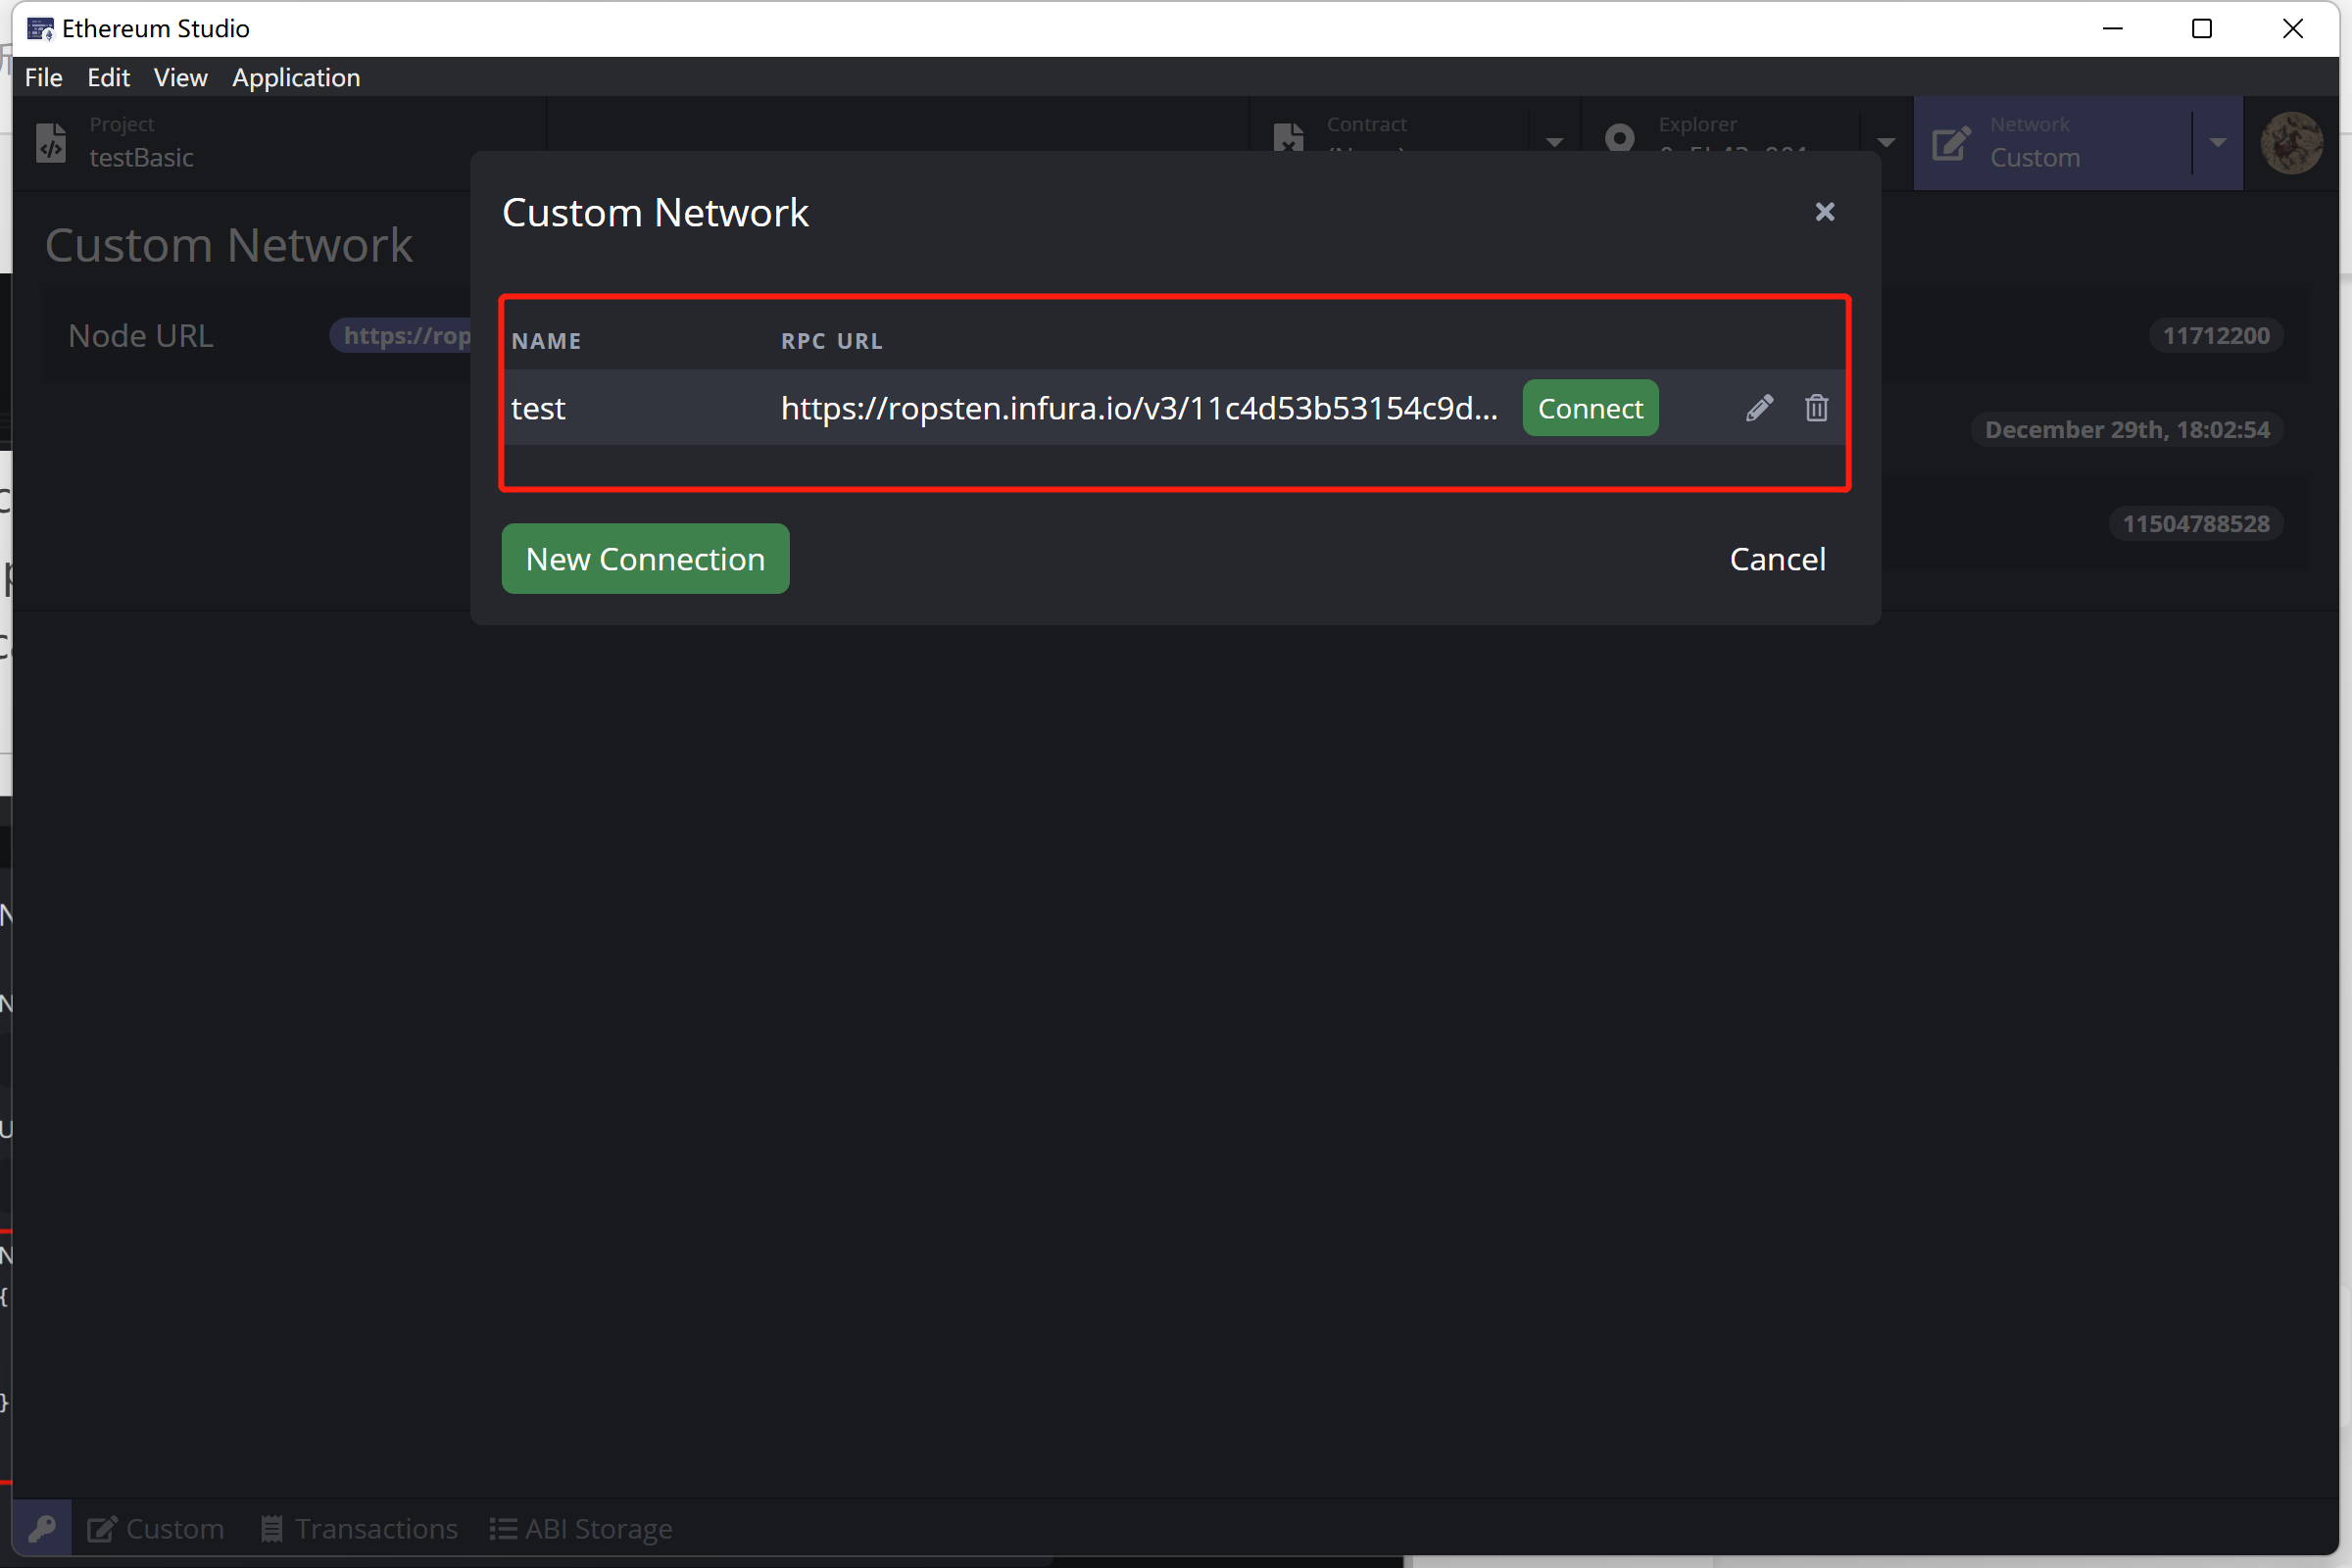
In the “Custom Network” panel, click the “gear” icon, and there will popup a window named “Custom Network”.

Click the “New Connection” button, and there will jump out a window for developers to add more network connections. Since each connection represents a node from one of the public or private networks, there will usually be a lot of different connections for developers to connect.
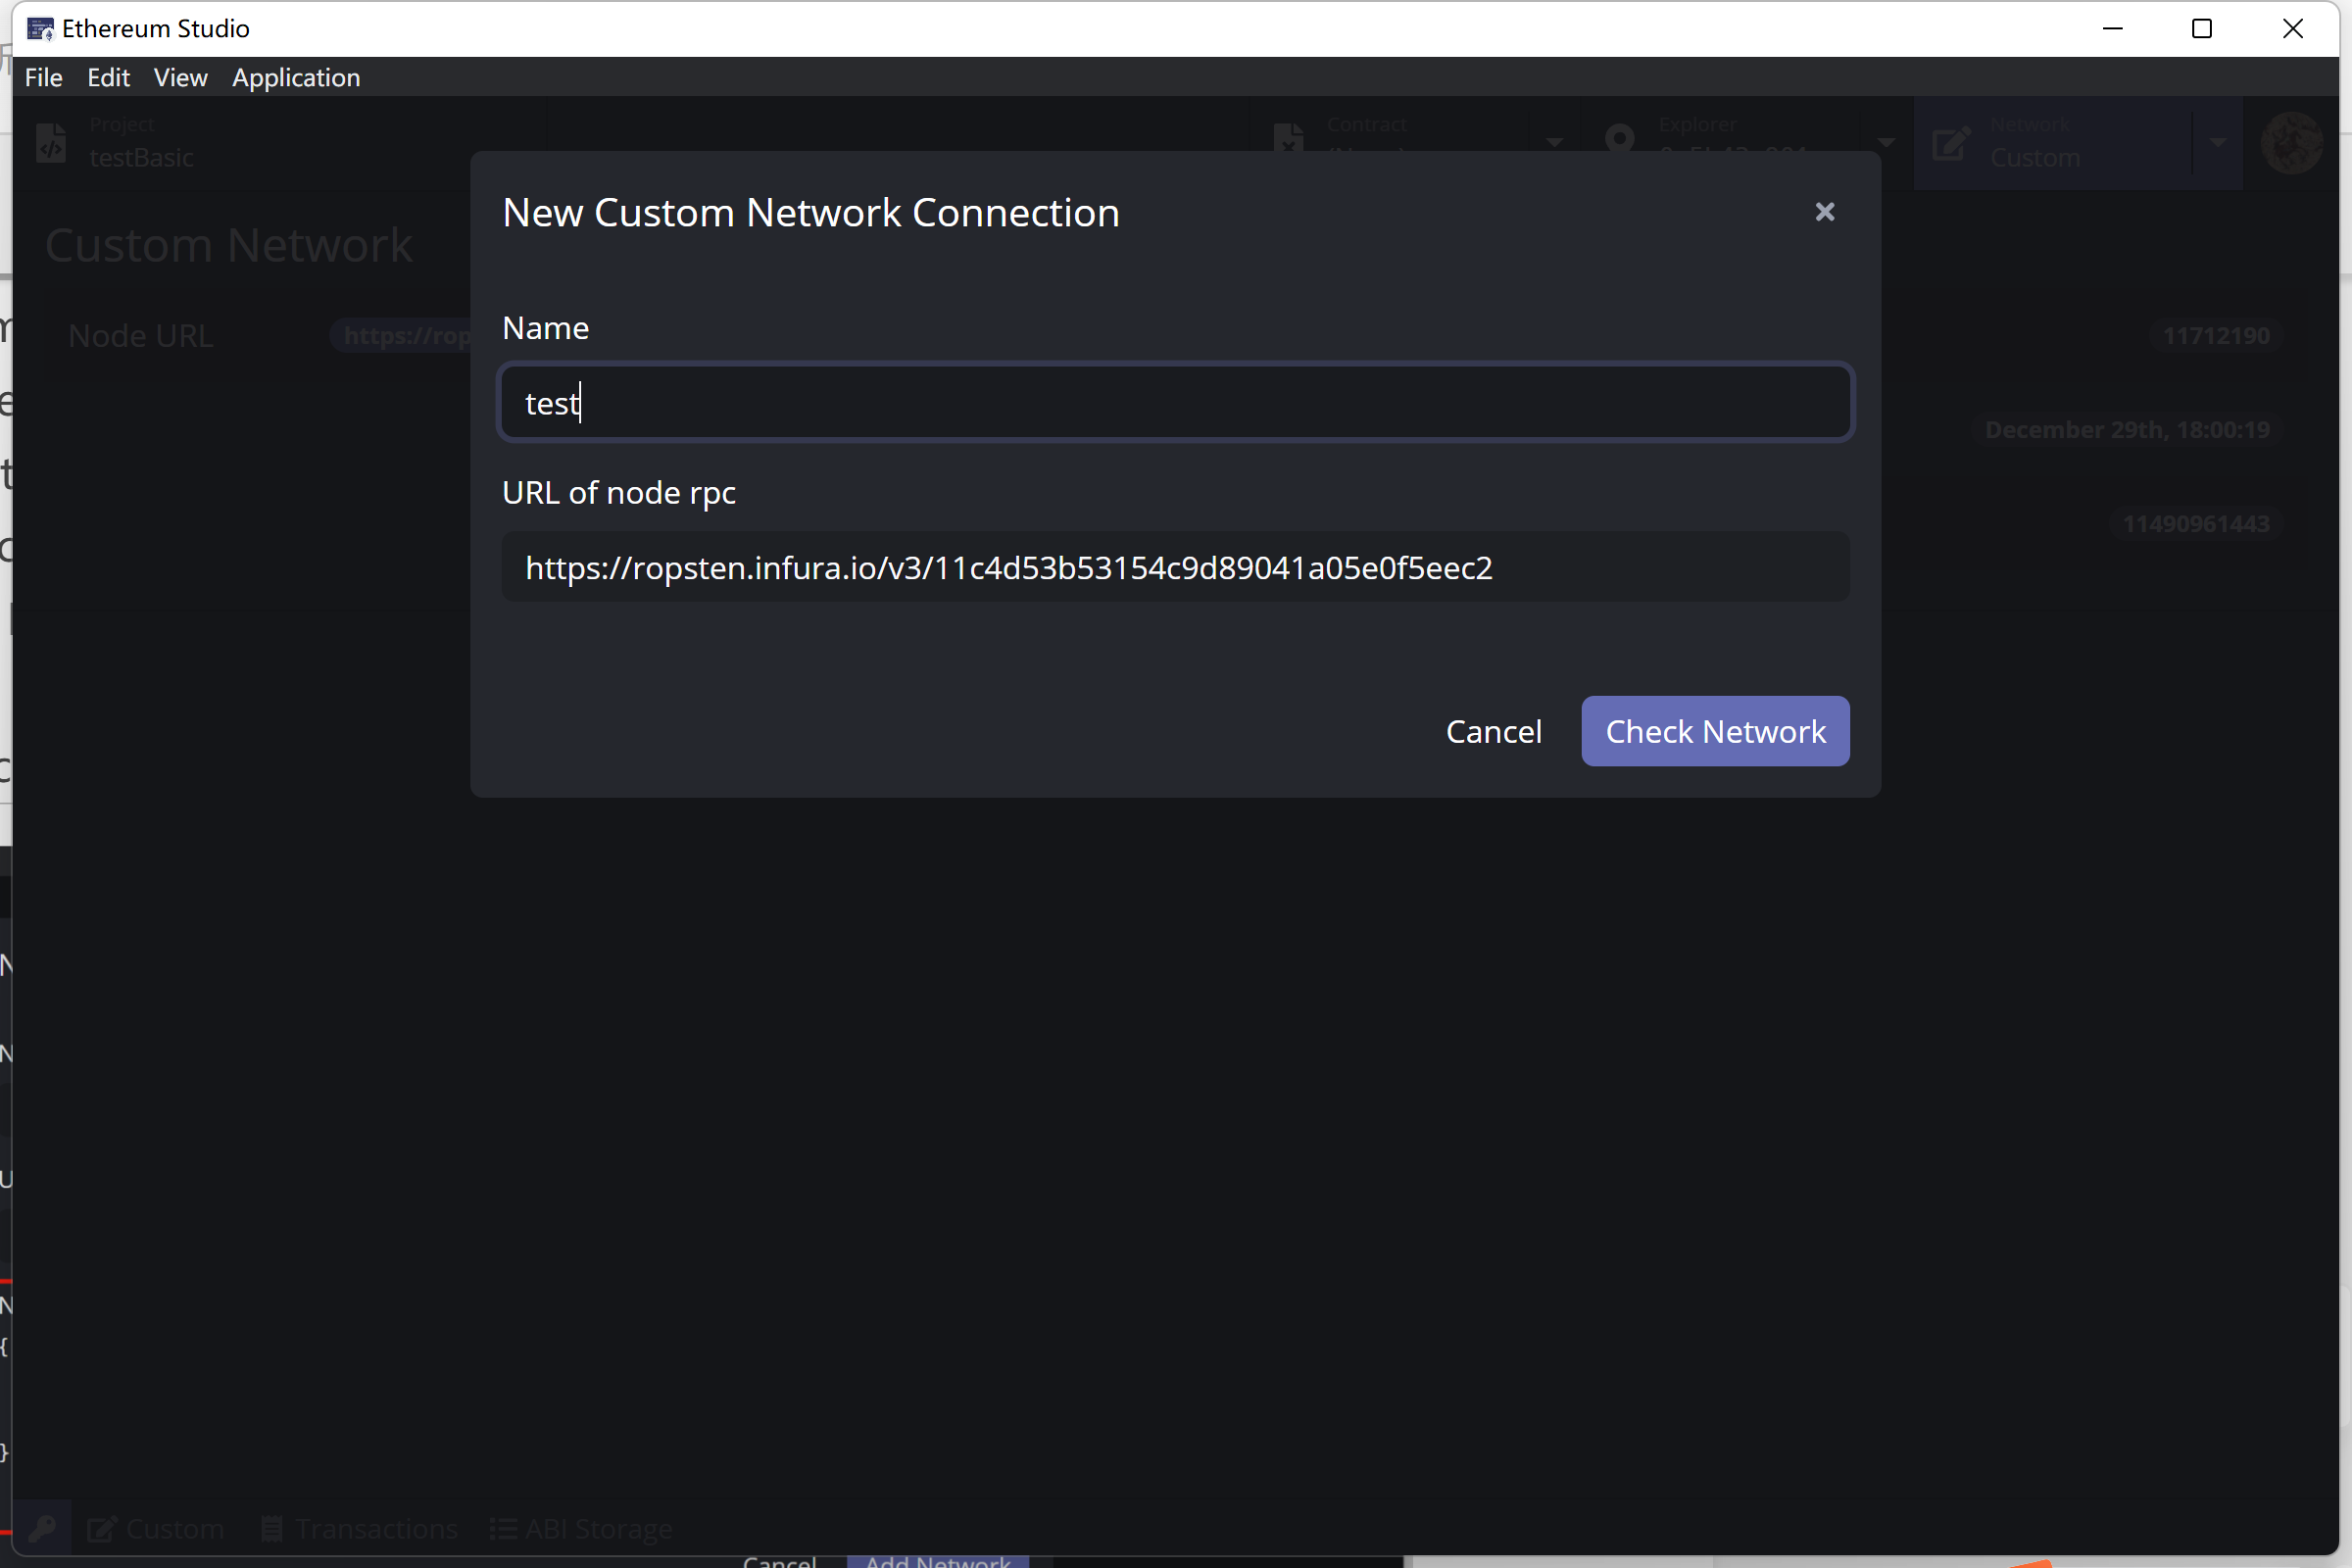
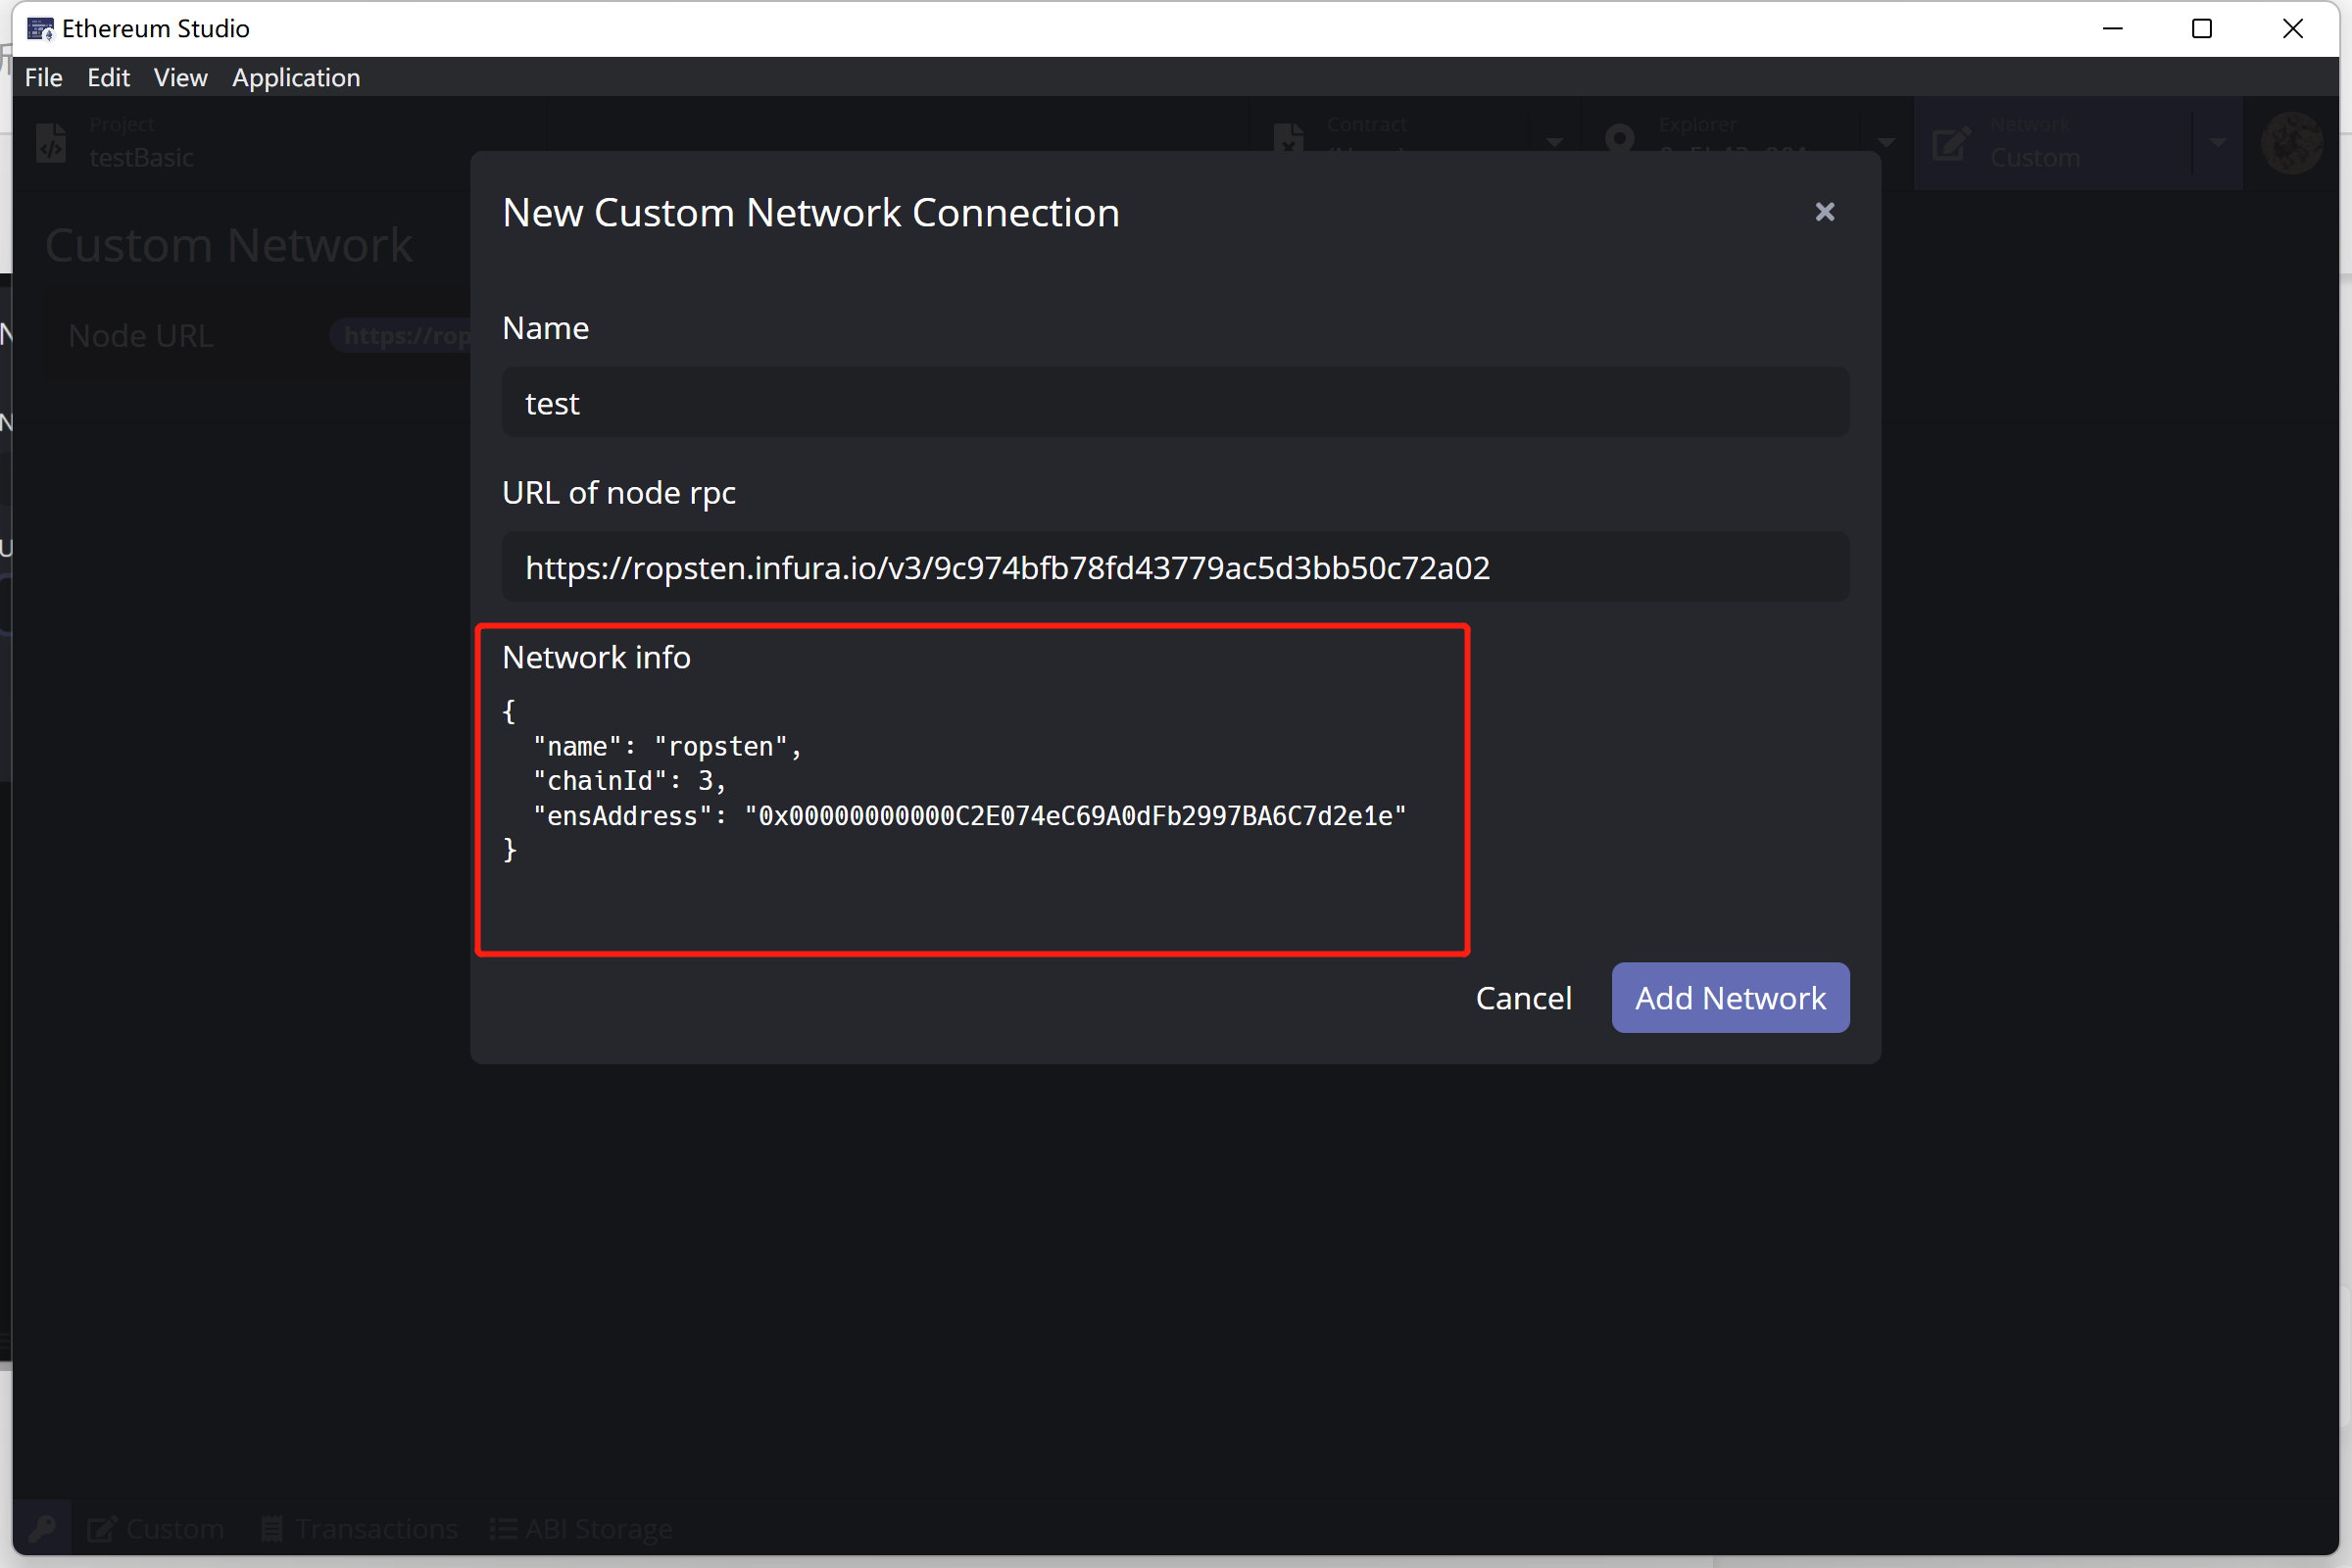
In the “New Custom Network Connection” window, developers can input the name and URL of node RPC. In this picture, there is a node of Ropsten network from Infura. Infura is a Web3 backend and Infrastructure-as-a-Service (IaaS) provider that offers blockchain developers a range of services and tools. Developers can use Infura as a fundamental infrastructure of Ethereum projects. Besides, developers can join other Geth nodes with the node parameters.
After clicking “Check Network,” a “Network info” will be added below the original panel. The panel shows detailed network information to be joined with “URL of node RPC”. Developers can check the information and join the network by clicking the “Add Network” button.
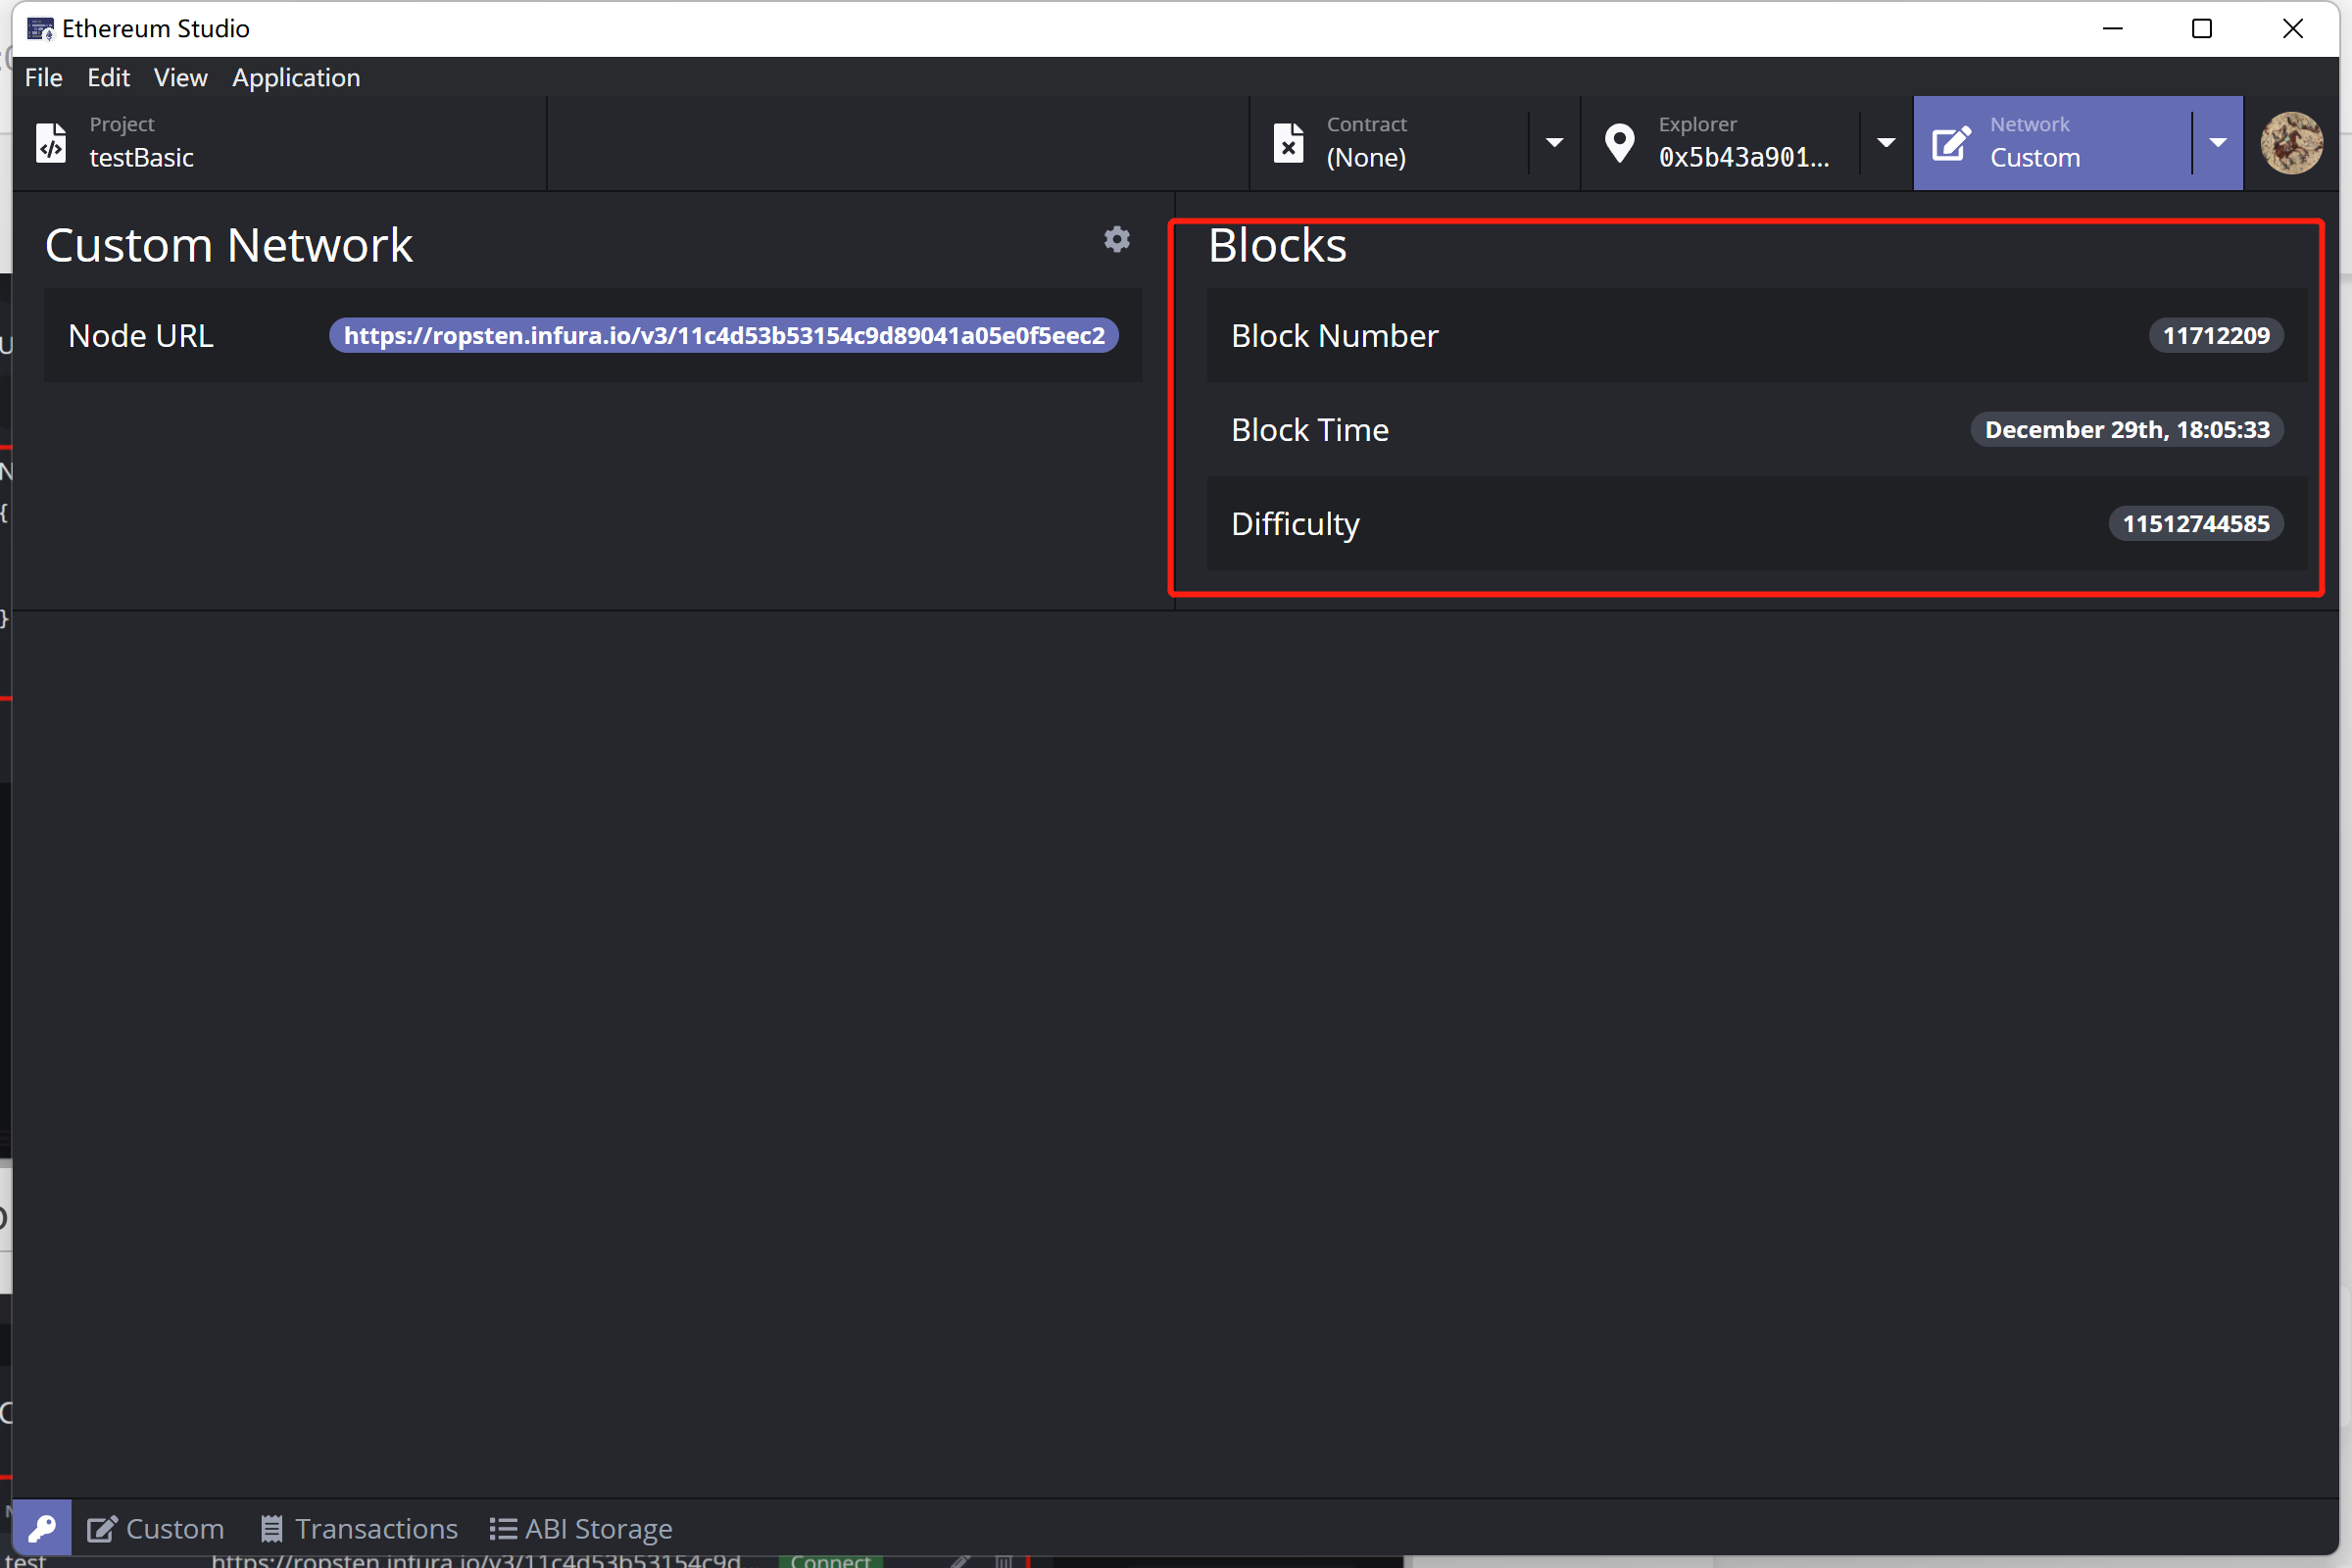
After adding a network, click the green “Connect” button, and there will be a “Blocks” panel showing the “Block Number”, “Block Time”, and “Difficulty” in real-time.