Editor
Build
After test and develop, developers needs to build smart contracts.
Build Preparation
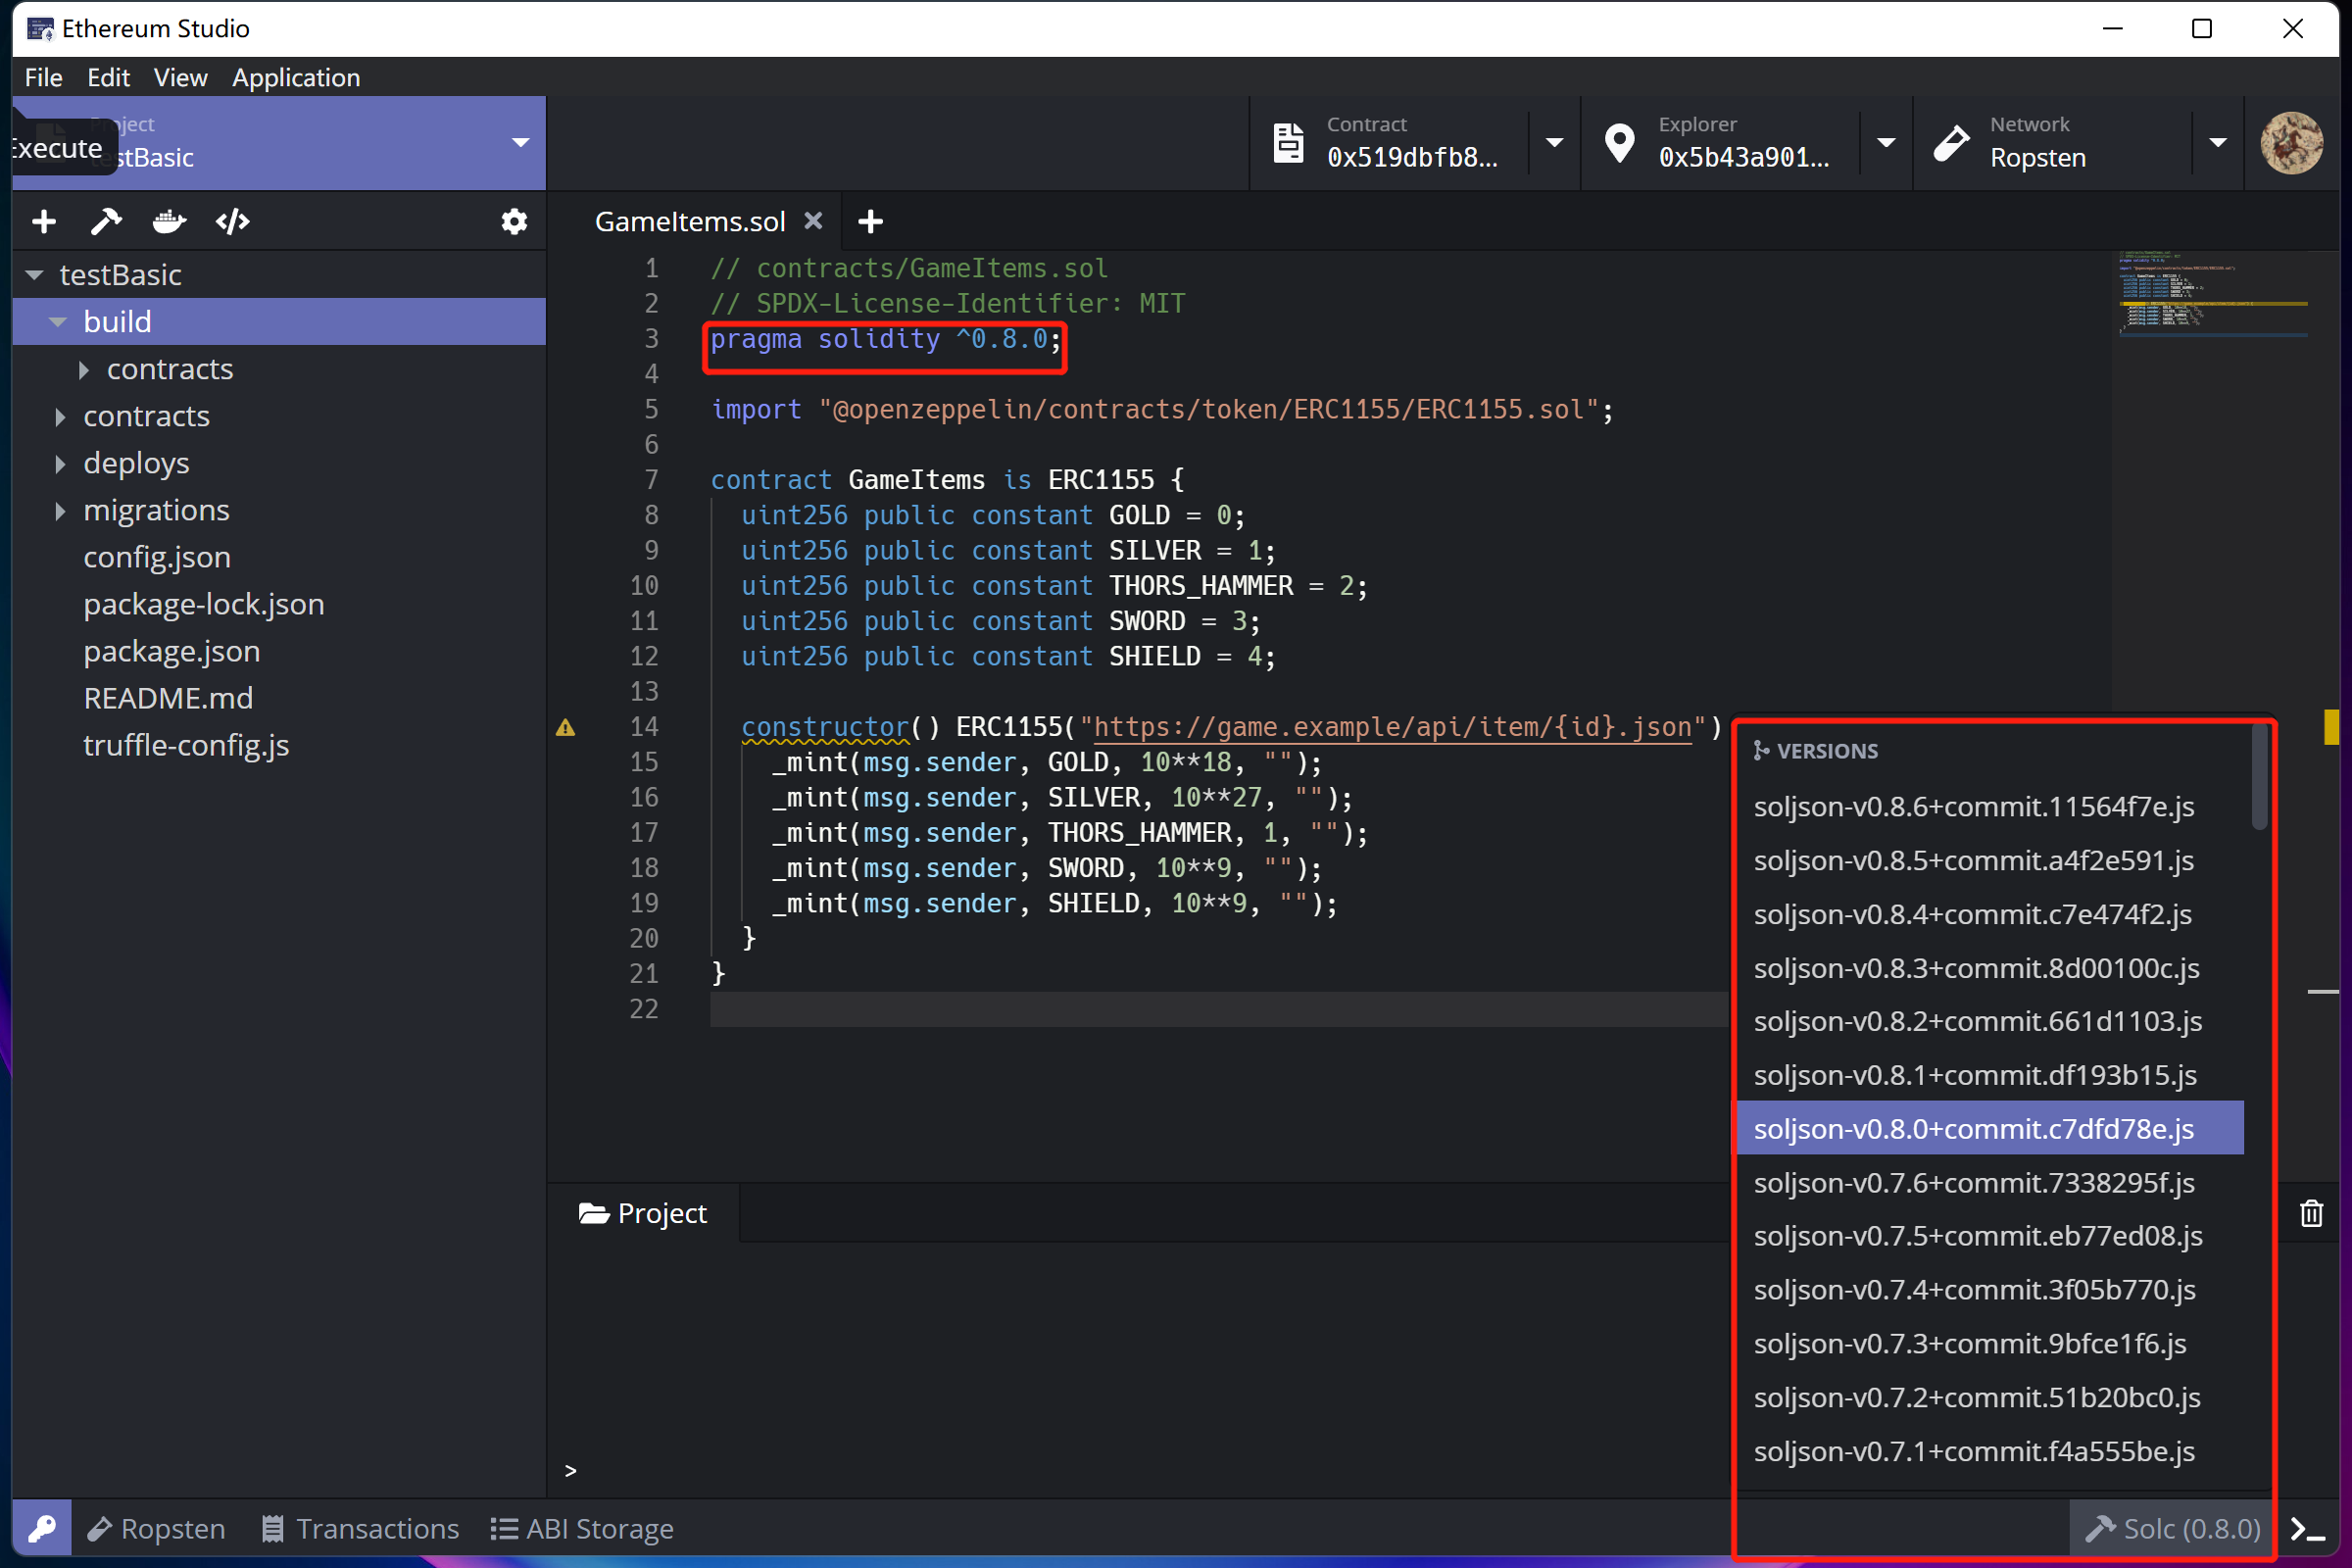
When an existed project is opened, the Ethereum Studio can automatically detect the solidity version written at the head of contracts. Developers can select the specific version of the solidity compiler by clicking the “hammer” icon at the bottom right corner with “Solc(0.x.y)”.
Build by Panel
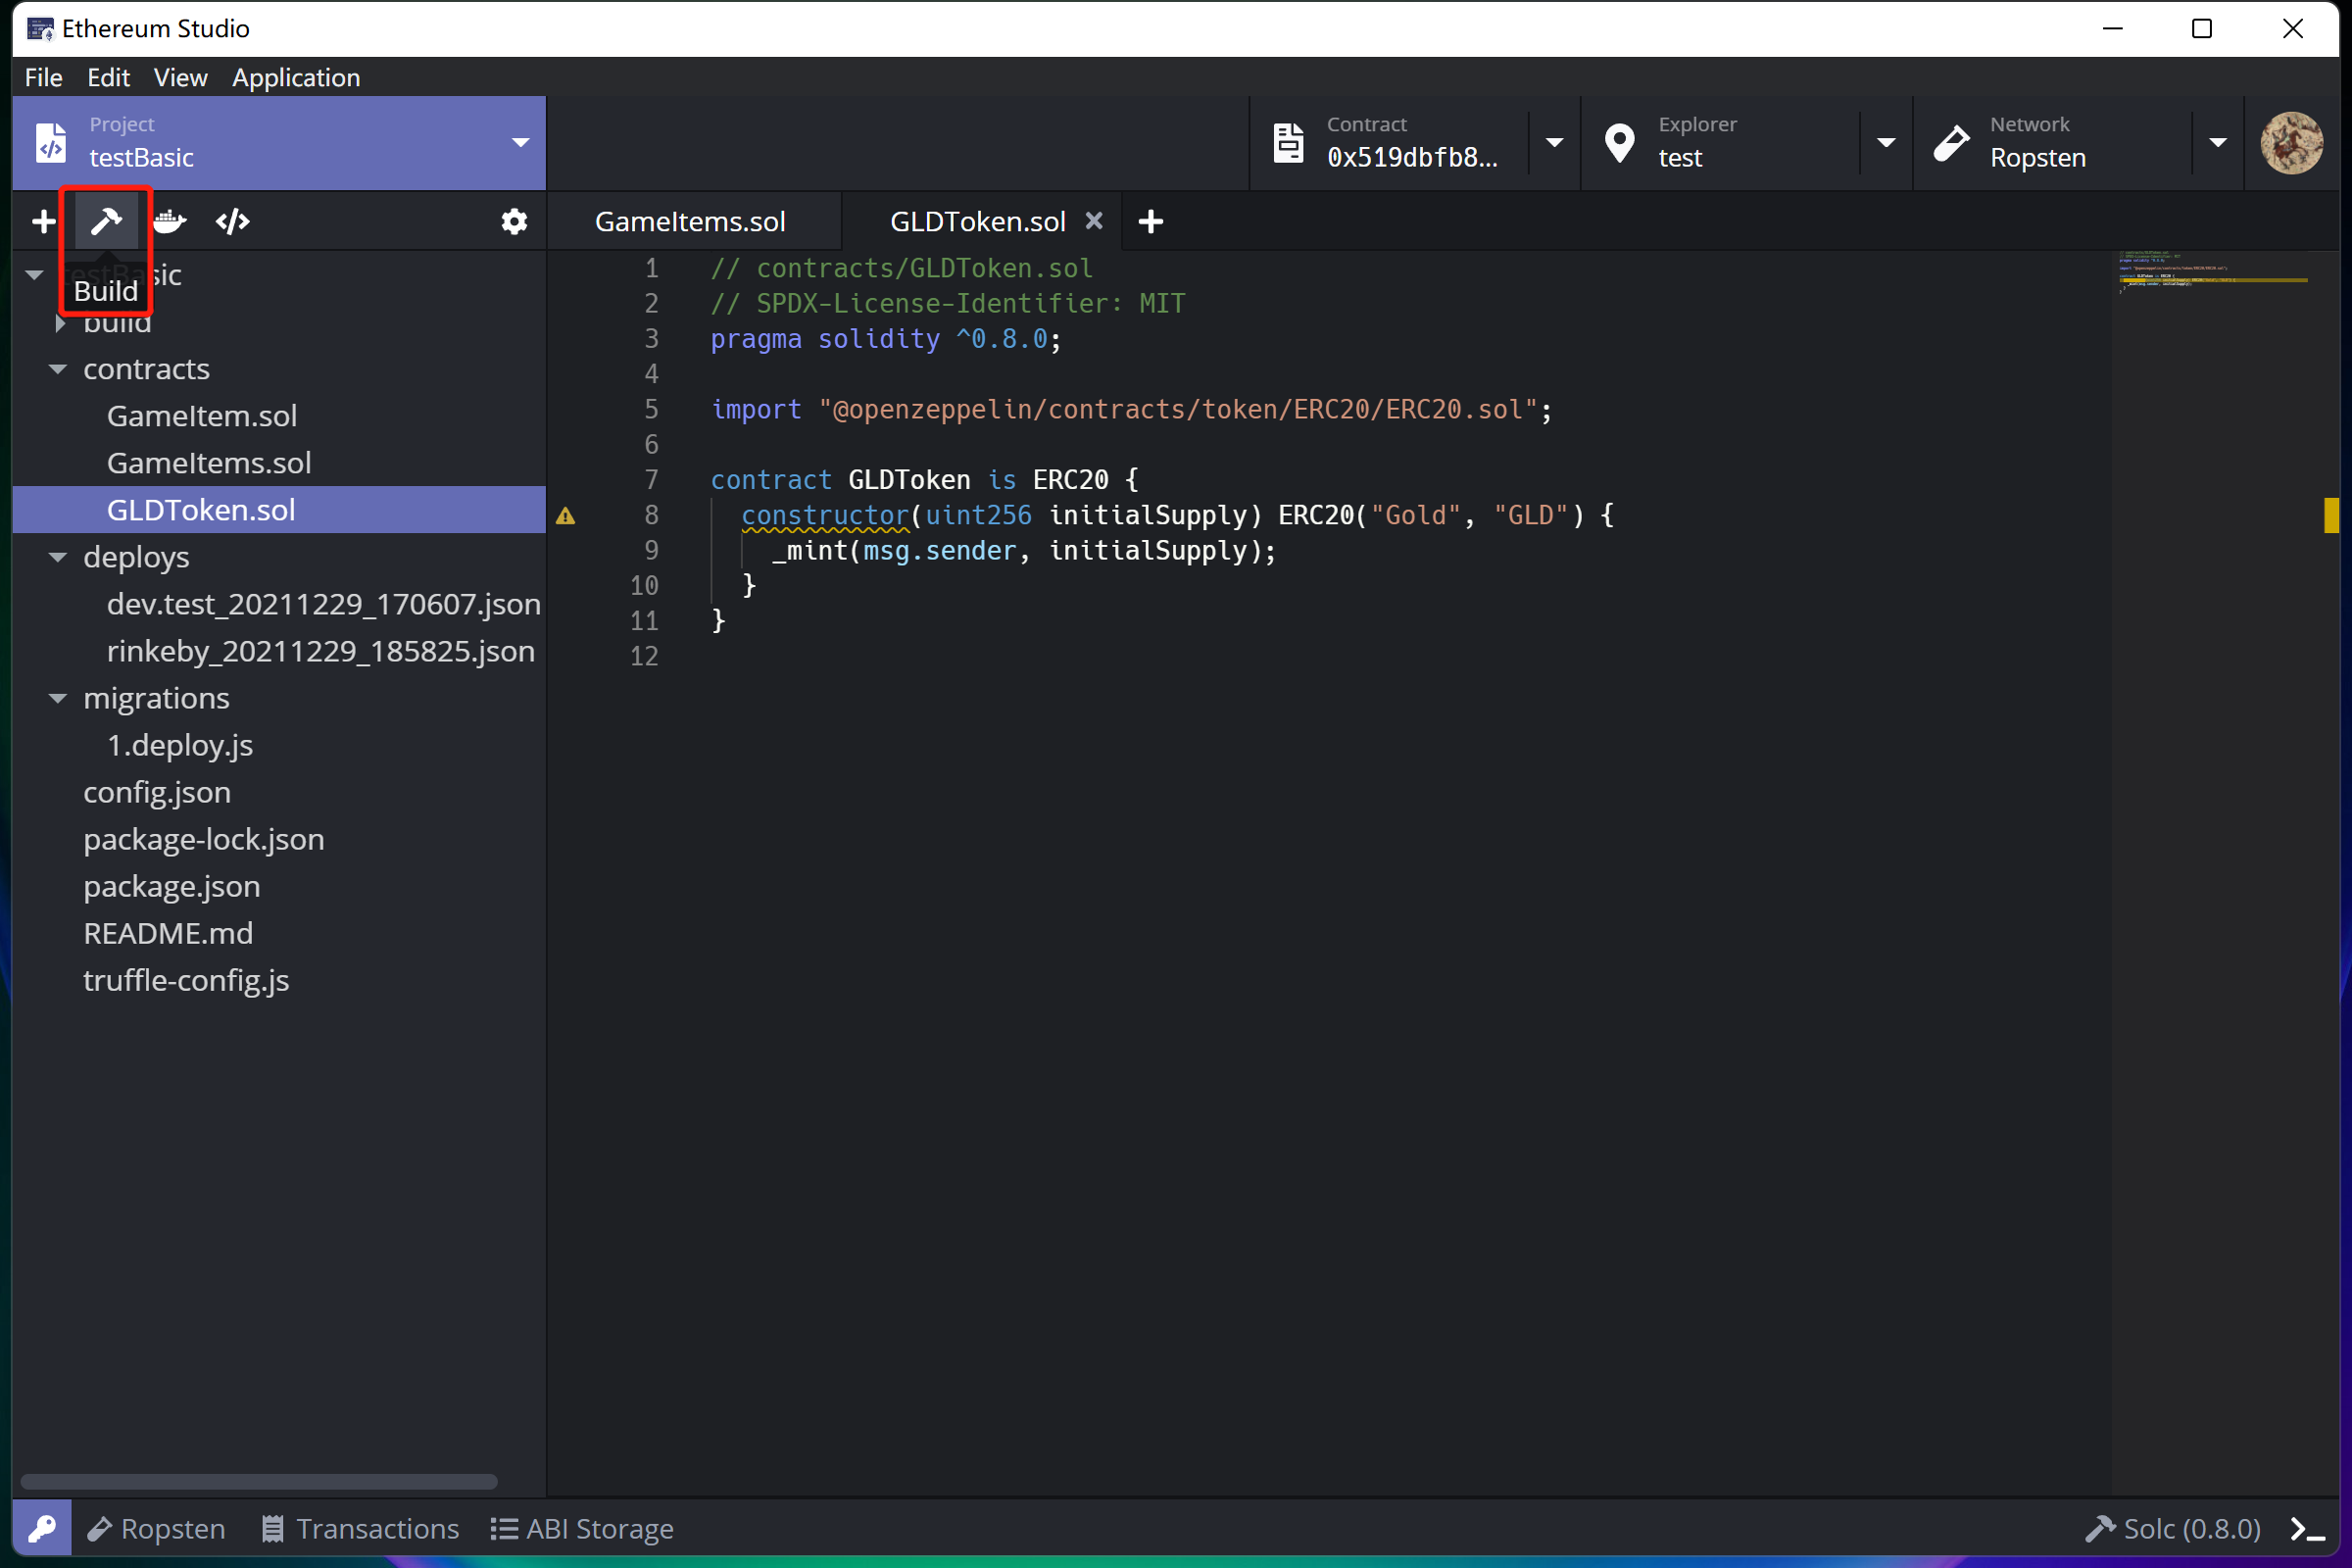
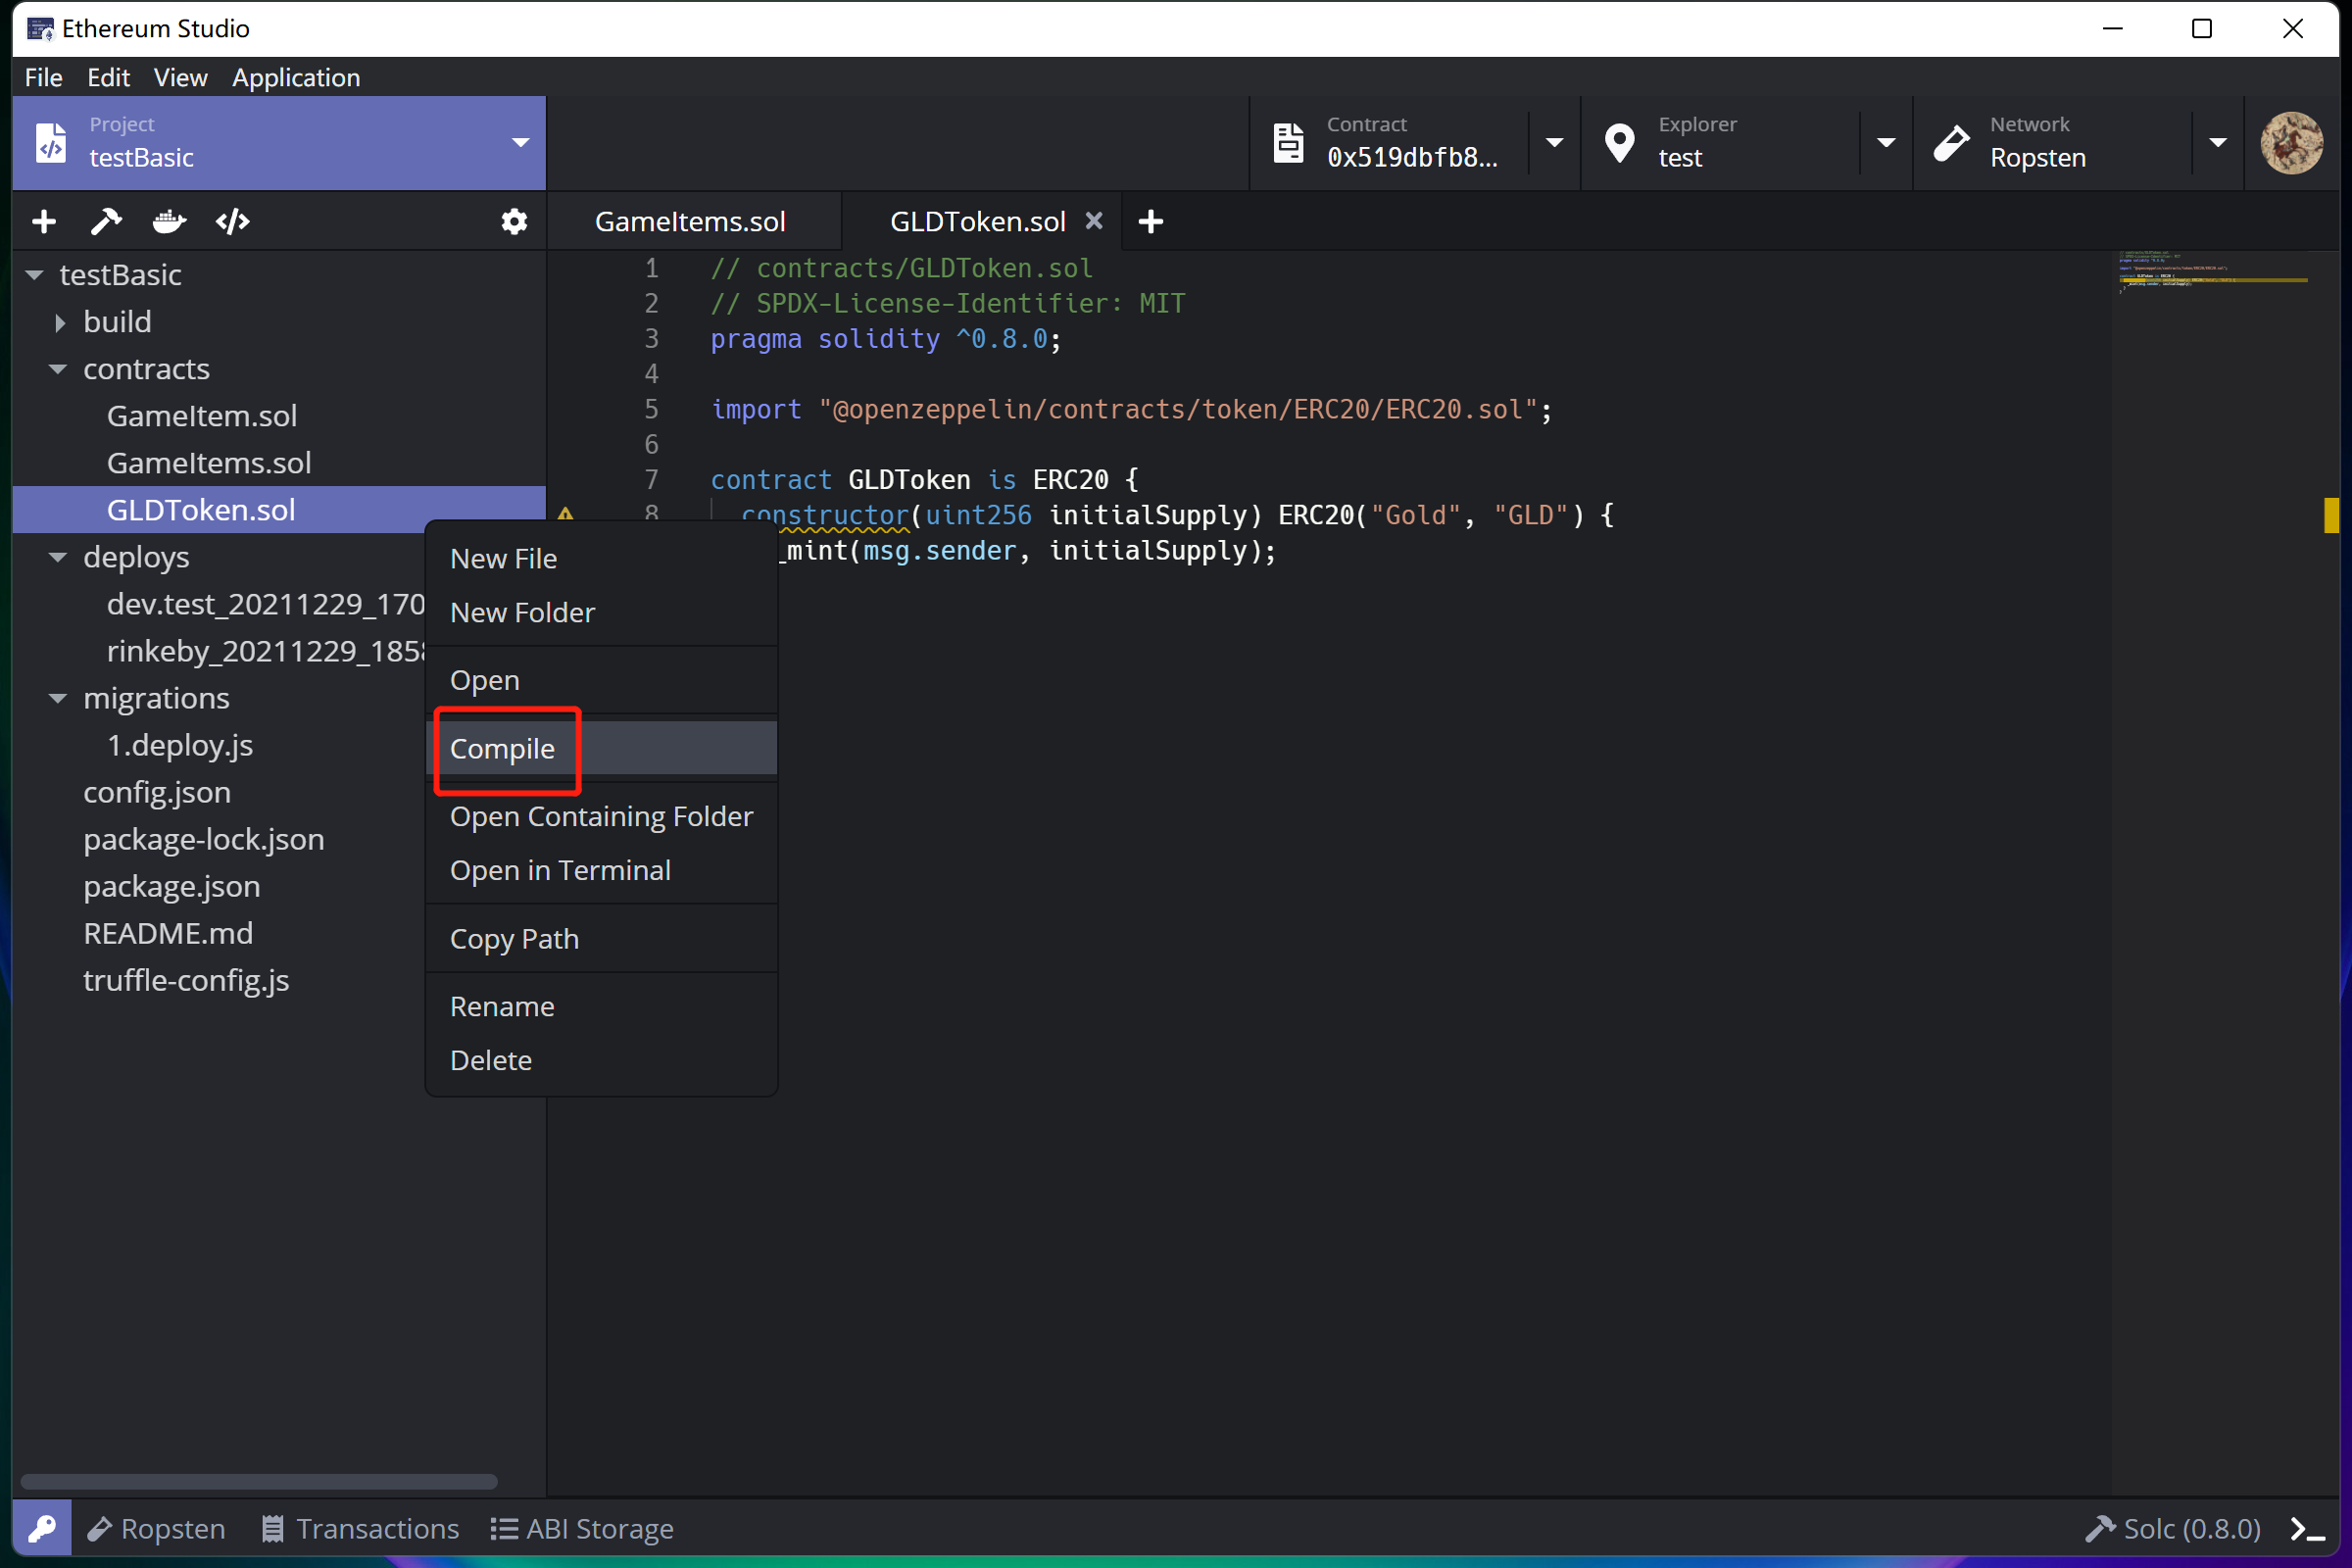
In the desktop client, developers can click the “hammer” icon below the “Project” panel or right-click the target file and select “Compile” to build the contract. Now the Ethereum Studio only supports building all contracts together, and the single file building will be released later.
Developers can find differences between web and desktop clients on building a project. The detail explanation can be checked in Chapter Install Desktop Client, Contrast with Web Client.
Build by Command Line
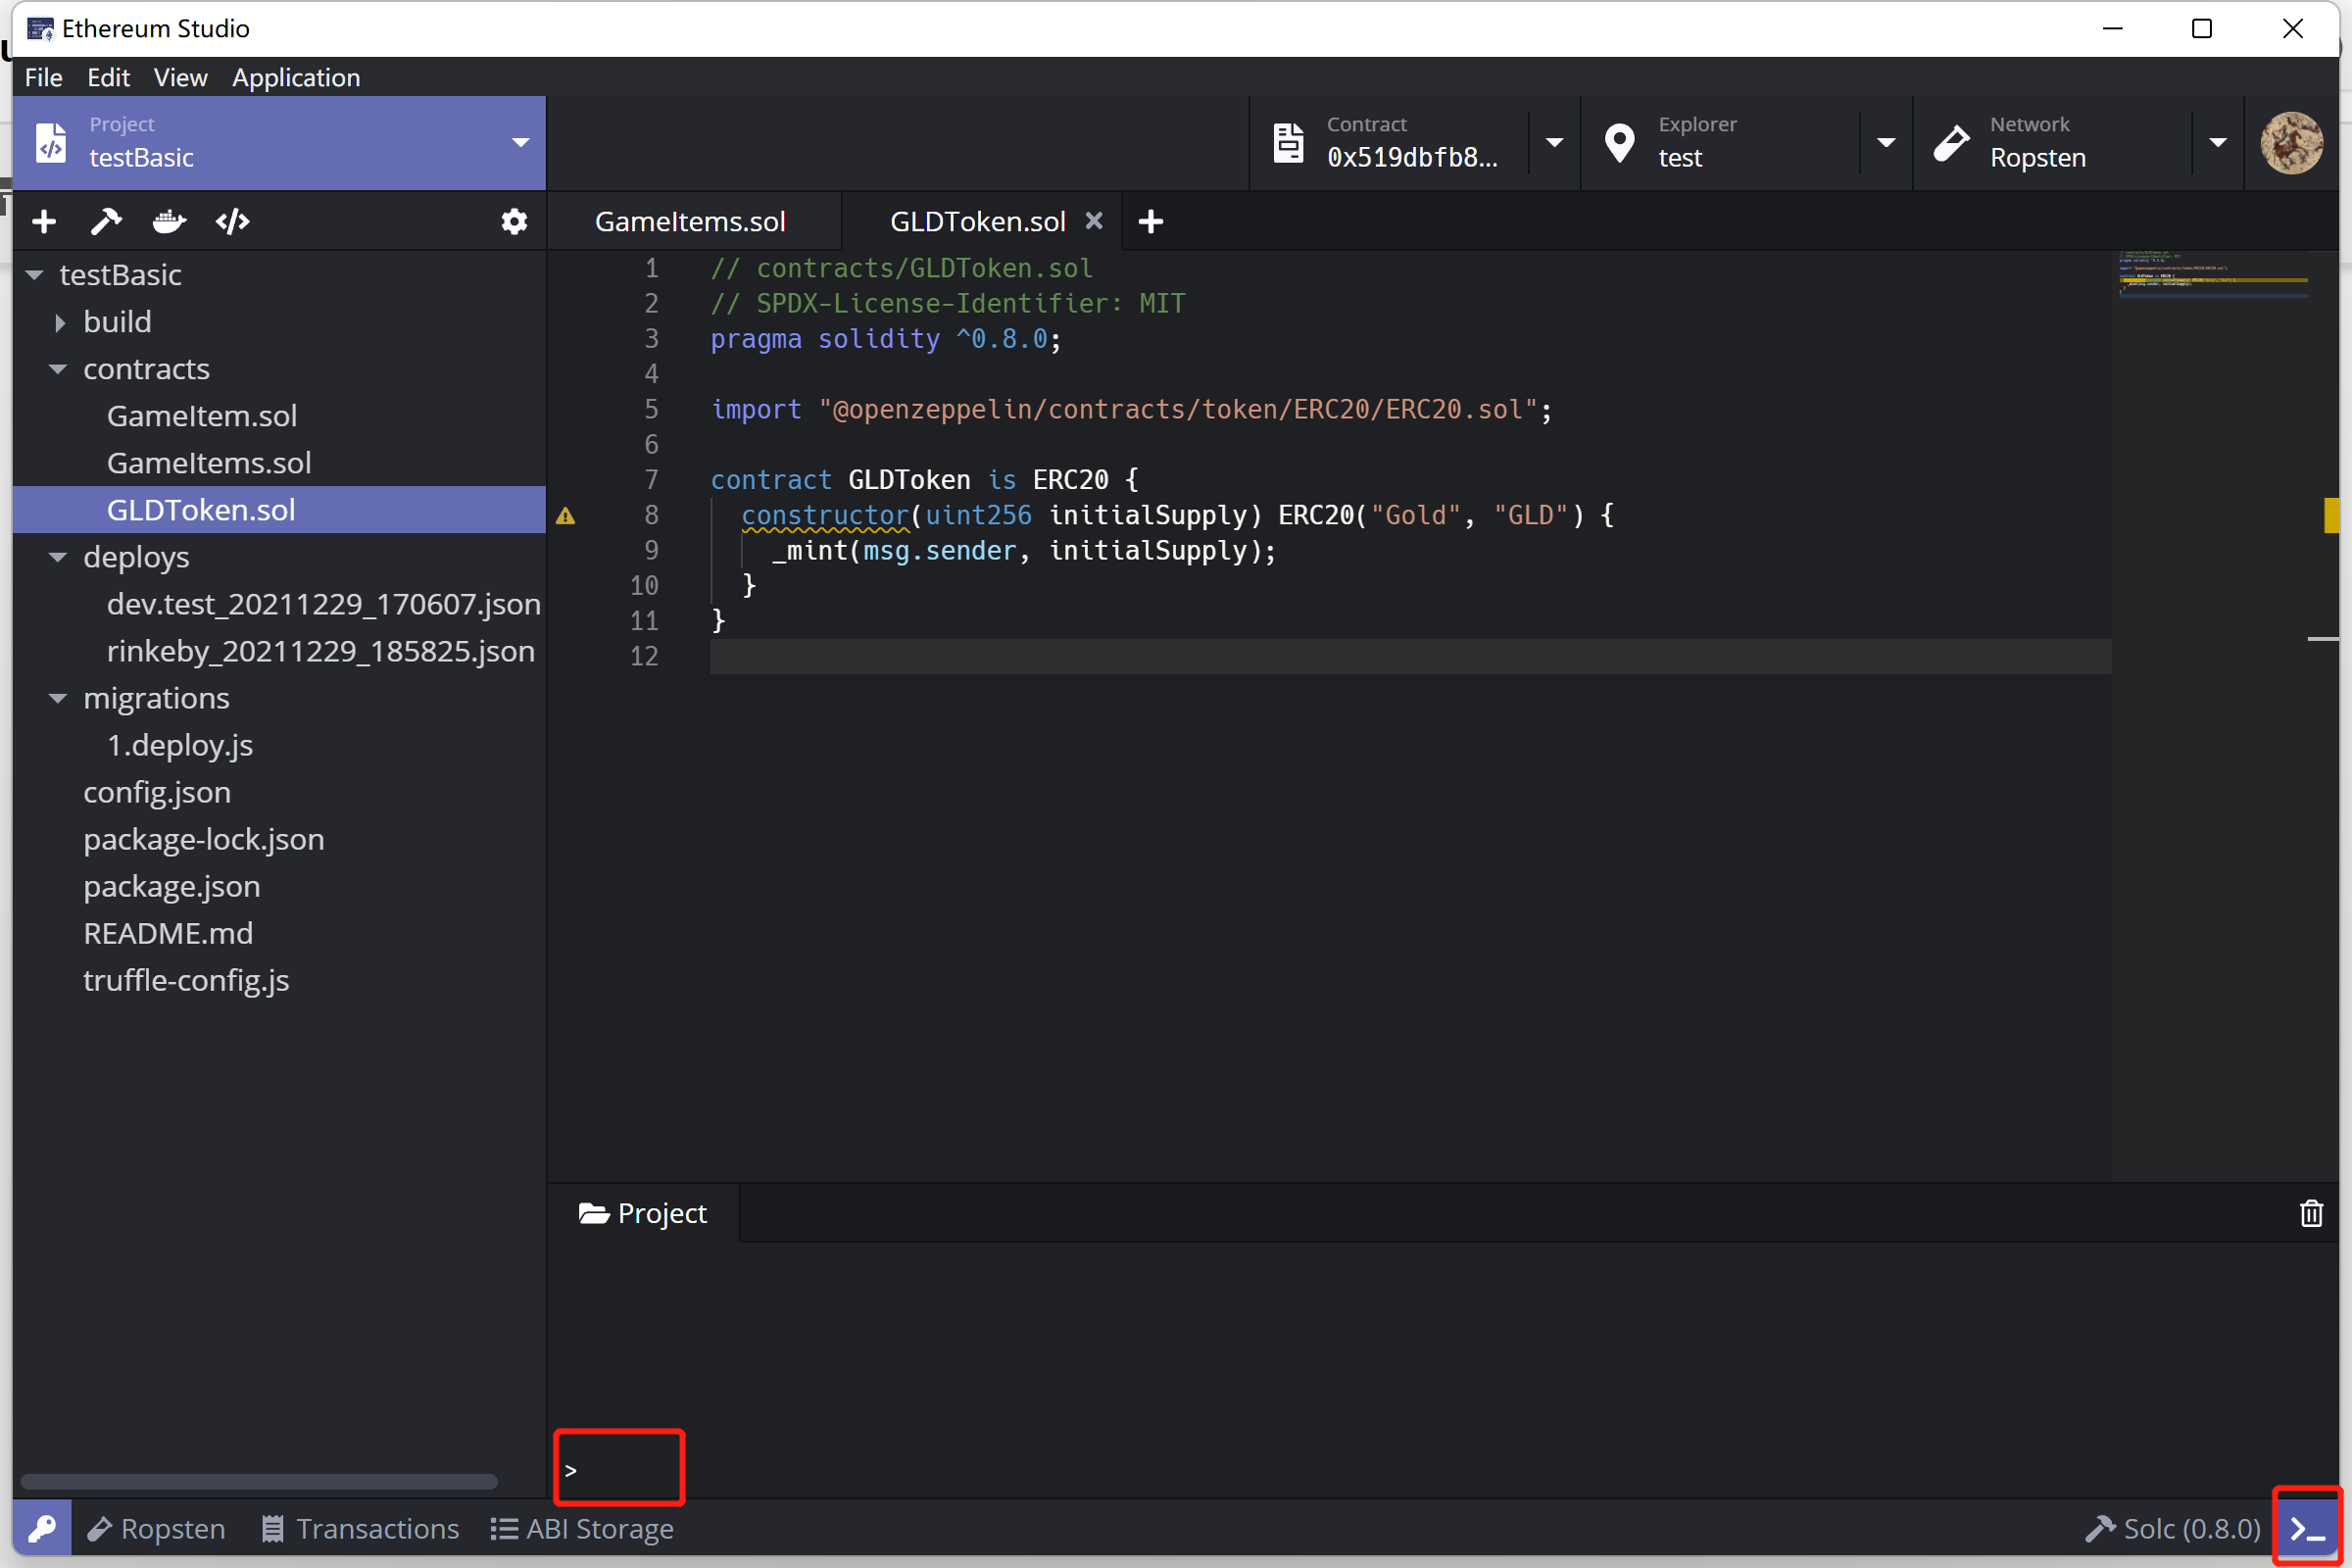
Developers can build contracts manually by opening the command line, clicking the “Terminal” icon and inputting the command through “Project” panel. Please note that the command must be corresponding to the selected framework during creating process. Developers can check the framework type in “package.json” with the commands following “scripts”.
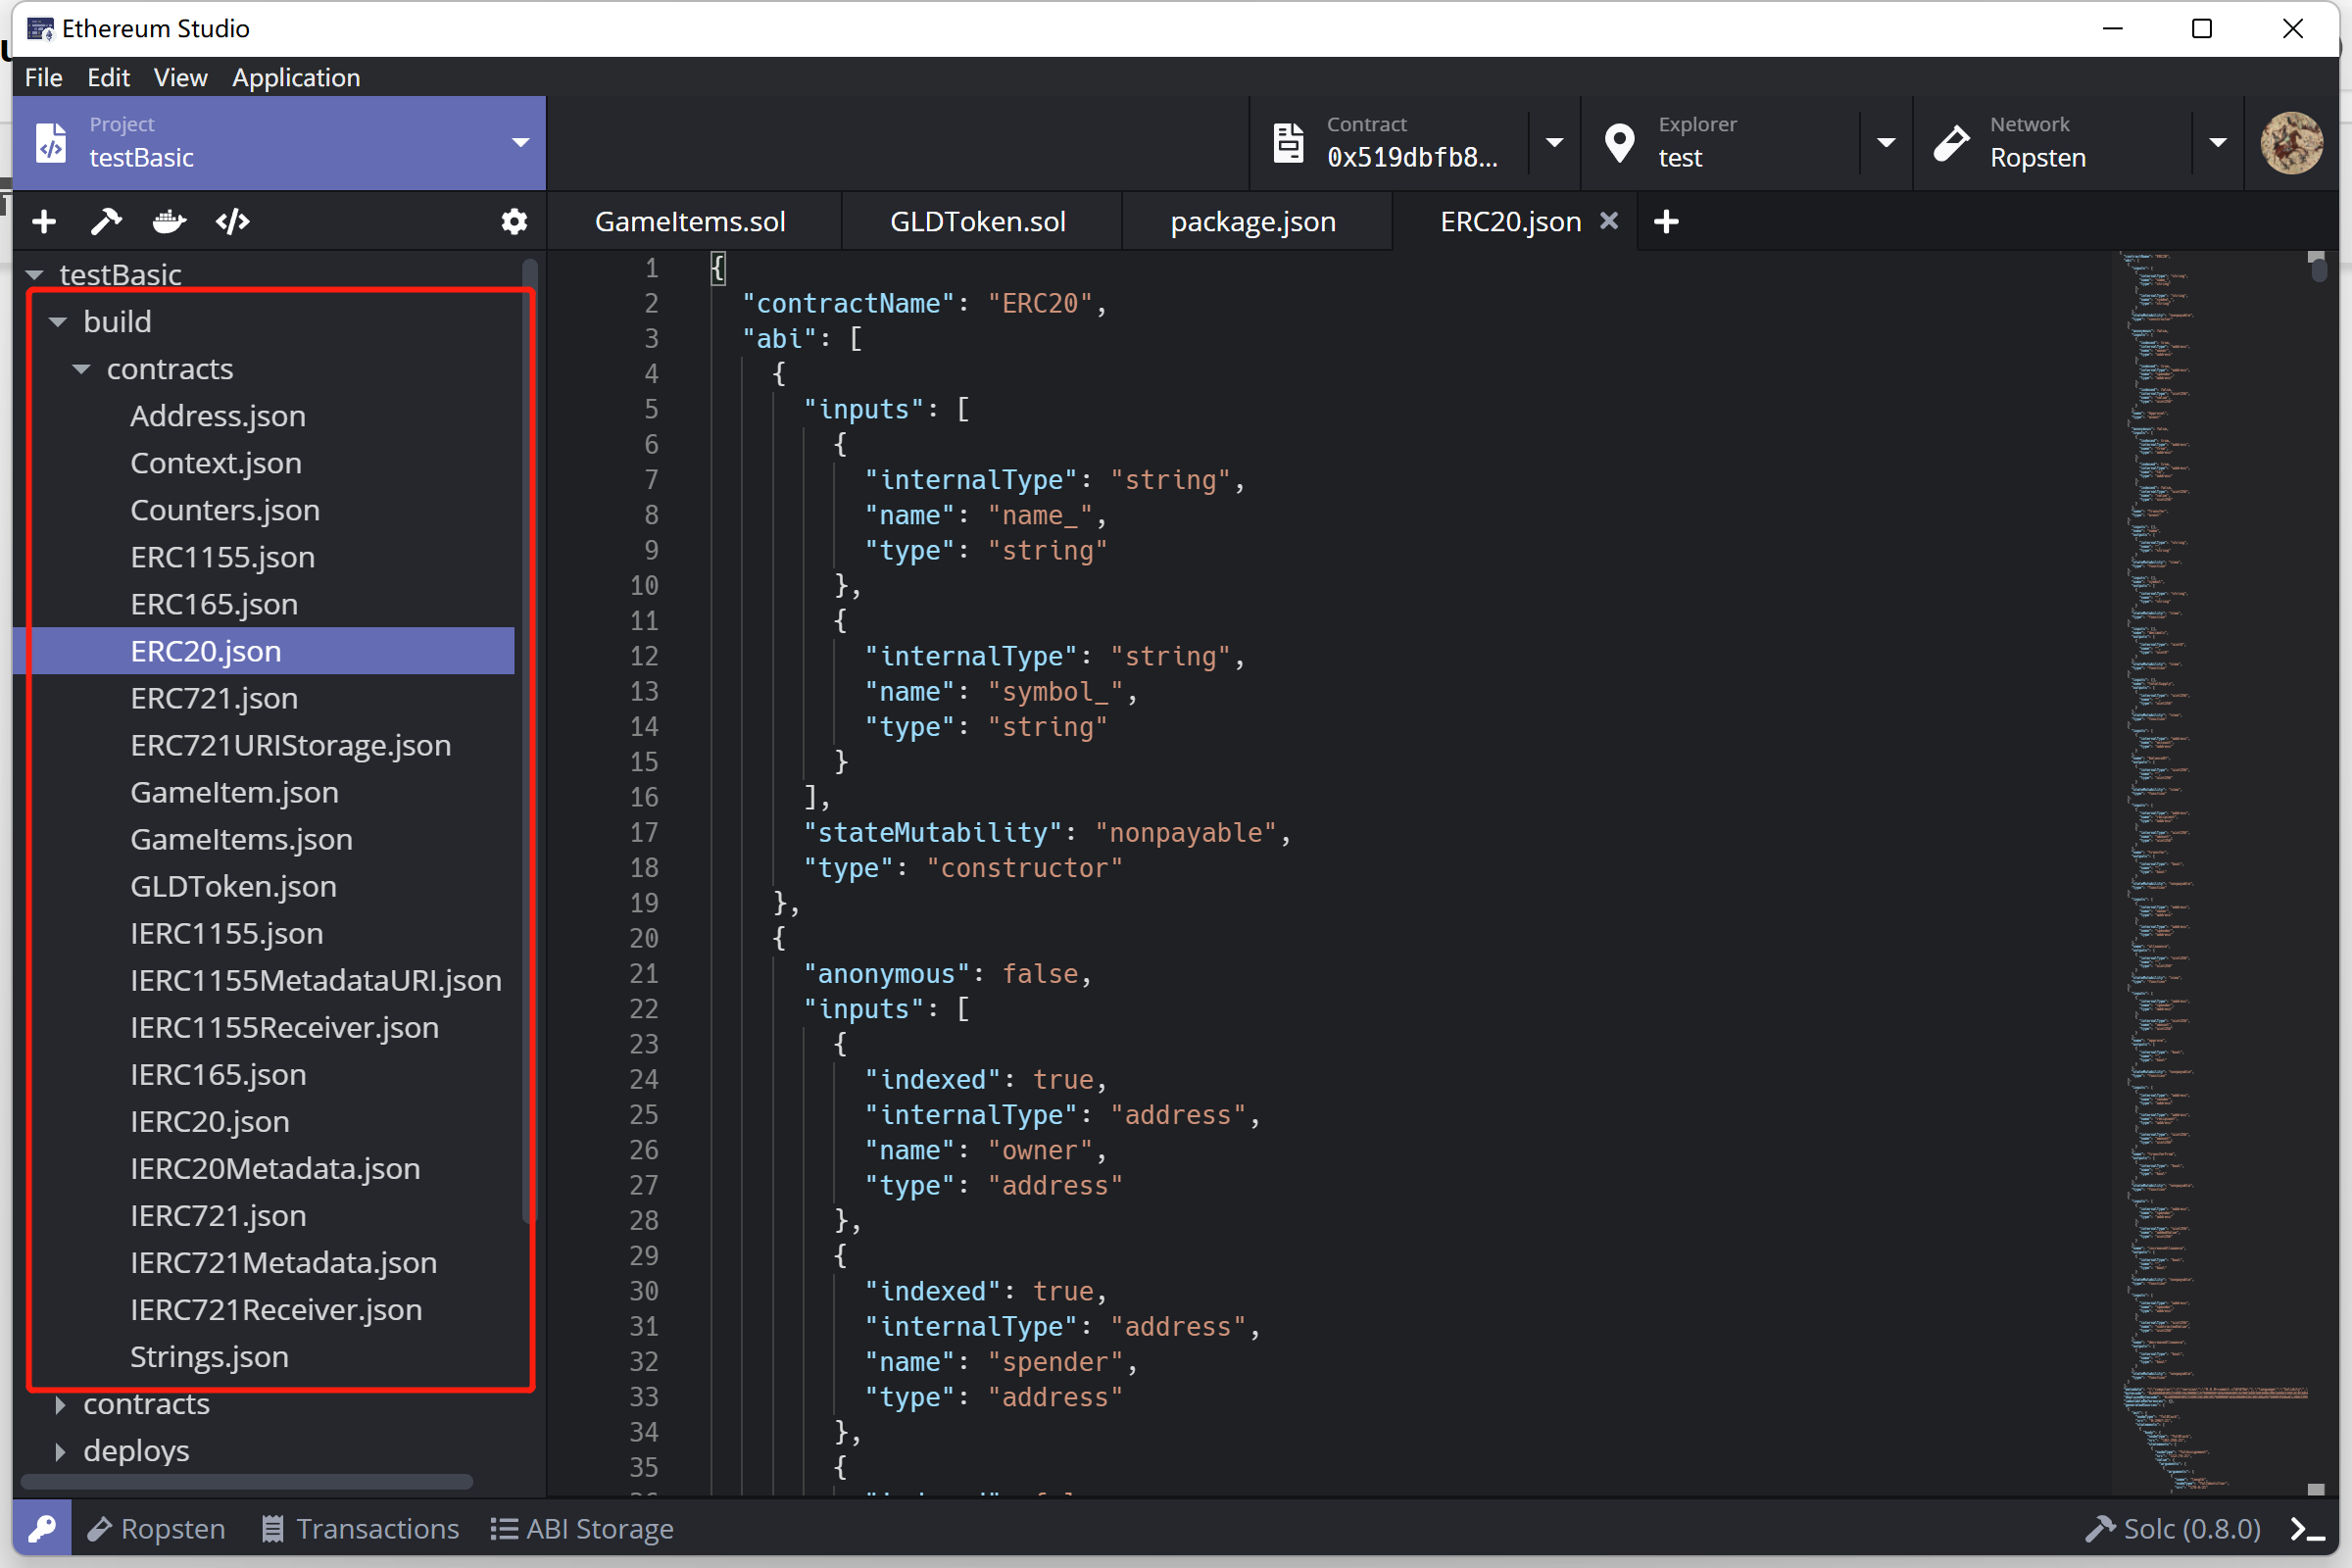
Check Building Details
After building successfully, the framework will build a new document named “build” containing a “contracts” document. In “contracts” document, there are all the JSON files generated in the building process. Each JSON file has the corresponding application binary interface(ABI). Developers will deploy ABI files on the network later.
Deploy
After building process, developers can deploy target contracts with generated ABI files.
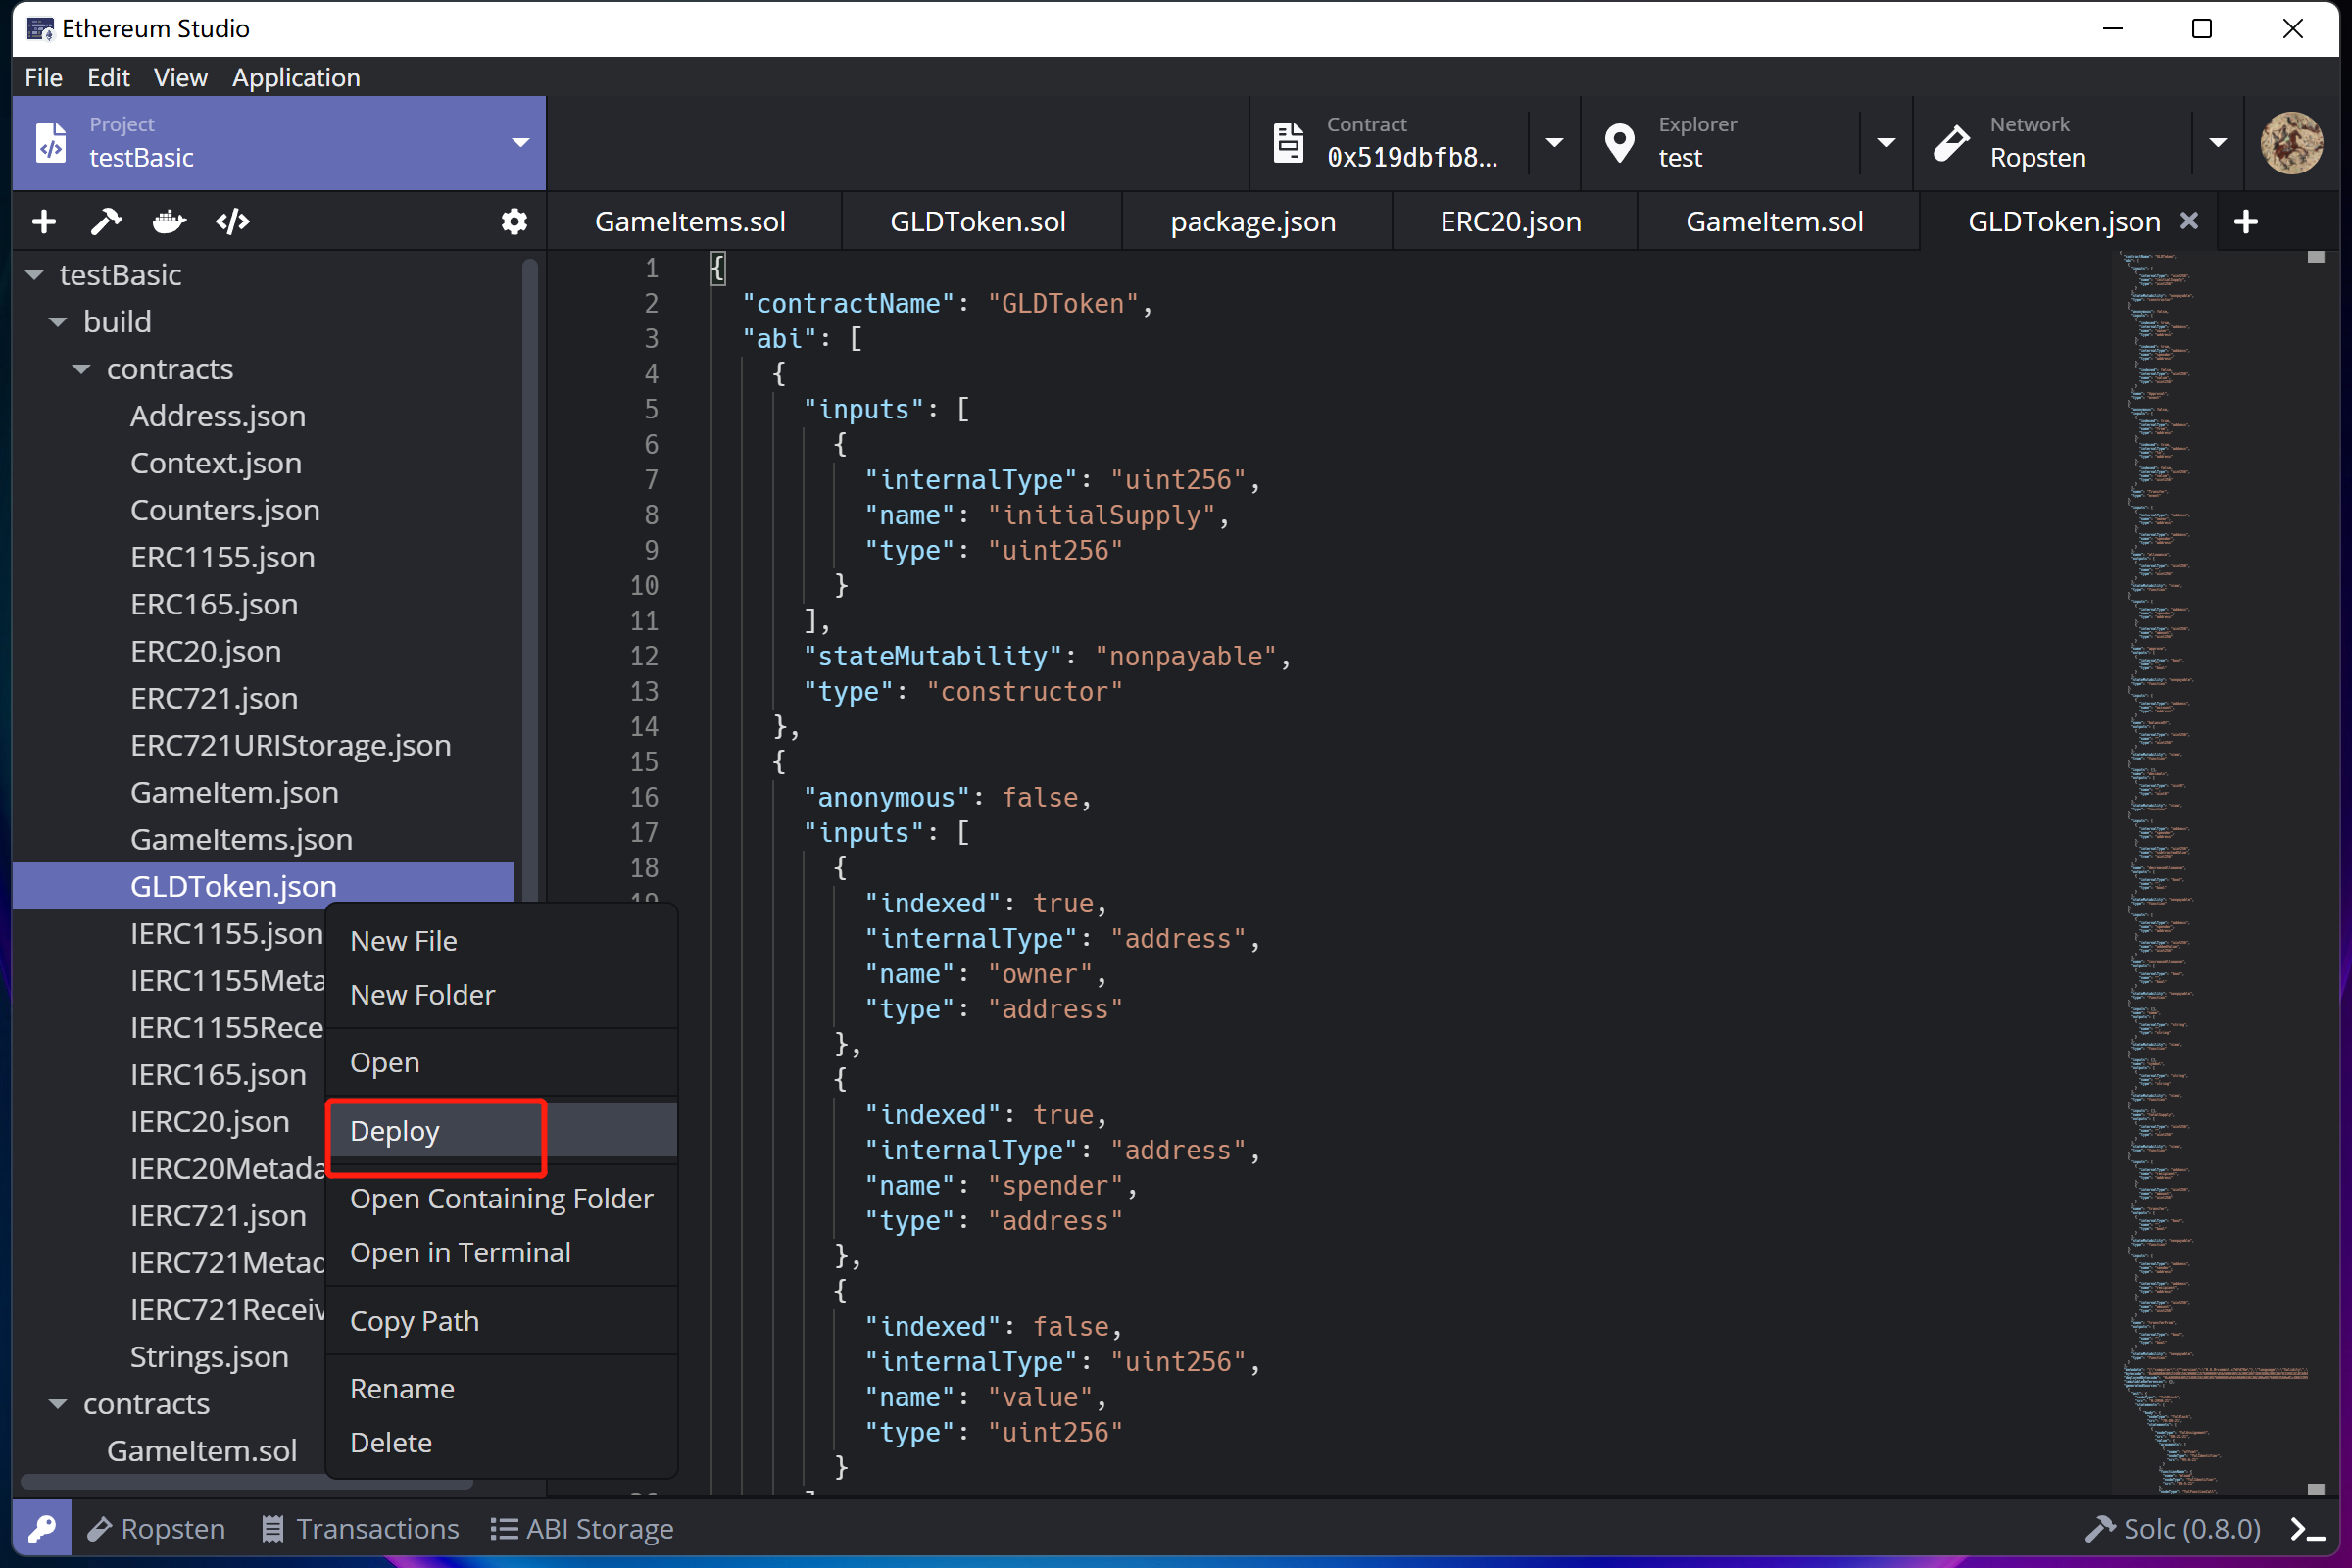
Deploy by Panel
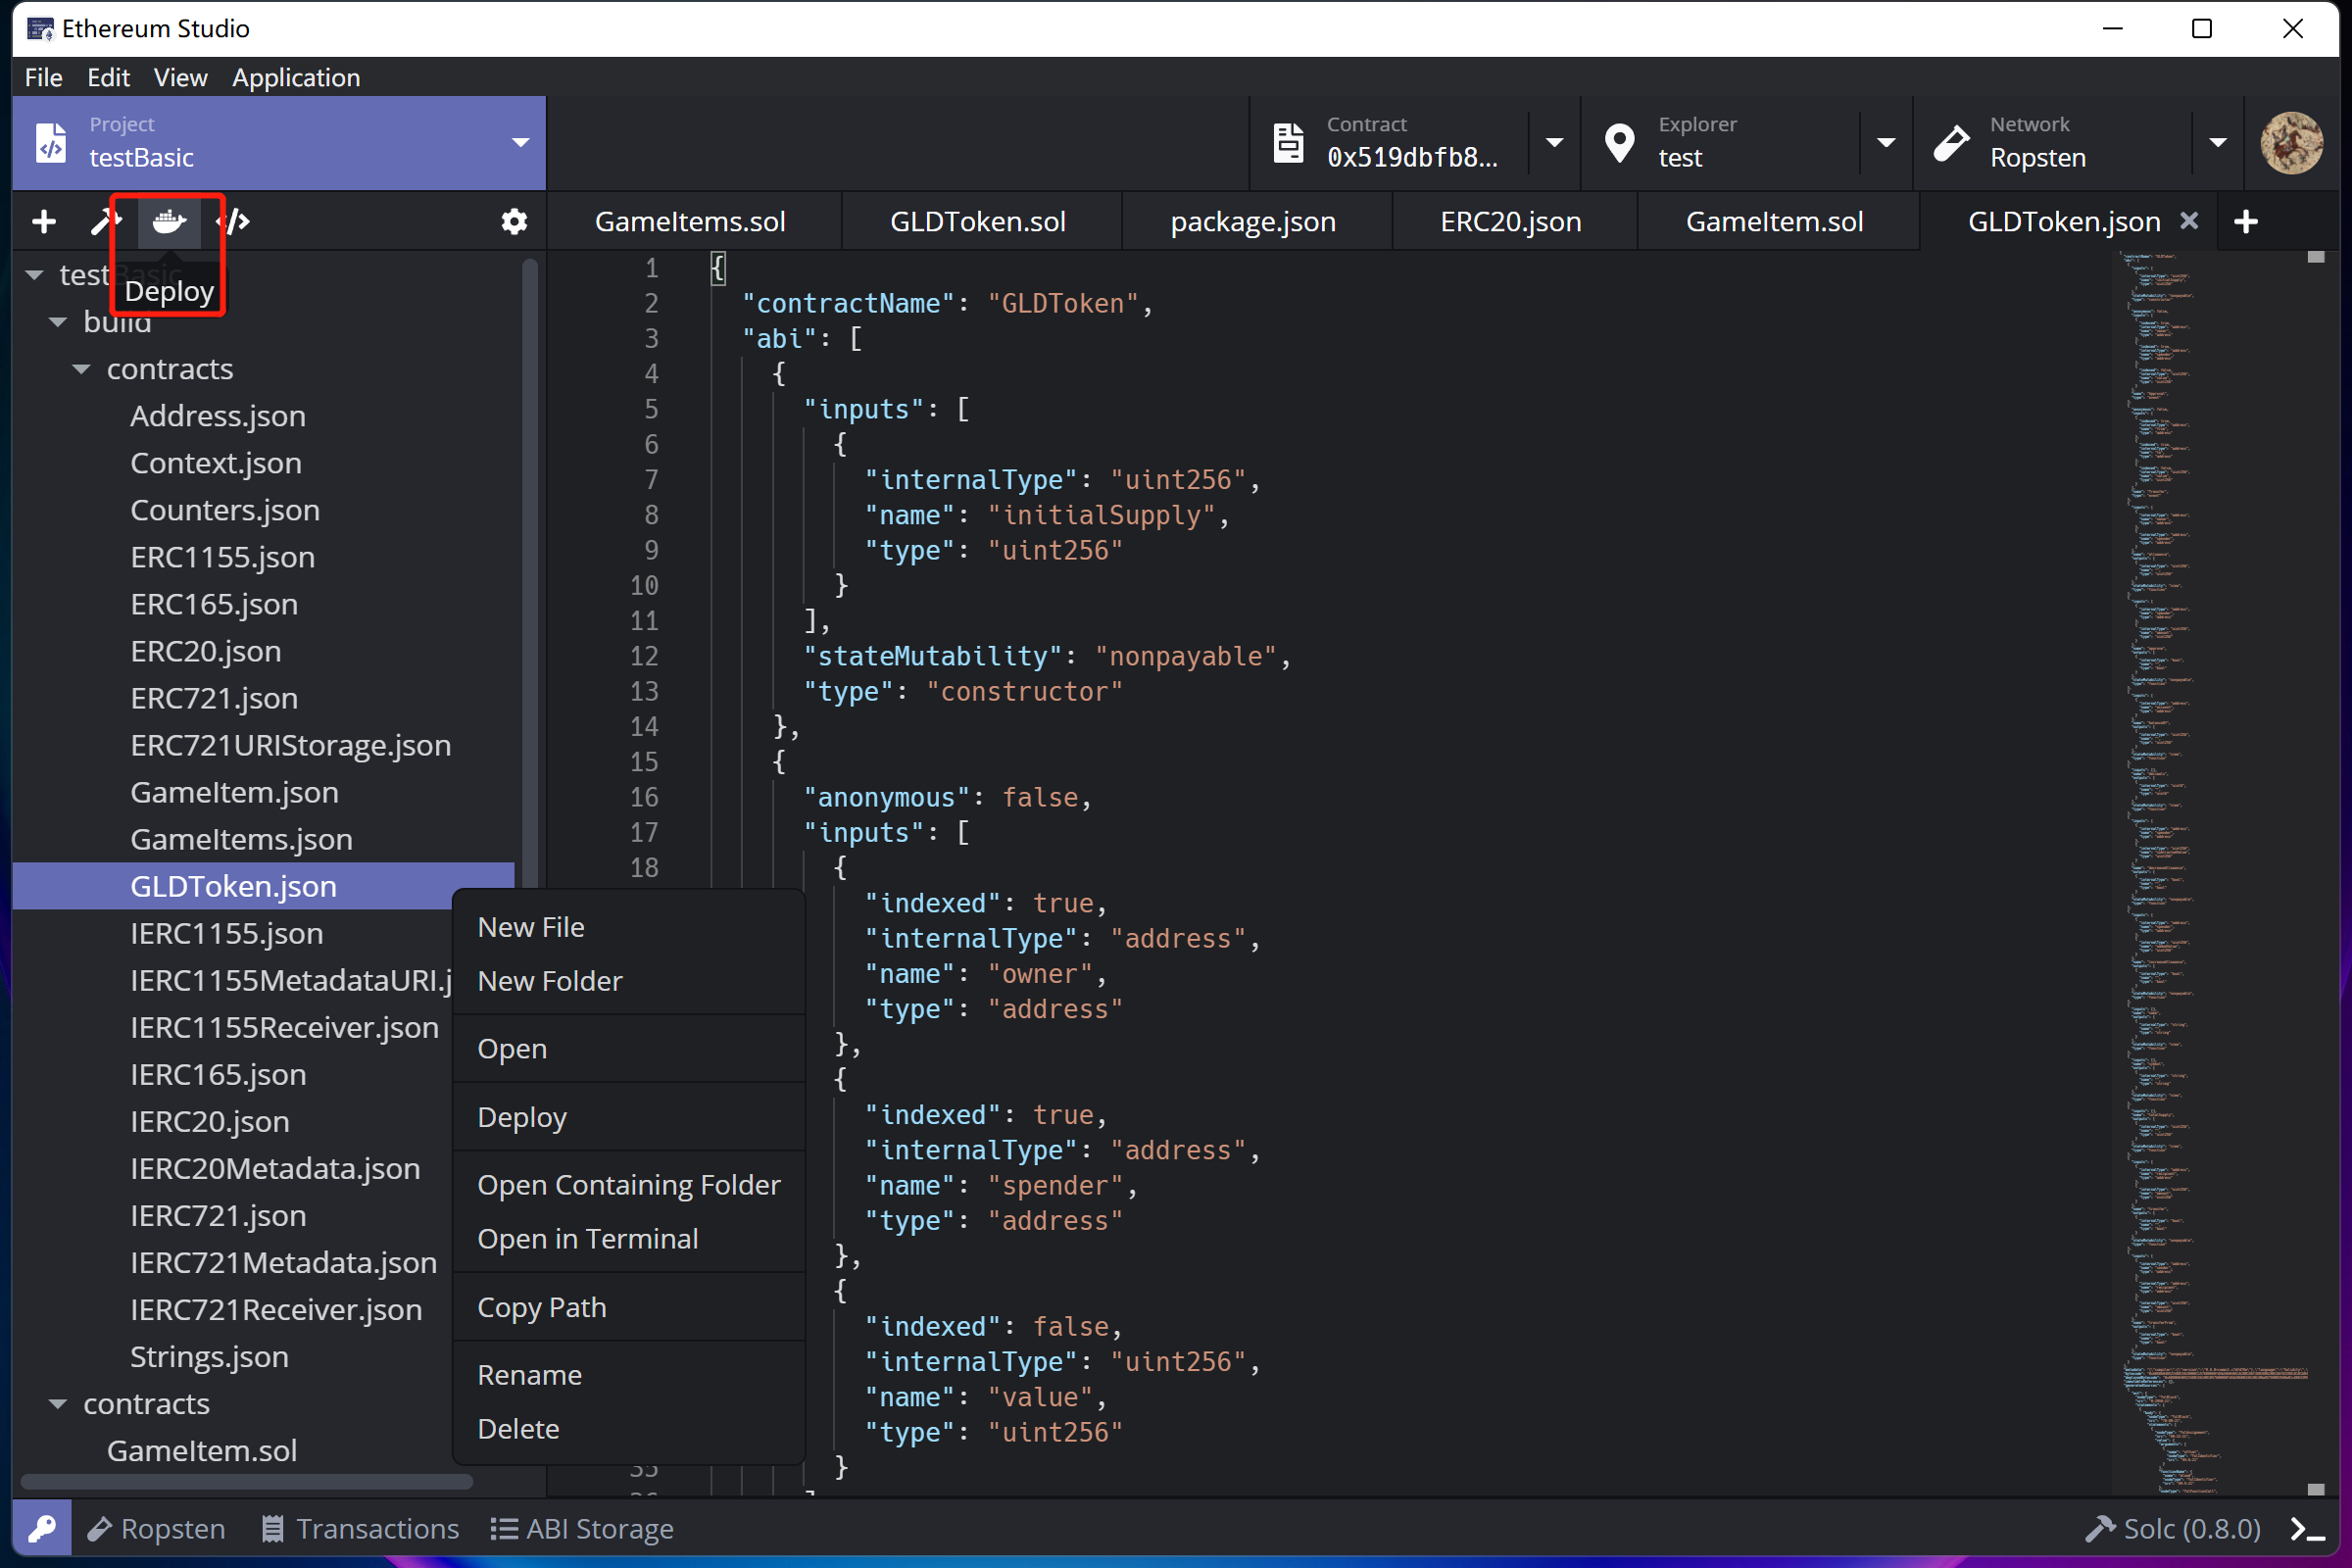
Developers can right-click the file name of an contract and select “Deploy”, and there will popup a “Deploy Contract” window. By other means, developers can click the “Docker” icon below the “Project” panel.
Deploy by Command Line
Developers can open the command line to deploy contracts manually by clicking the “Terminal” icon and input command through the “Project” panel. Please note that the commands must be corresponding to the selected framework during project creating process. Developers can check the framework in “package.json” with commands following “scripts”.
Deploy Preparation
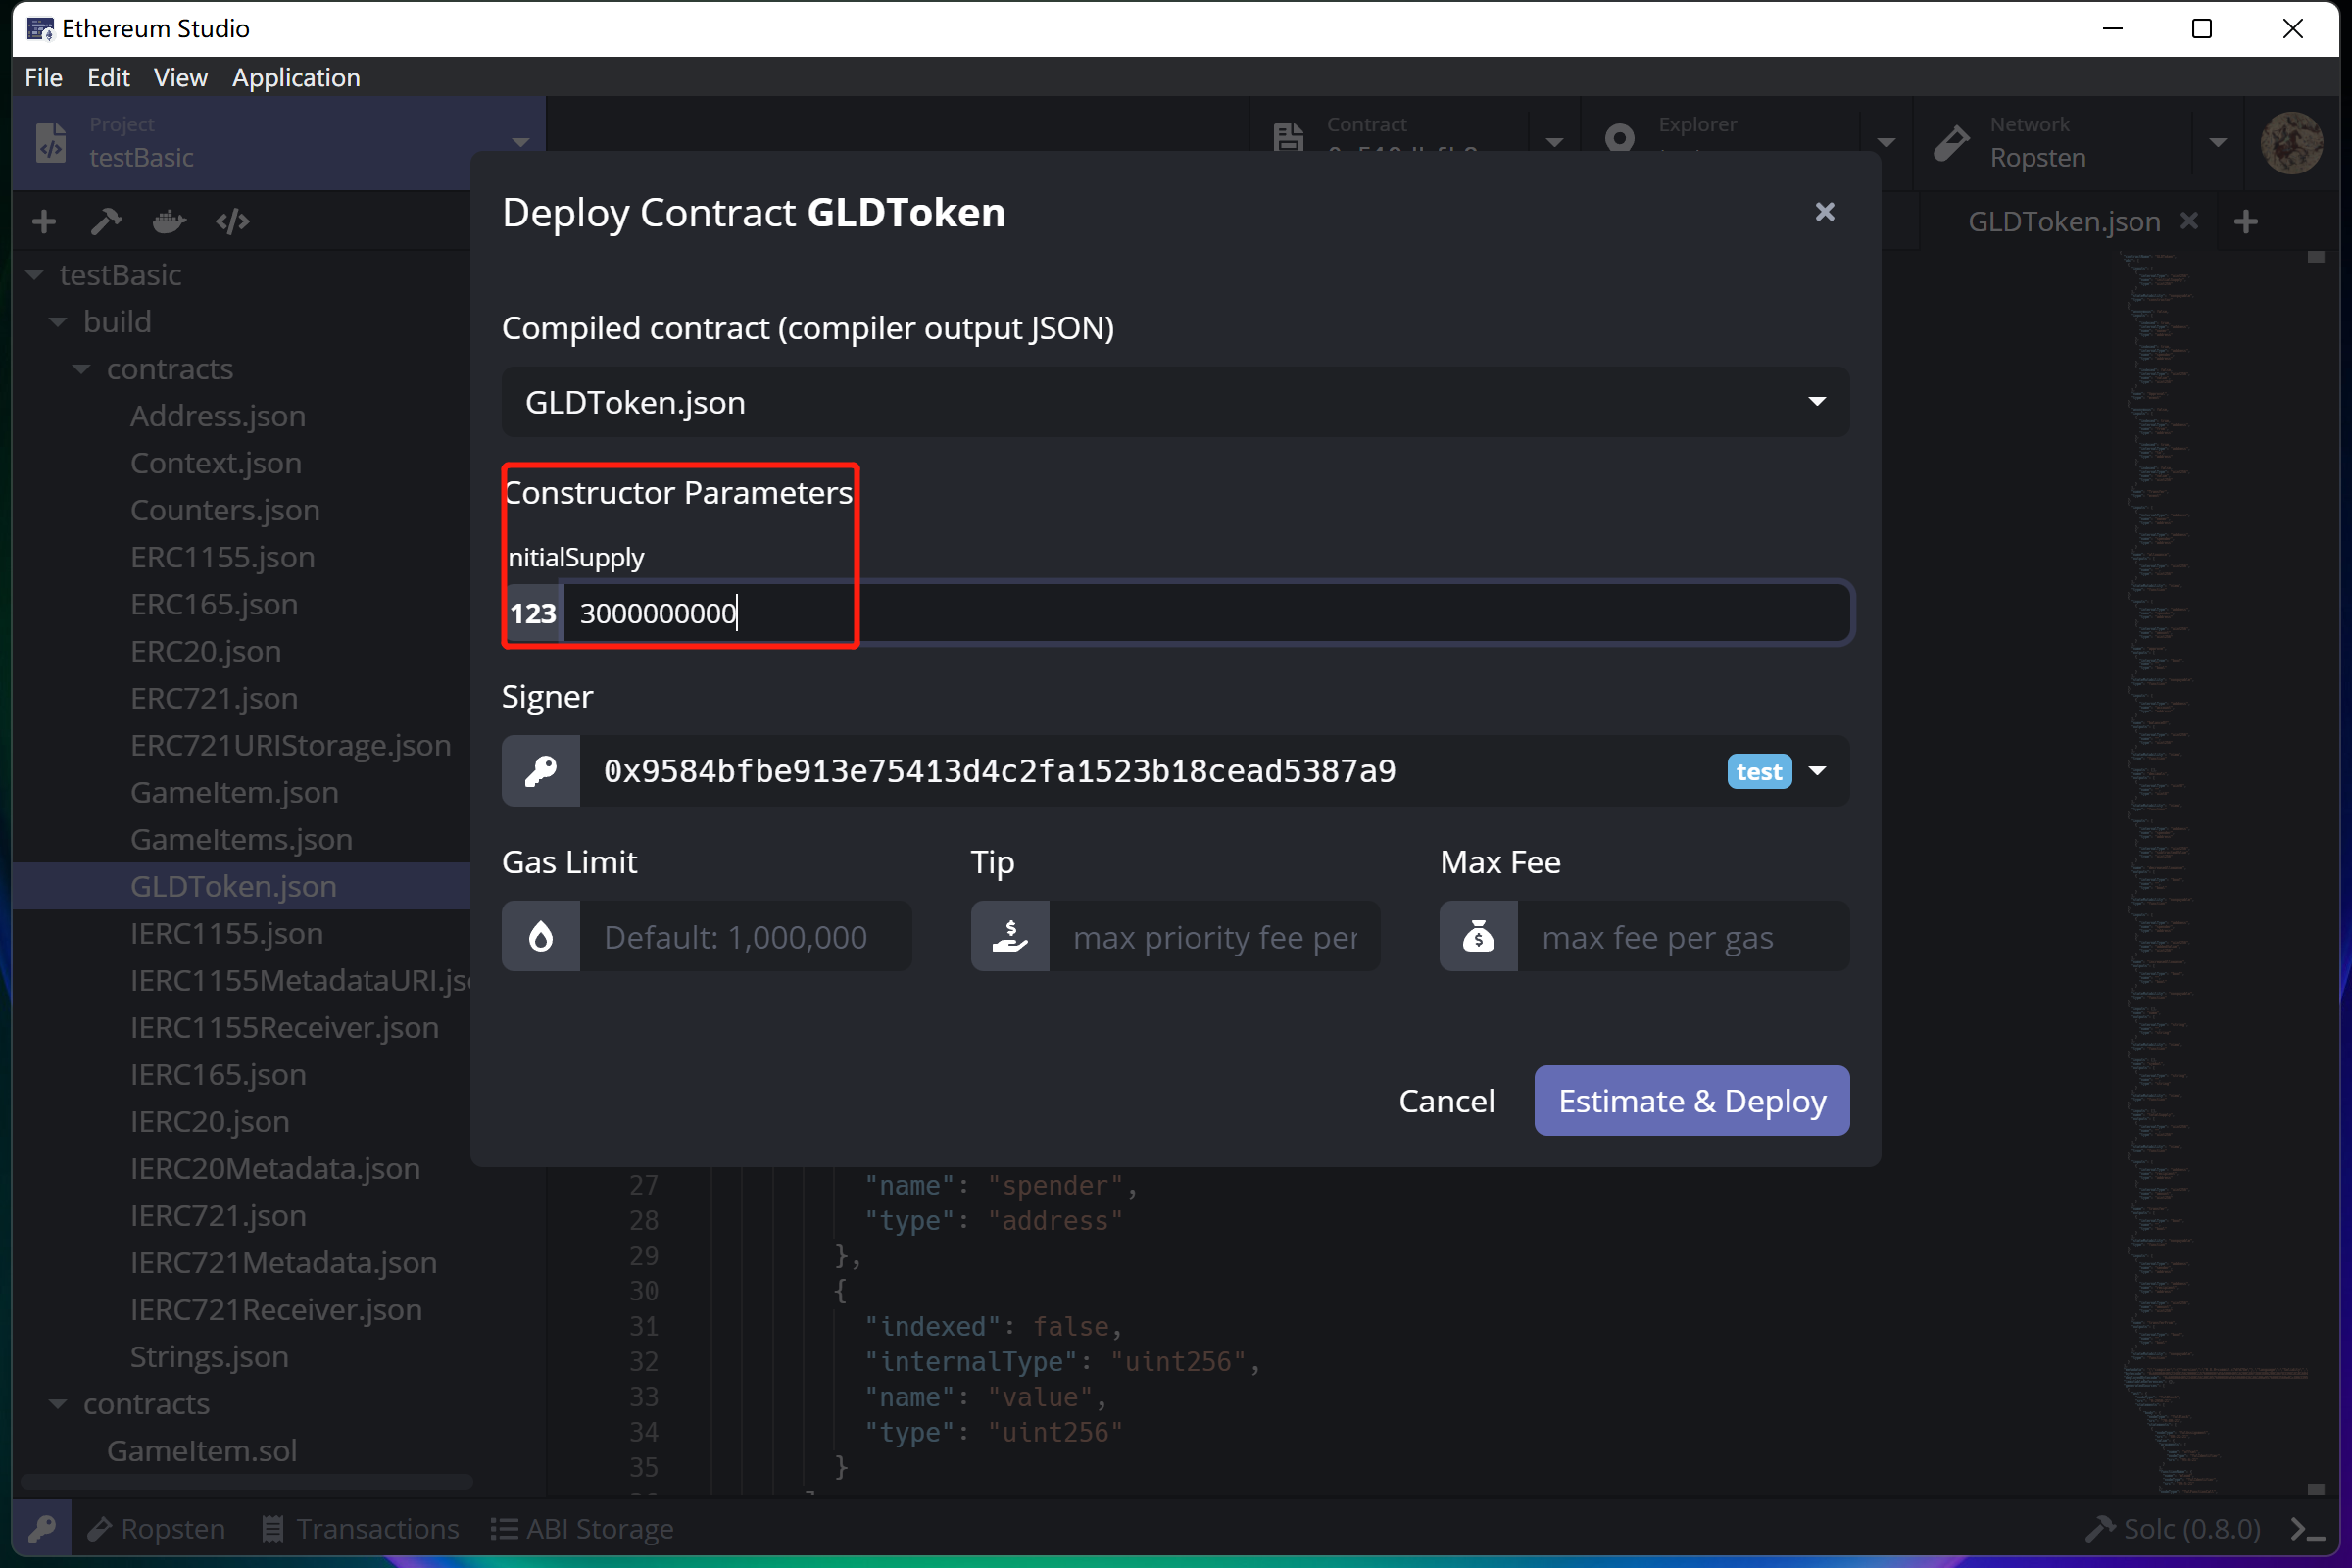
There will be a “Deploy Contract” window in the preparation process. Developers can choose a JSON file to deploy on the network in this window.
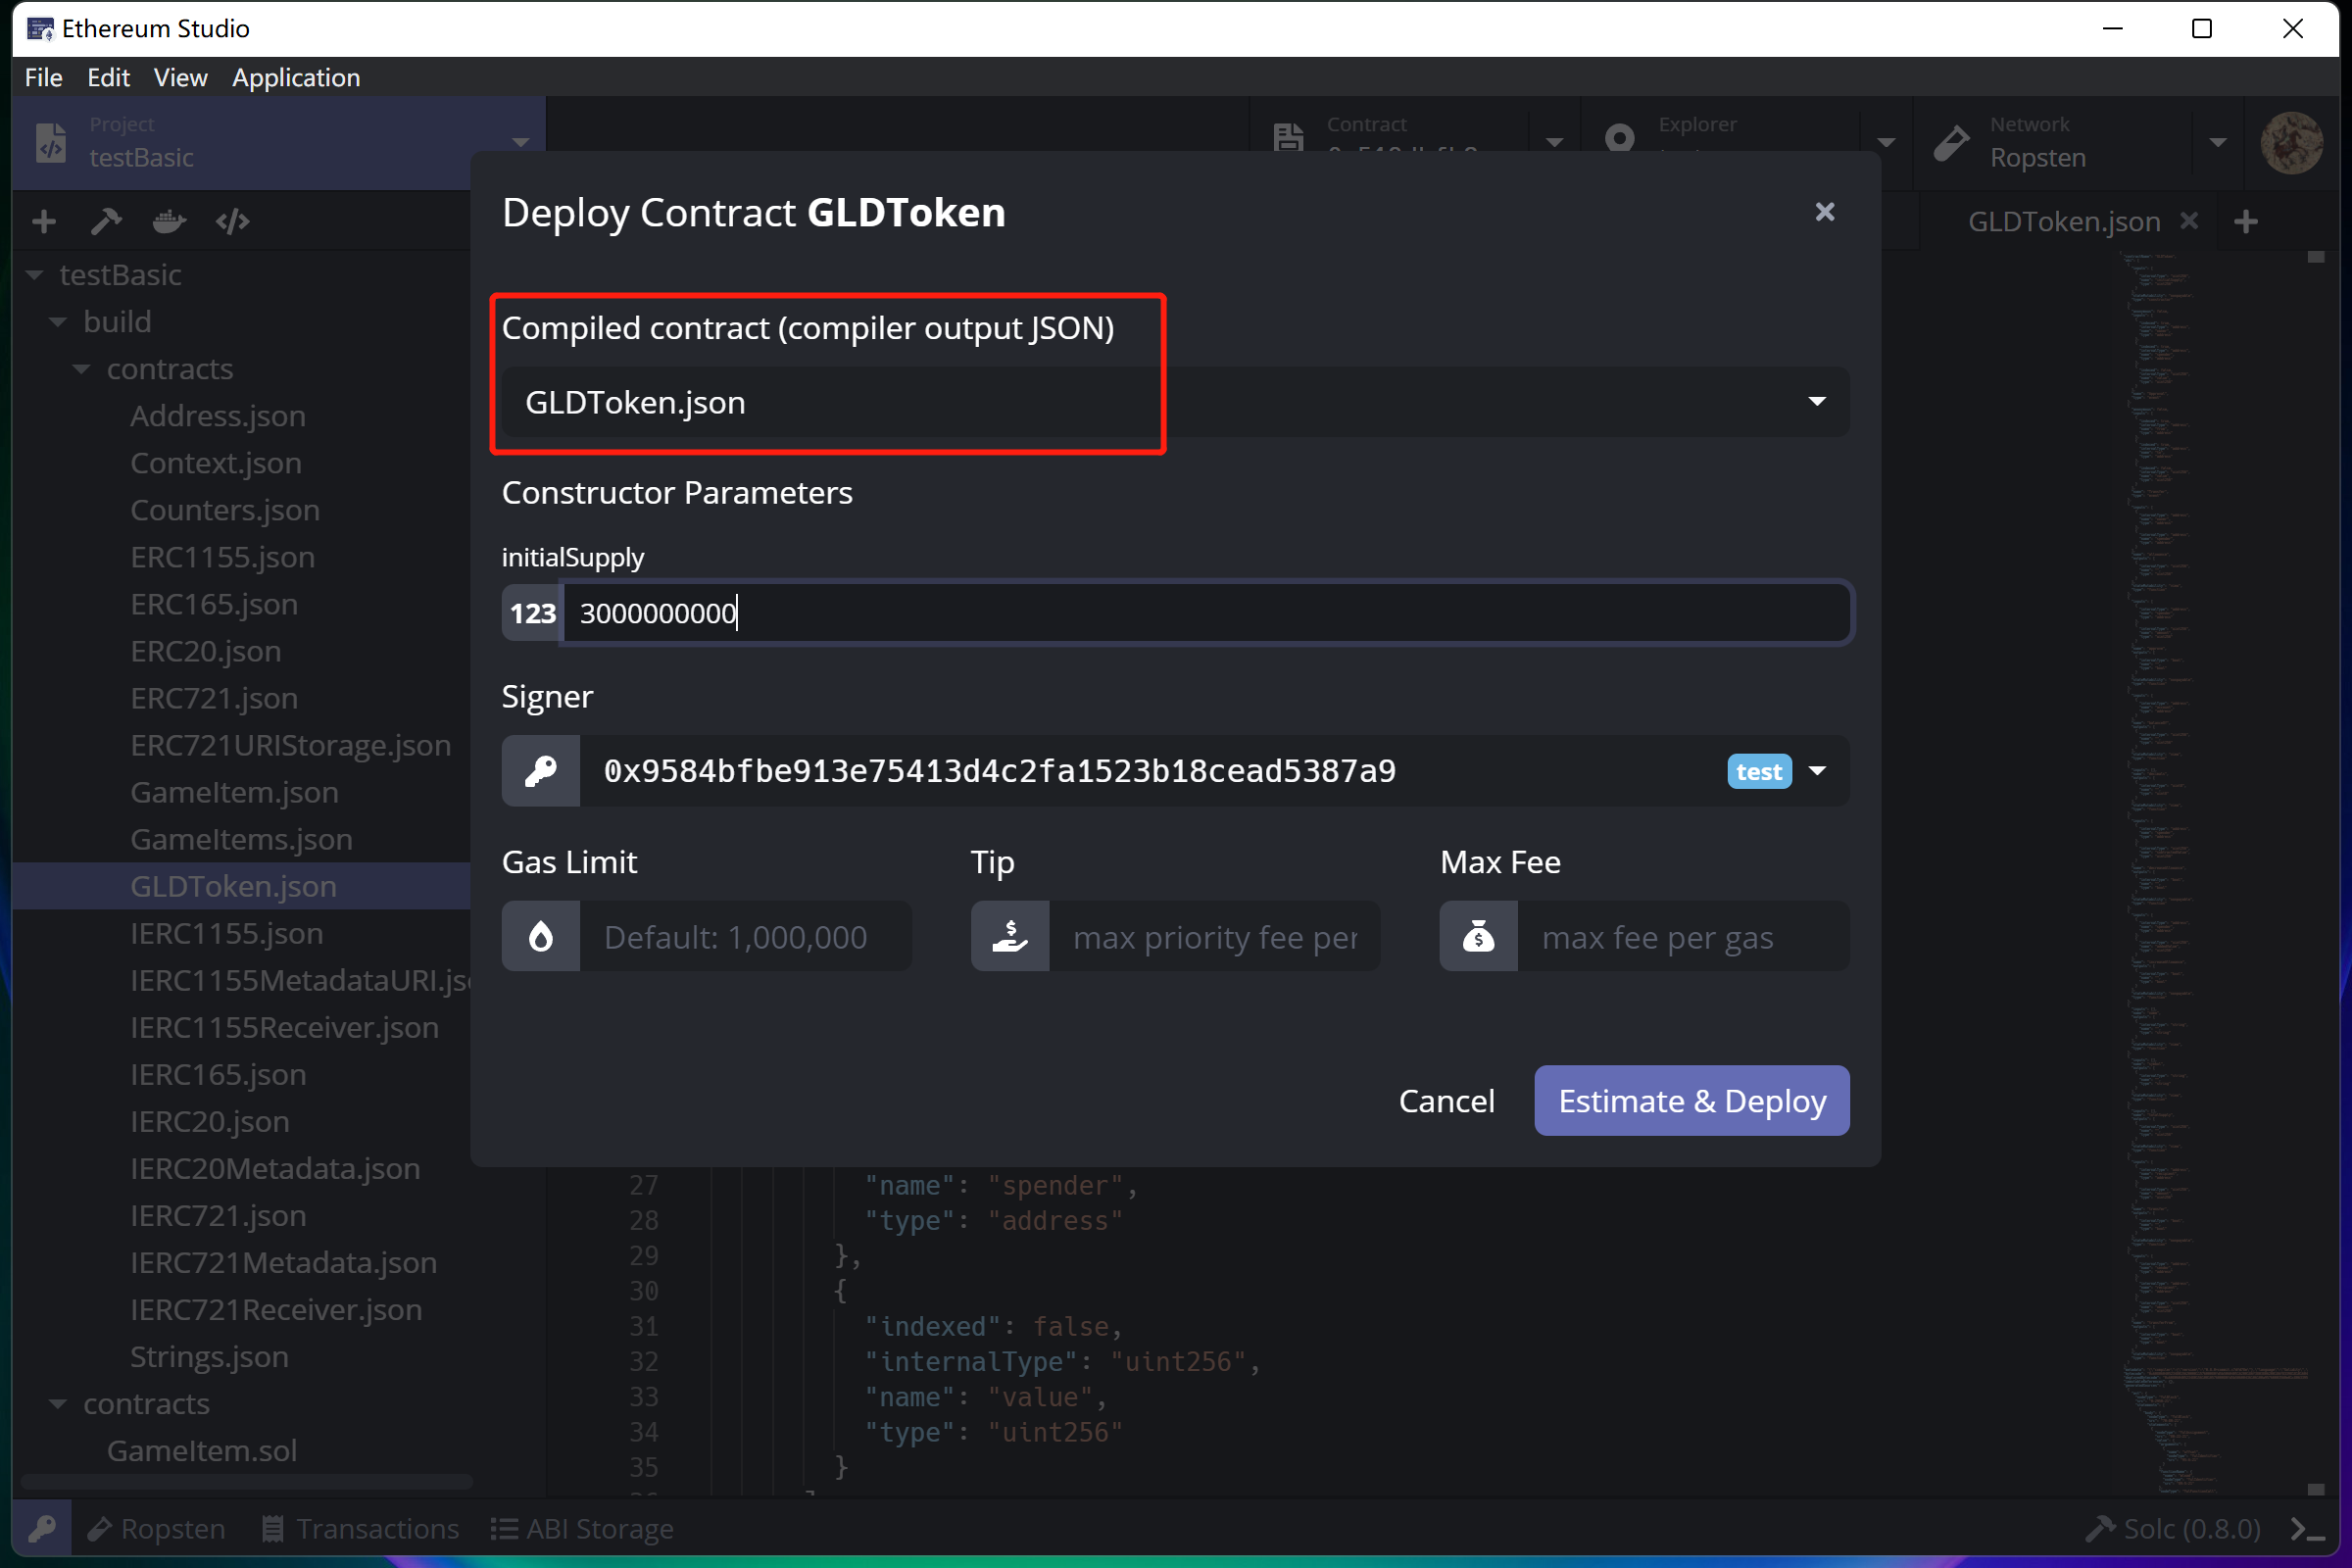
“Constructor Parameters” are corresponding to the constructor function parameters for users to input.
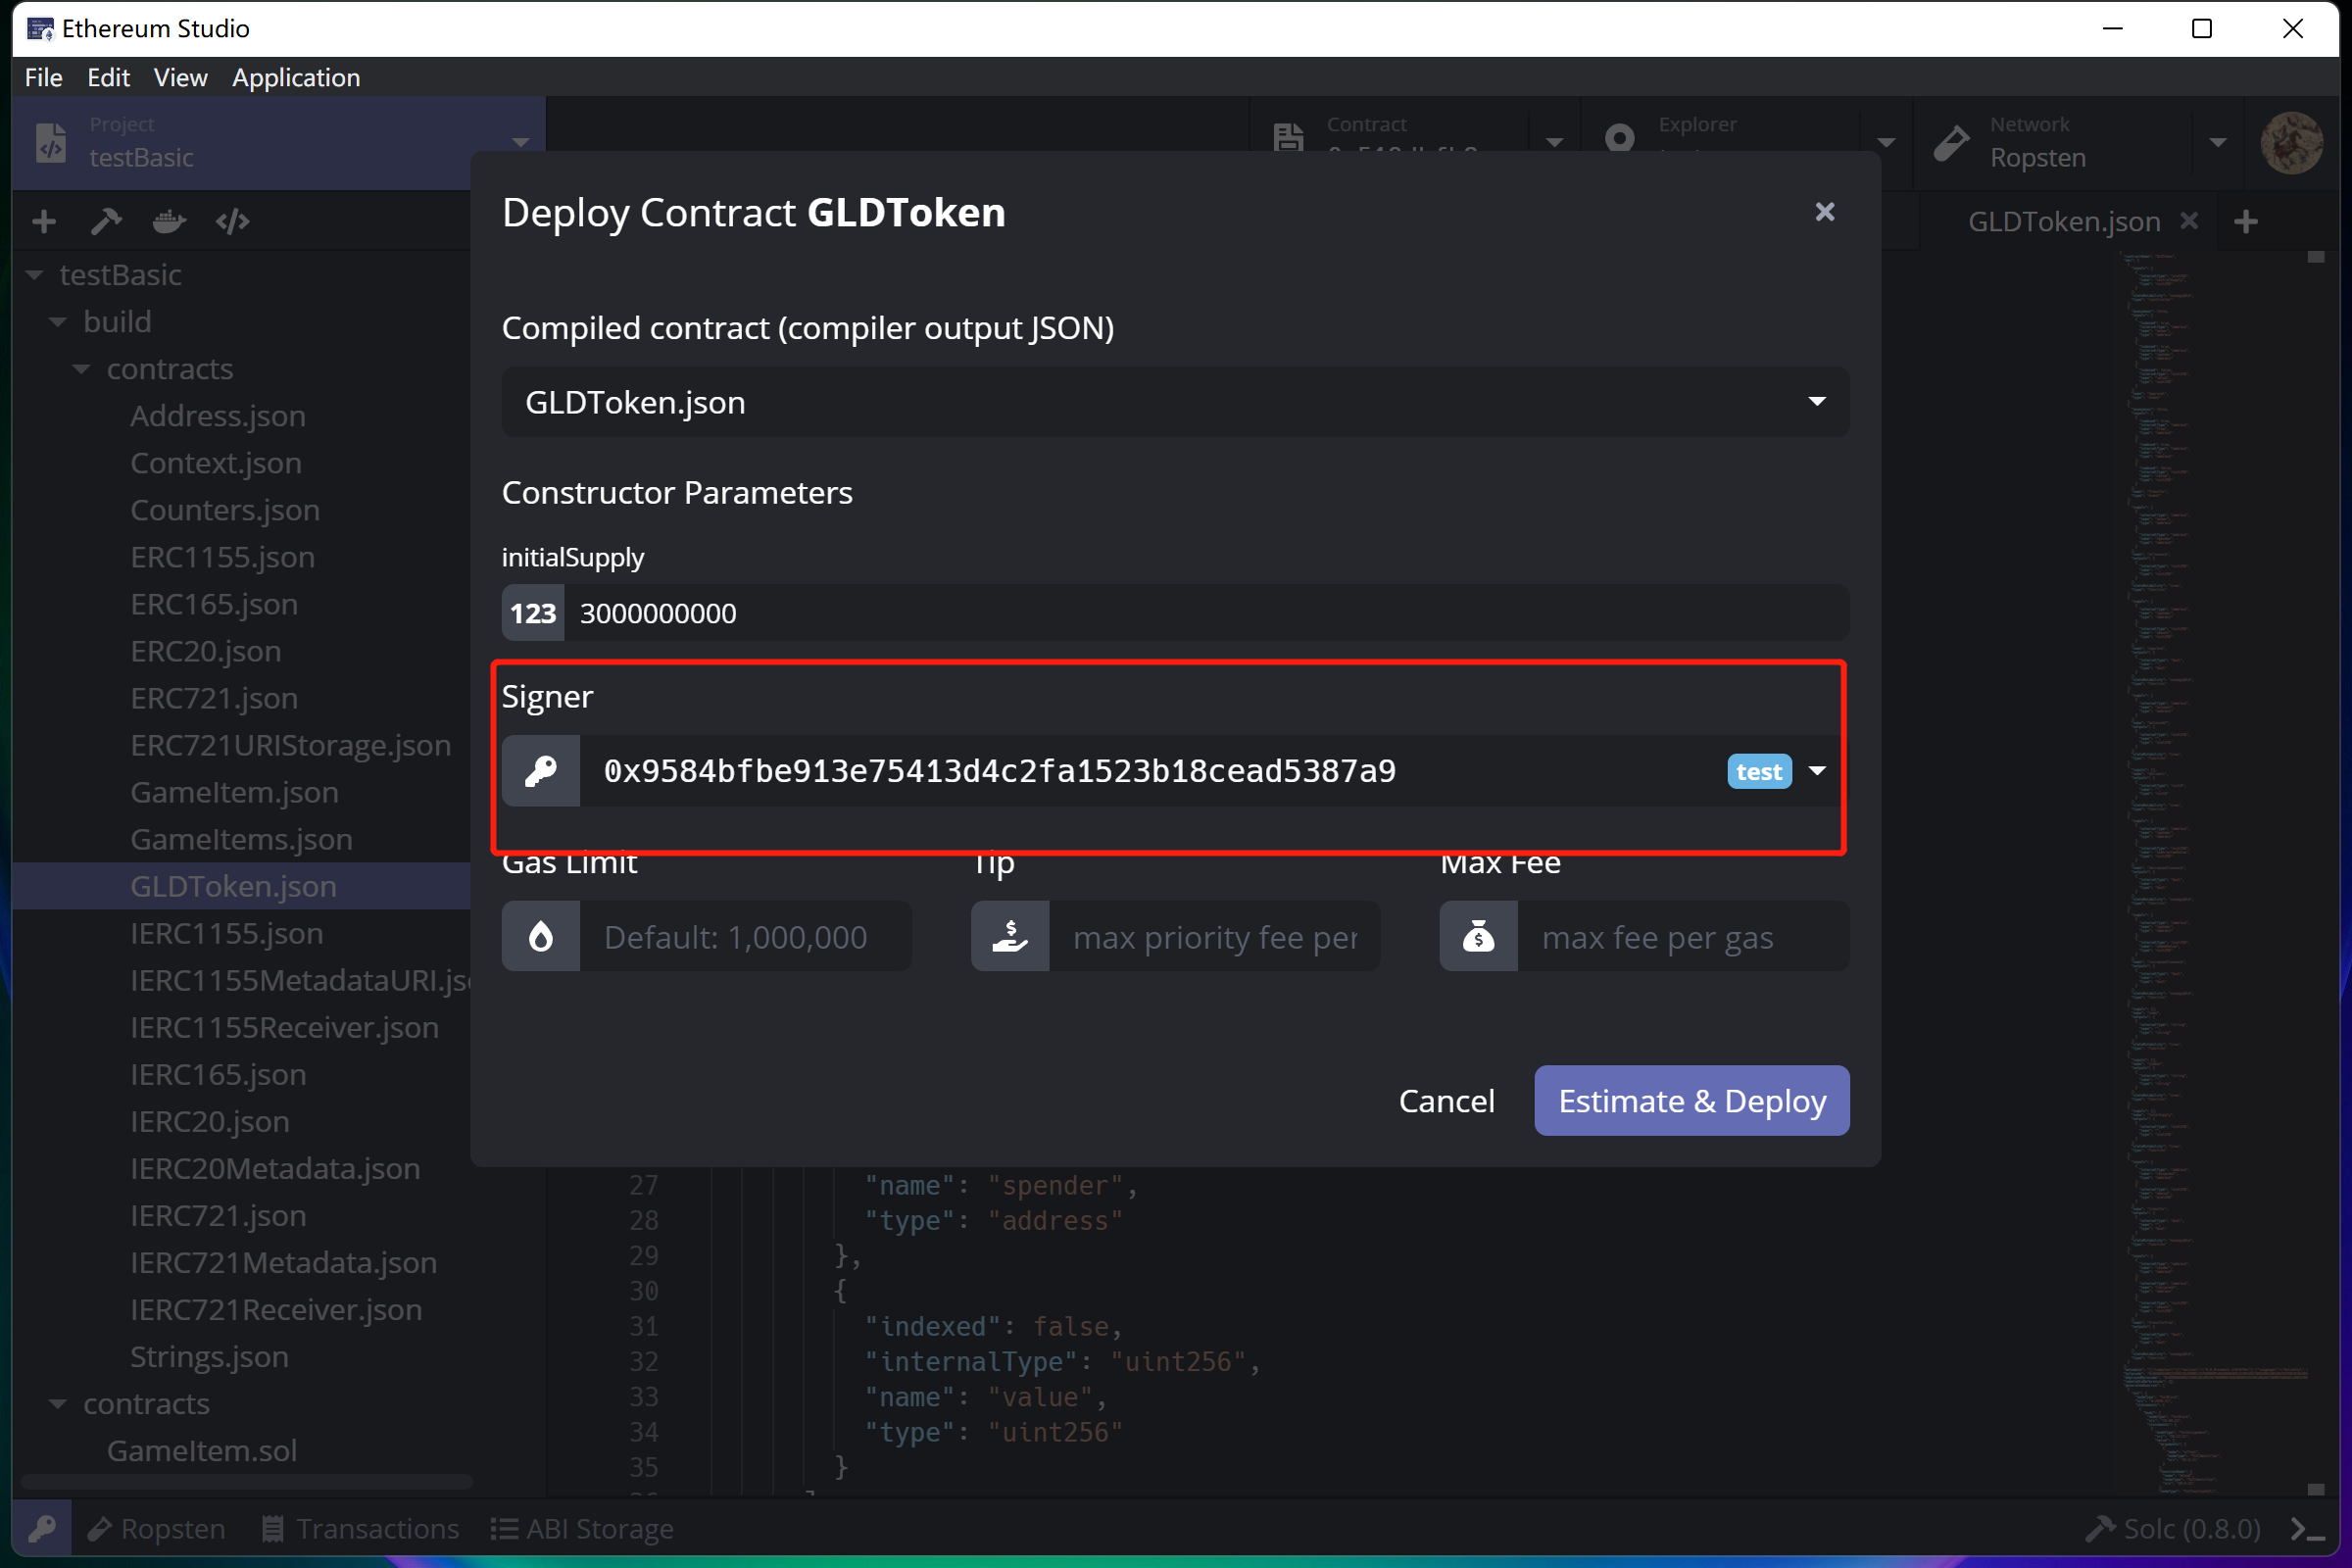
Developers can choose “Signer”, the final payer of gas fee and tip for deploying this contract. Developers needs to ensure the signer has enough ETH on the target network. Otherwise, the later “Estimate & Deploy” process will not be successful.
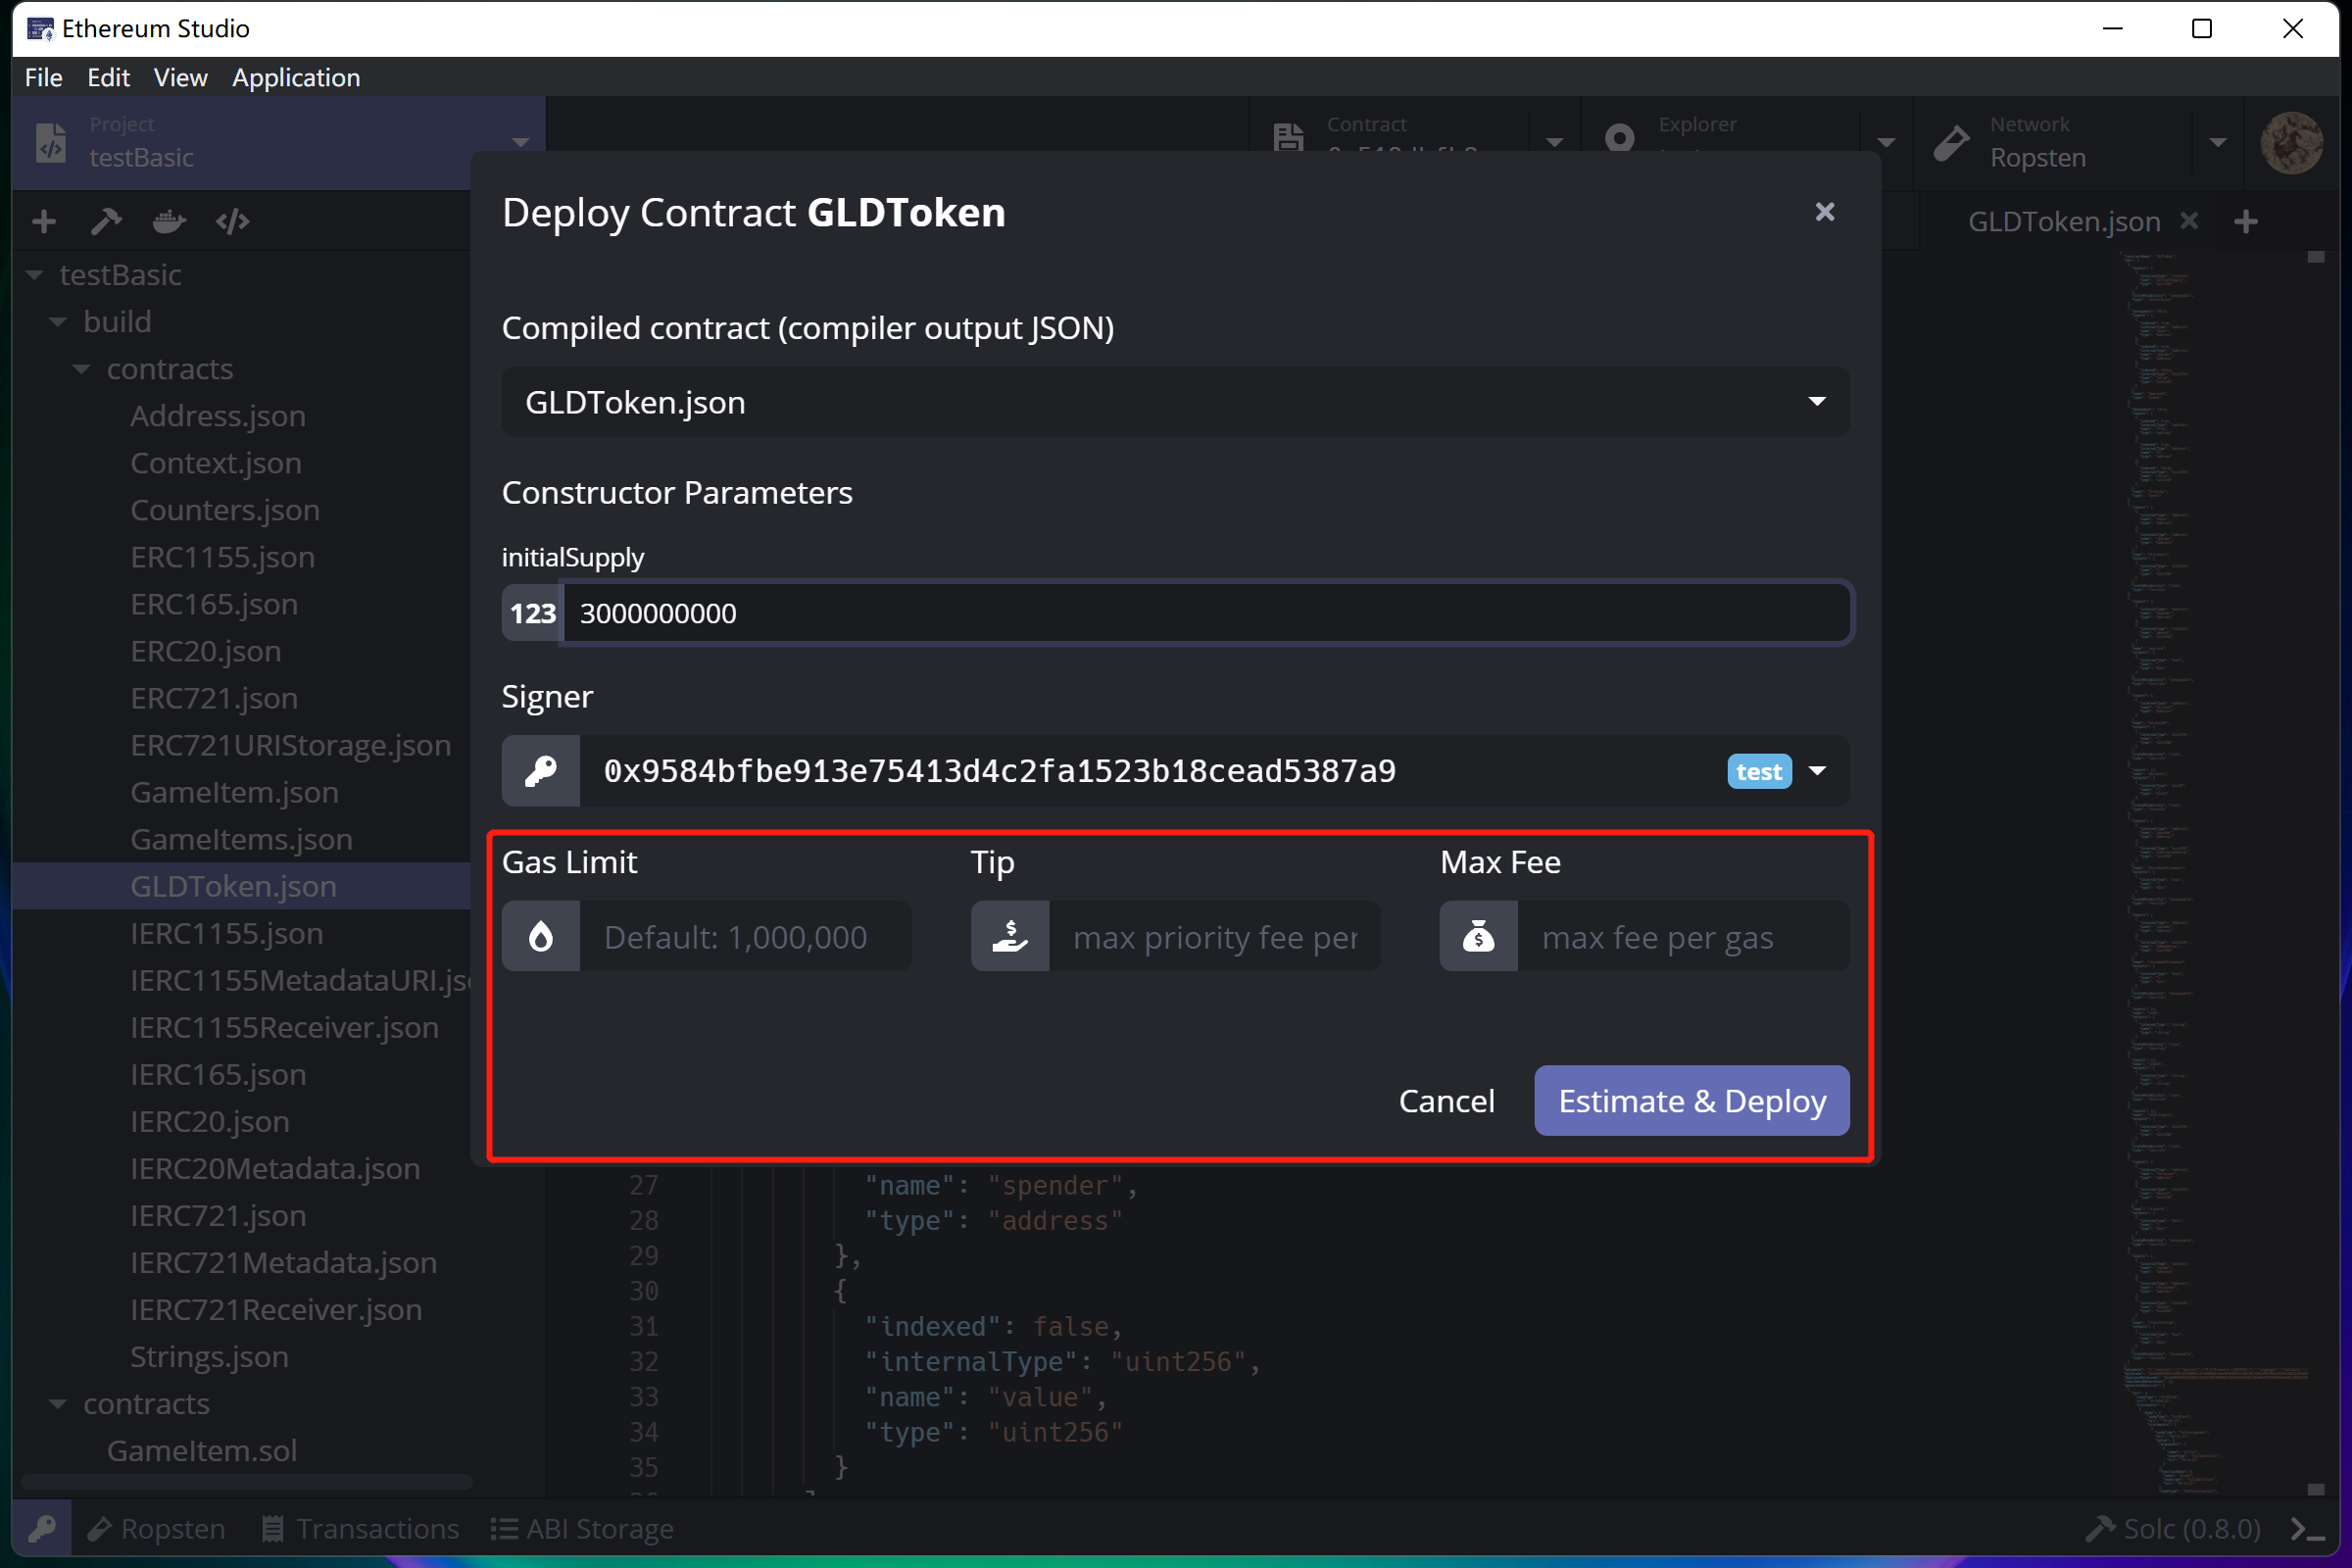
The “Estimate & Deploy” button locates at the bottom right corner. There will be a real-time estimation of “Gas Limit”, “Tip”, and “Max Fee” located below. It will be significantly different for the estimation time and price. Developers should carefully check the network gas fee before deploying.
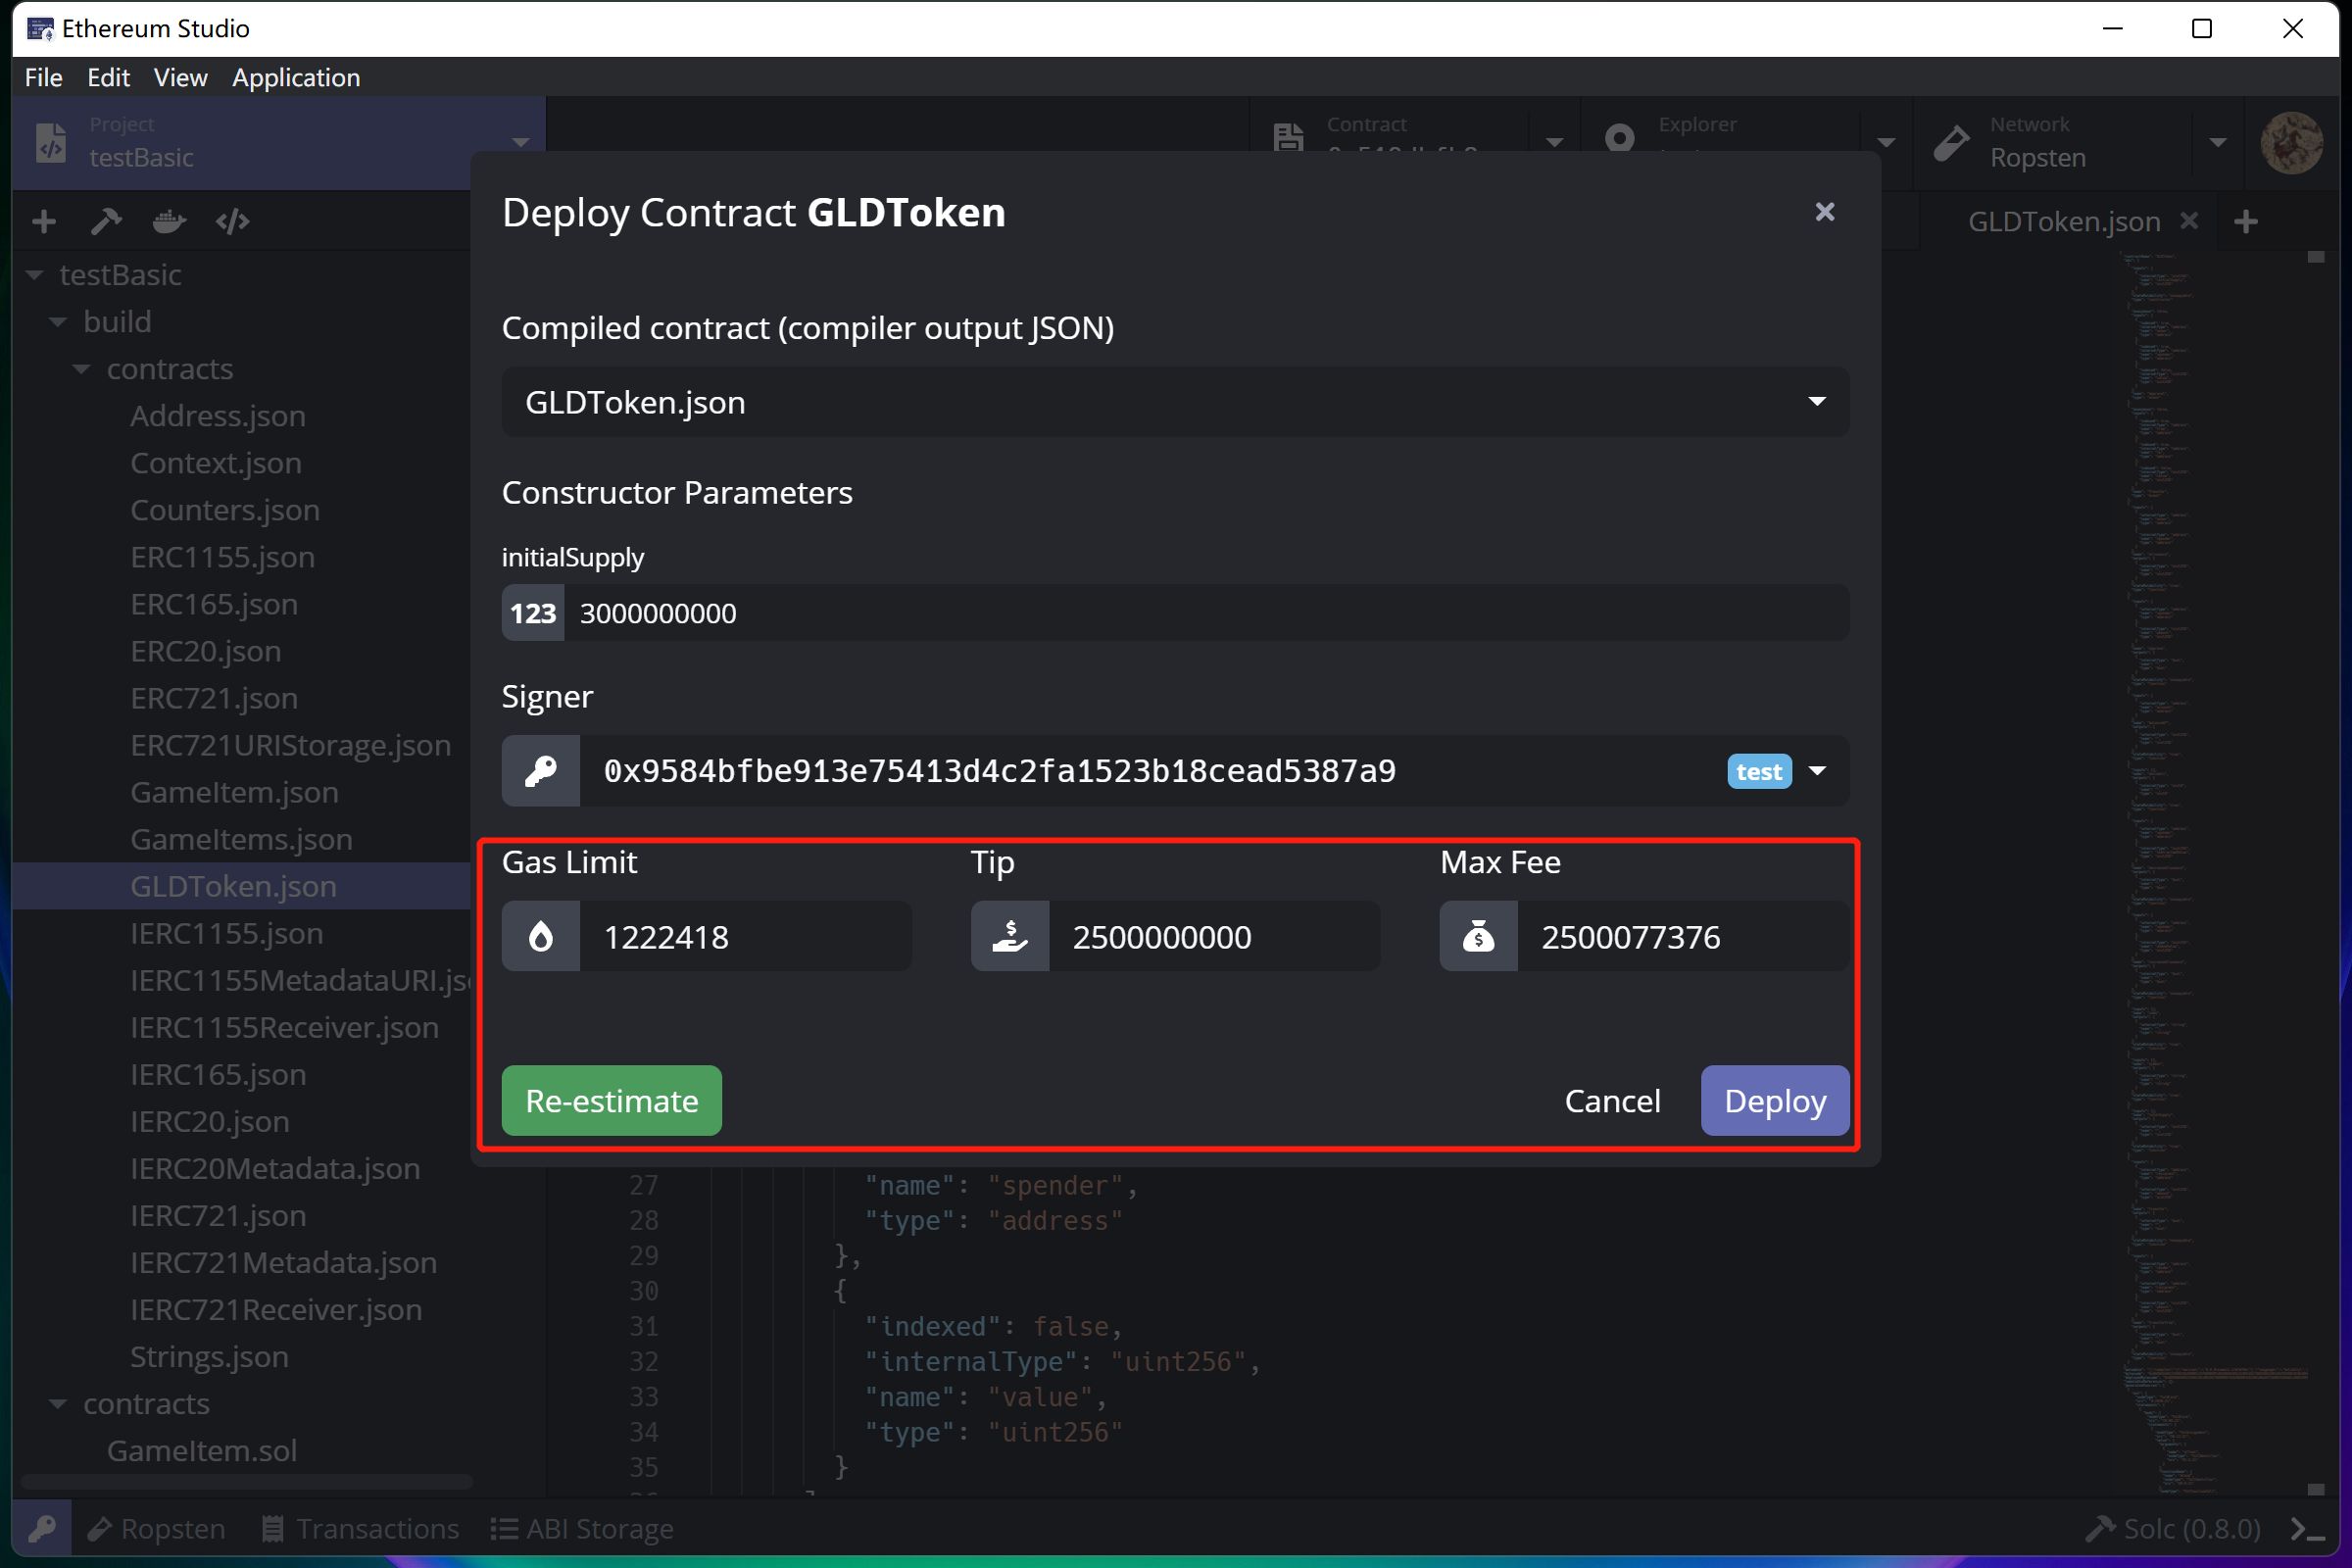
After estimating process, there are exact price numbers in each box. If developers feel the gas fee price is too high or the network is too busy, click the green “Re-estimate” button at the bottom left corner to estimate cost again. If developers supposes the price is fair, click the purple “Deploy” button on the bottom right corner to deploy the contract.
Check Deploy Transactions
After clicking “Deploy”, developers can check deploy schedule by clicking the bottom “Transactions” button to review any transaction. Developers can check detailed information with the popup “Deploy a Contract” window.
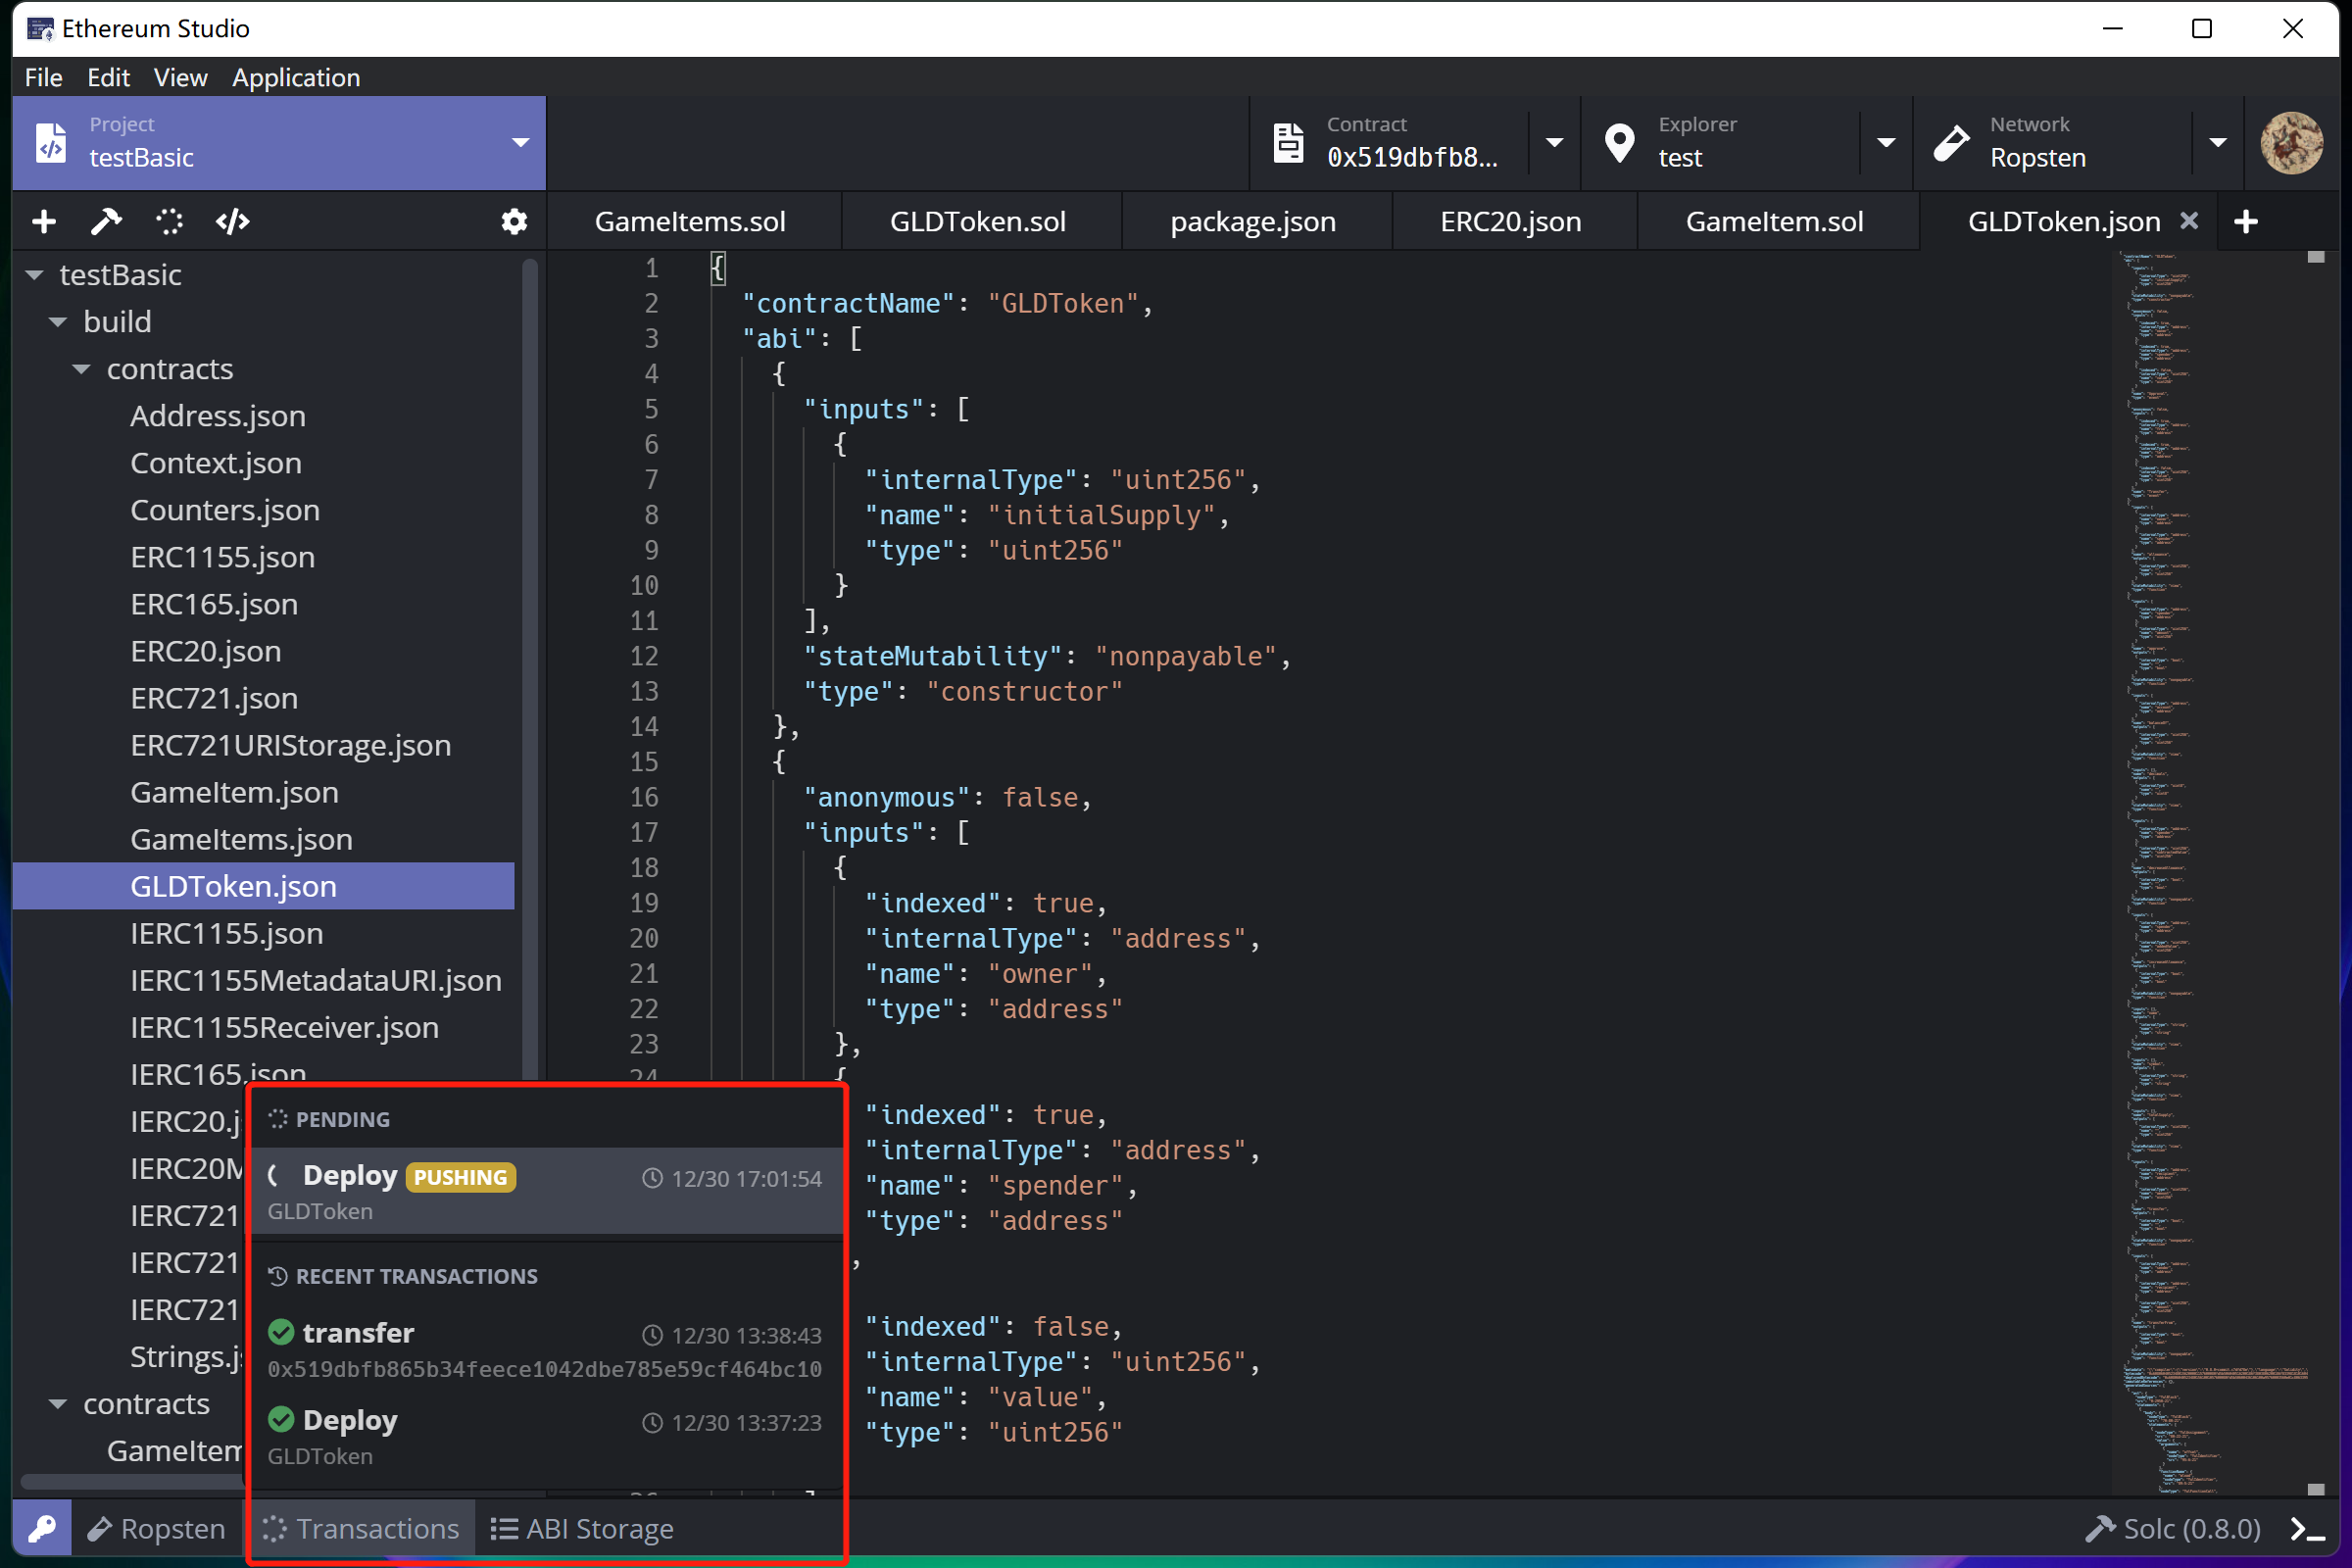
Five boxes show detailed information in the “Deploy a Contract” window. In the “Basic” panel, there are several most crucial pieces of information of deployment, including address. Developers can click on the “Contract” address, and the “Contract” panel will show the contract functions for developers to call.

Project Settings
At the right end of the toolbar, there is a “gear” icon named “Project Settings”. Click the icon, and there will be the “Project Settings” panel in the editor. This panel is a graphic show of the “config.json” file. Developers can easily change settings in the project.
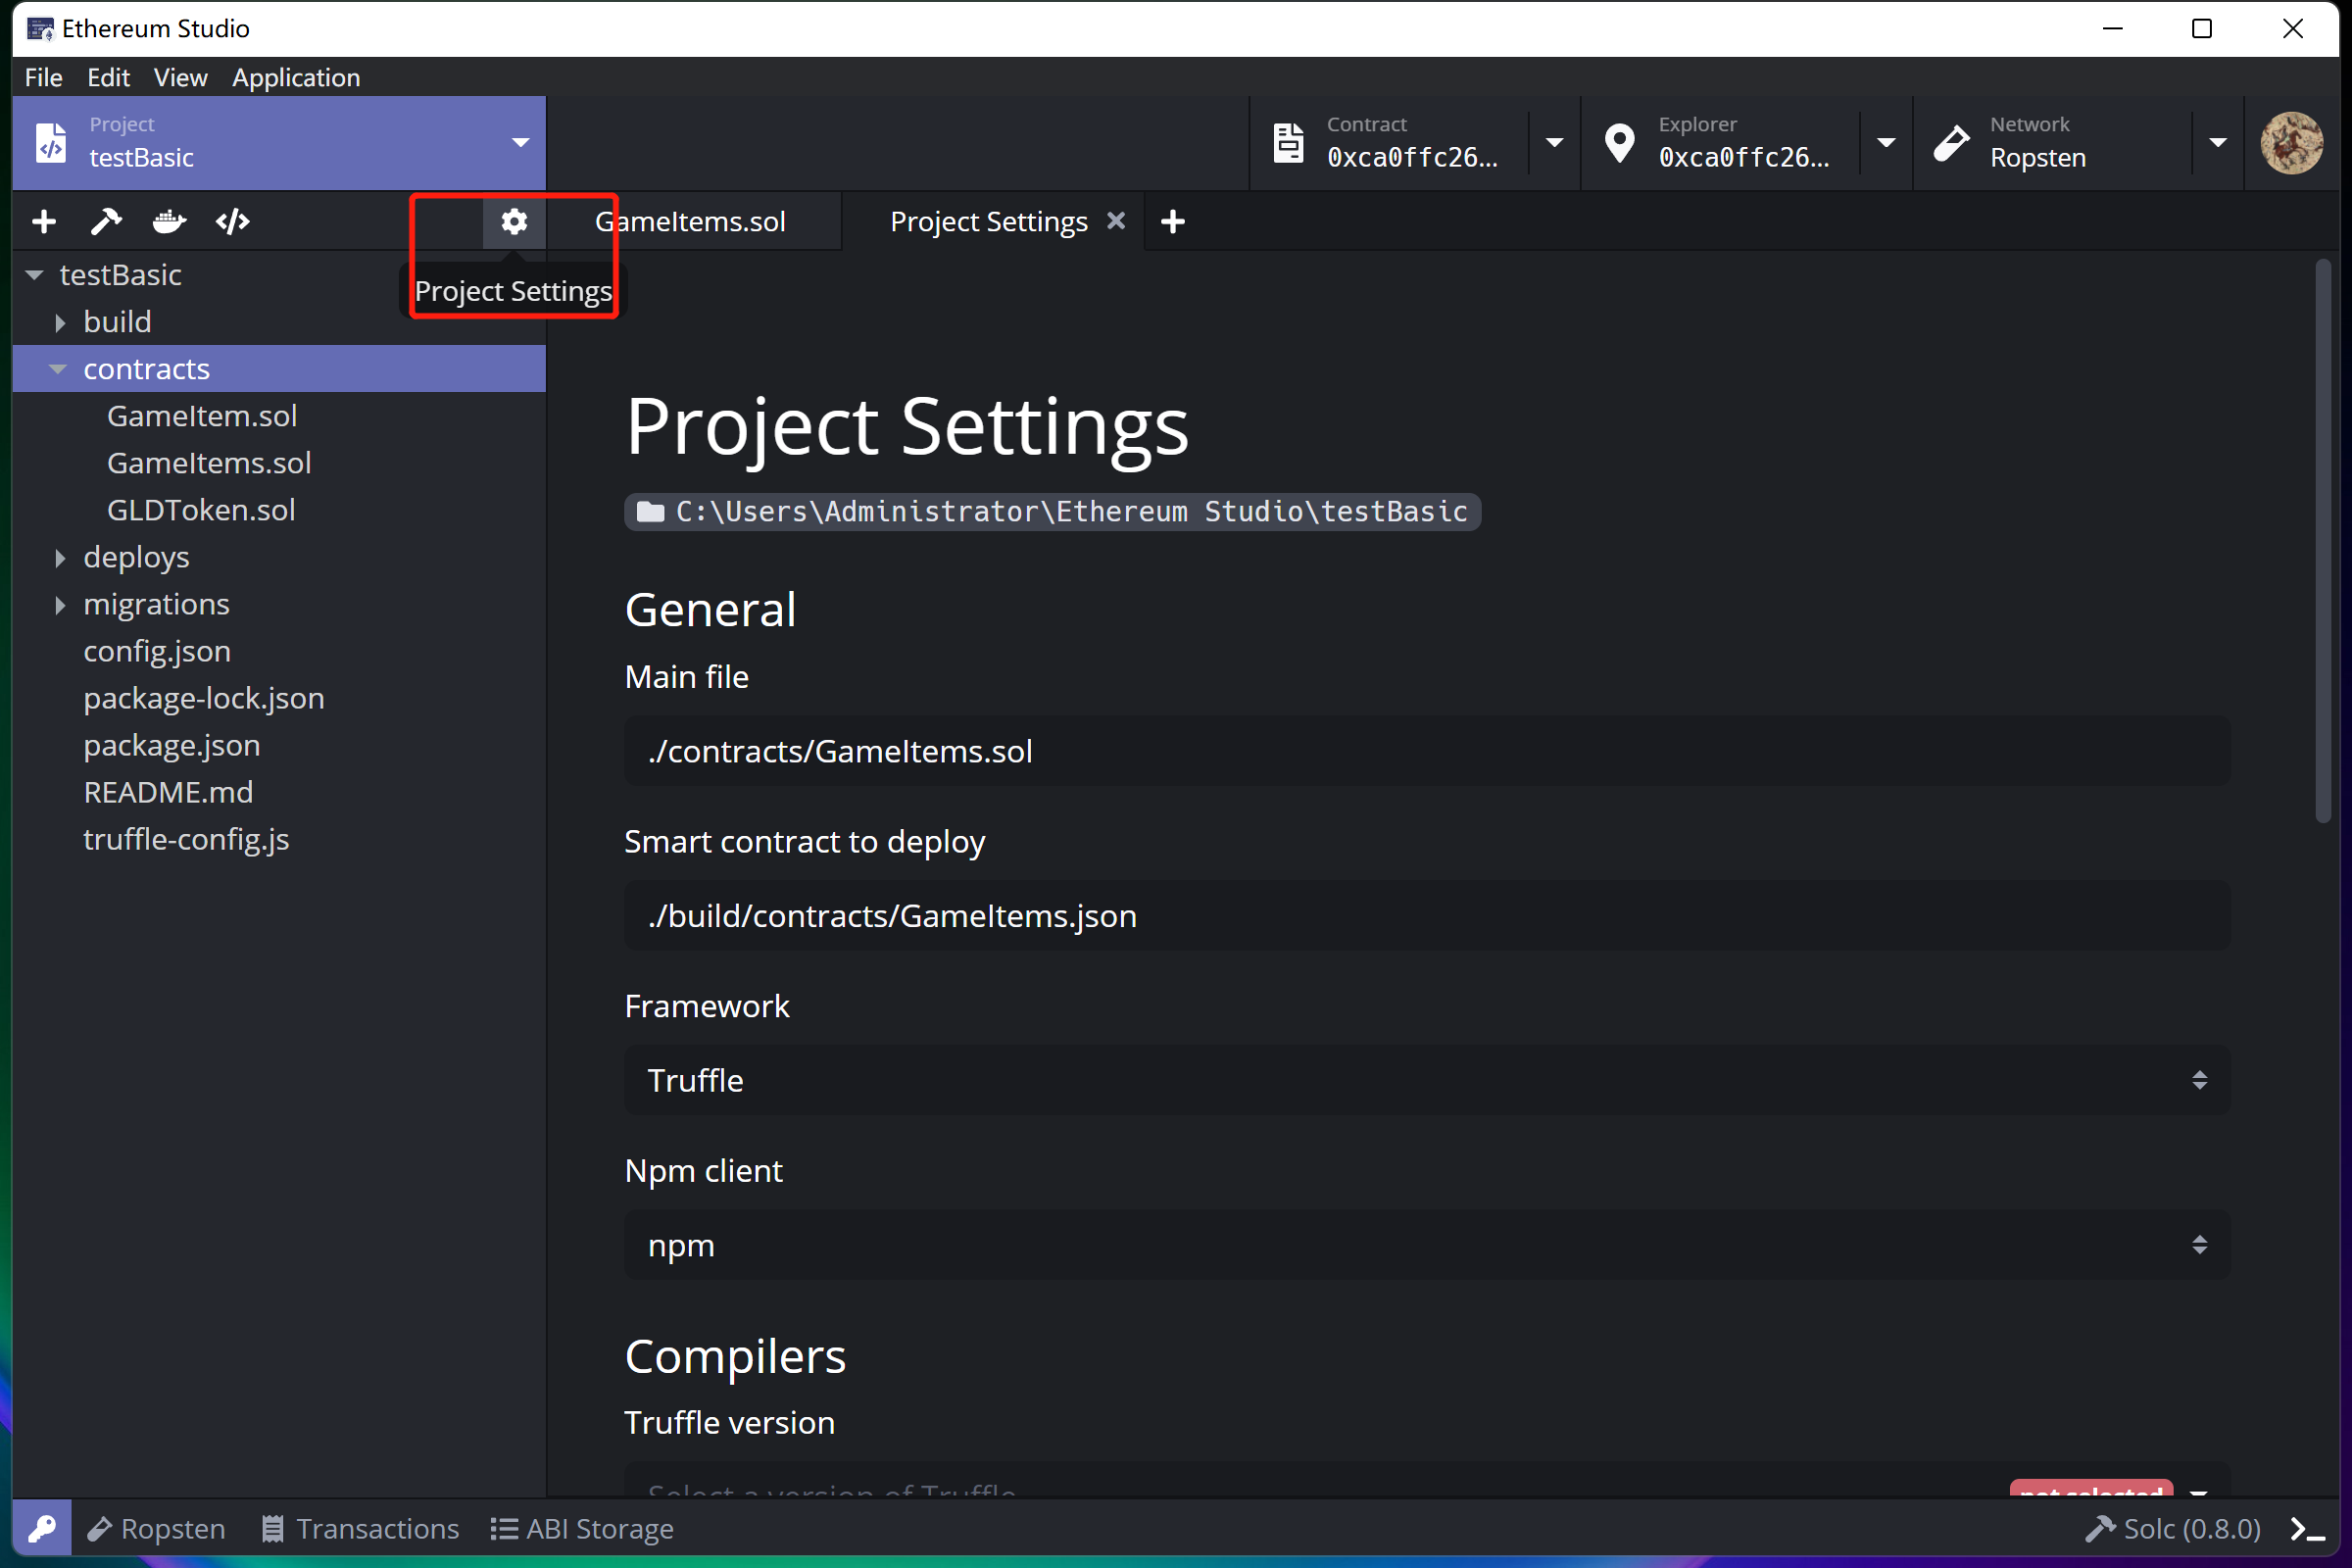
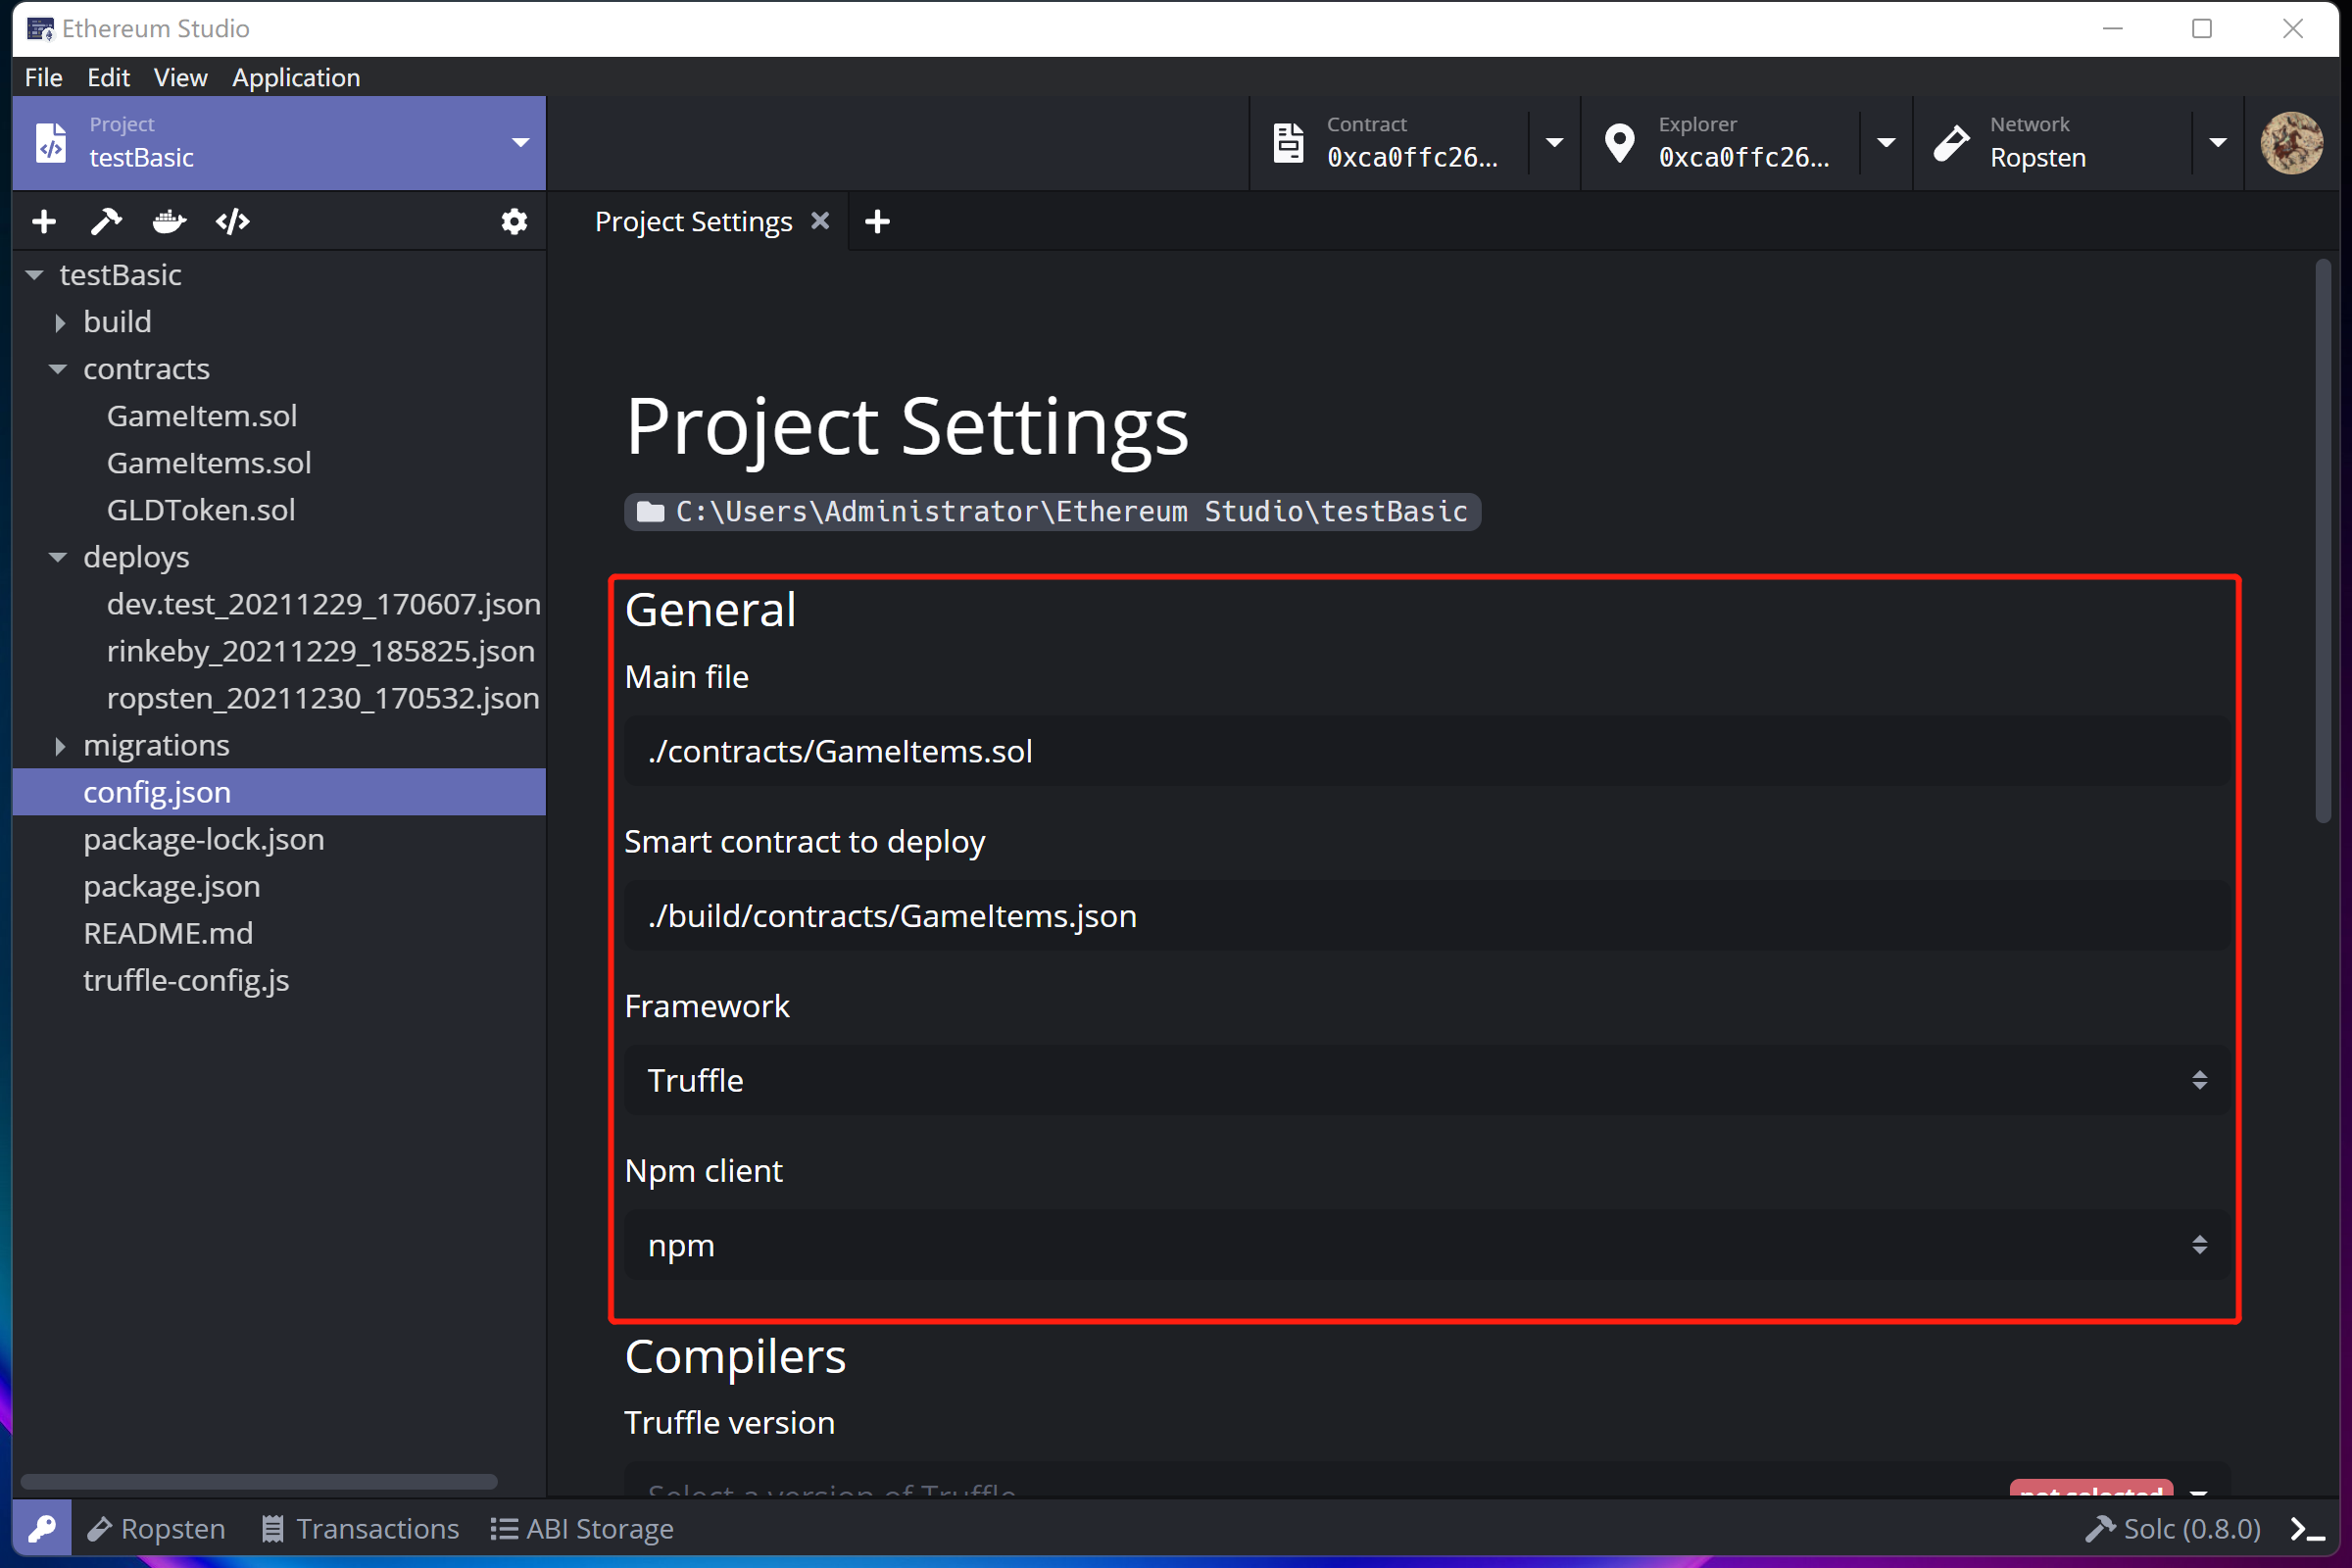
General
In the “General” part, the “Main file” is the default selection of deploying file.
Developers can switch the framework here and then use a new framework to build or deploy with more detailed configuration in “package.json”.
Developers can change clients here and use a new client like yarn or cnpm. Please make sure that developers has installed the clients and runs directly in the command line.
Compilers
Developers can select the Truffle version while the default version is settled during the creating process. The “Solc(0.x.y)” version is identical to the pragma version in the head of solidity file. Developers can change the EVM version and Optimizer directly. The Ethereum Studio disabled Optimizer???
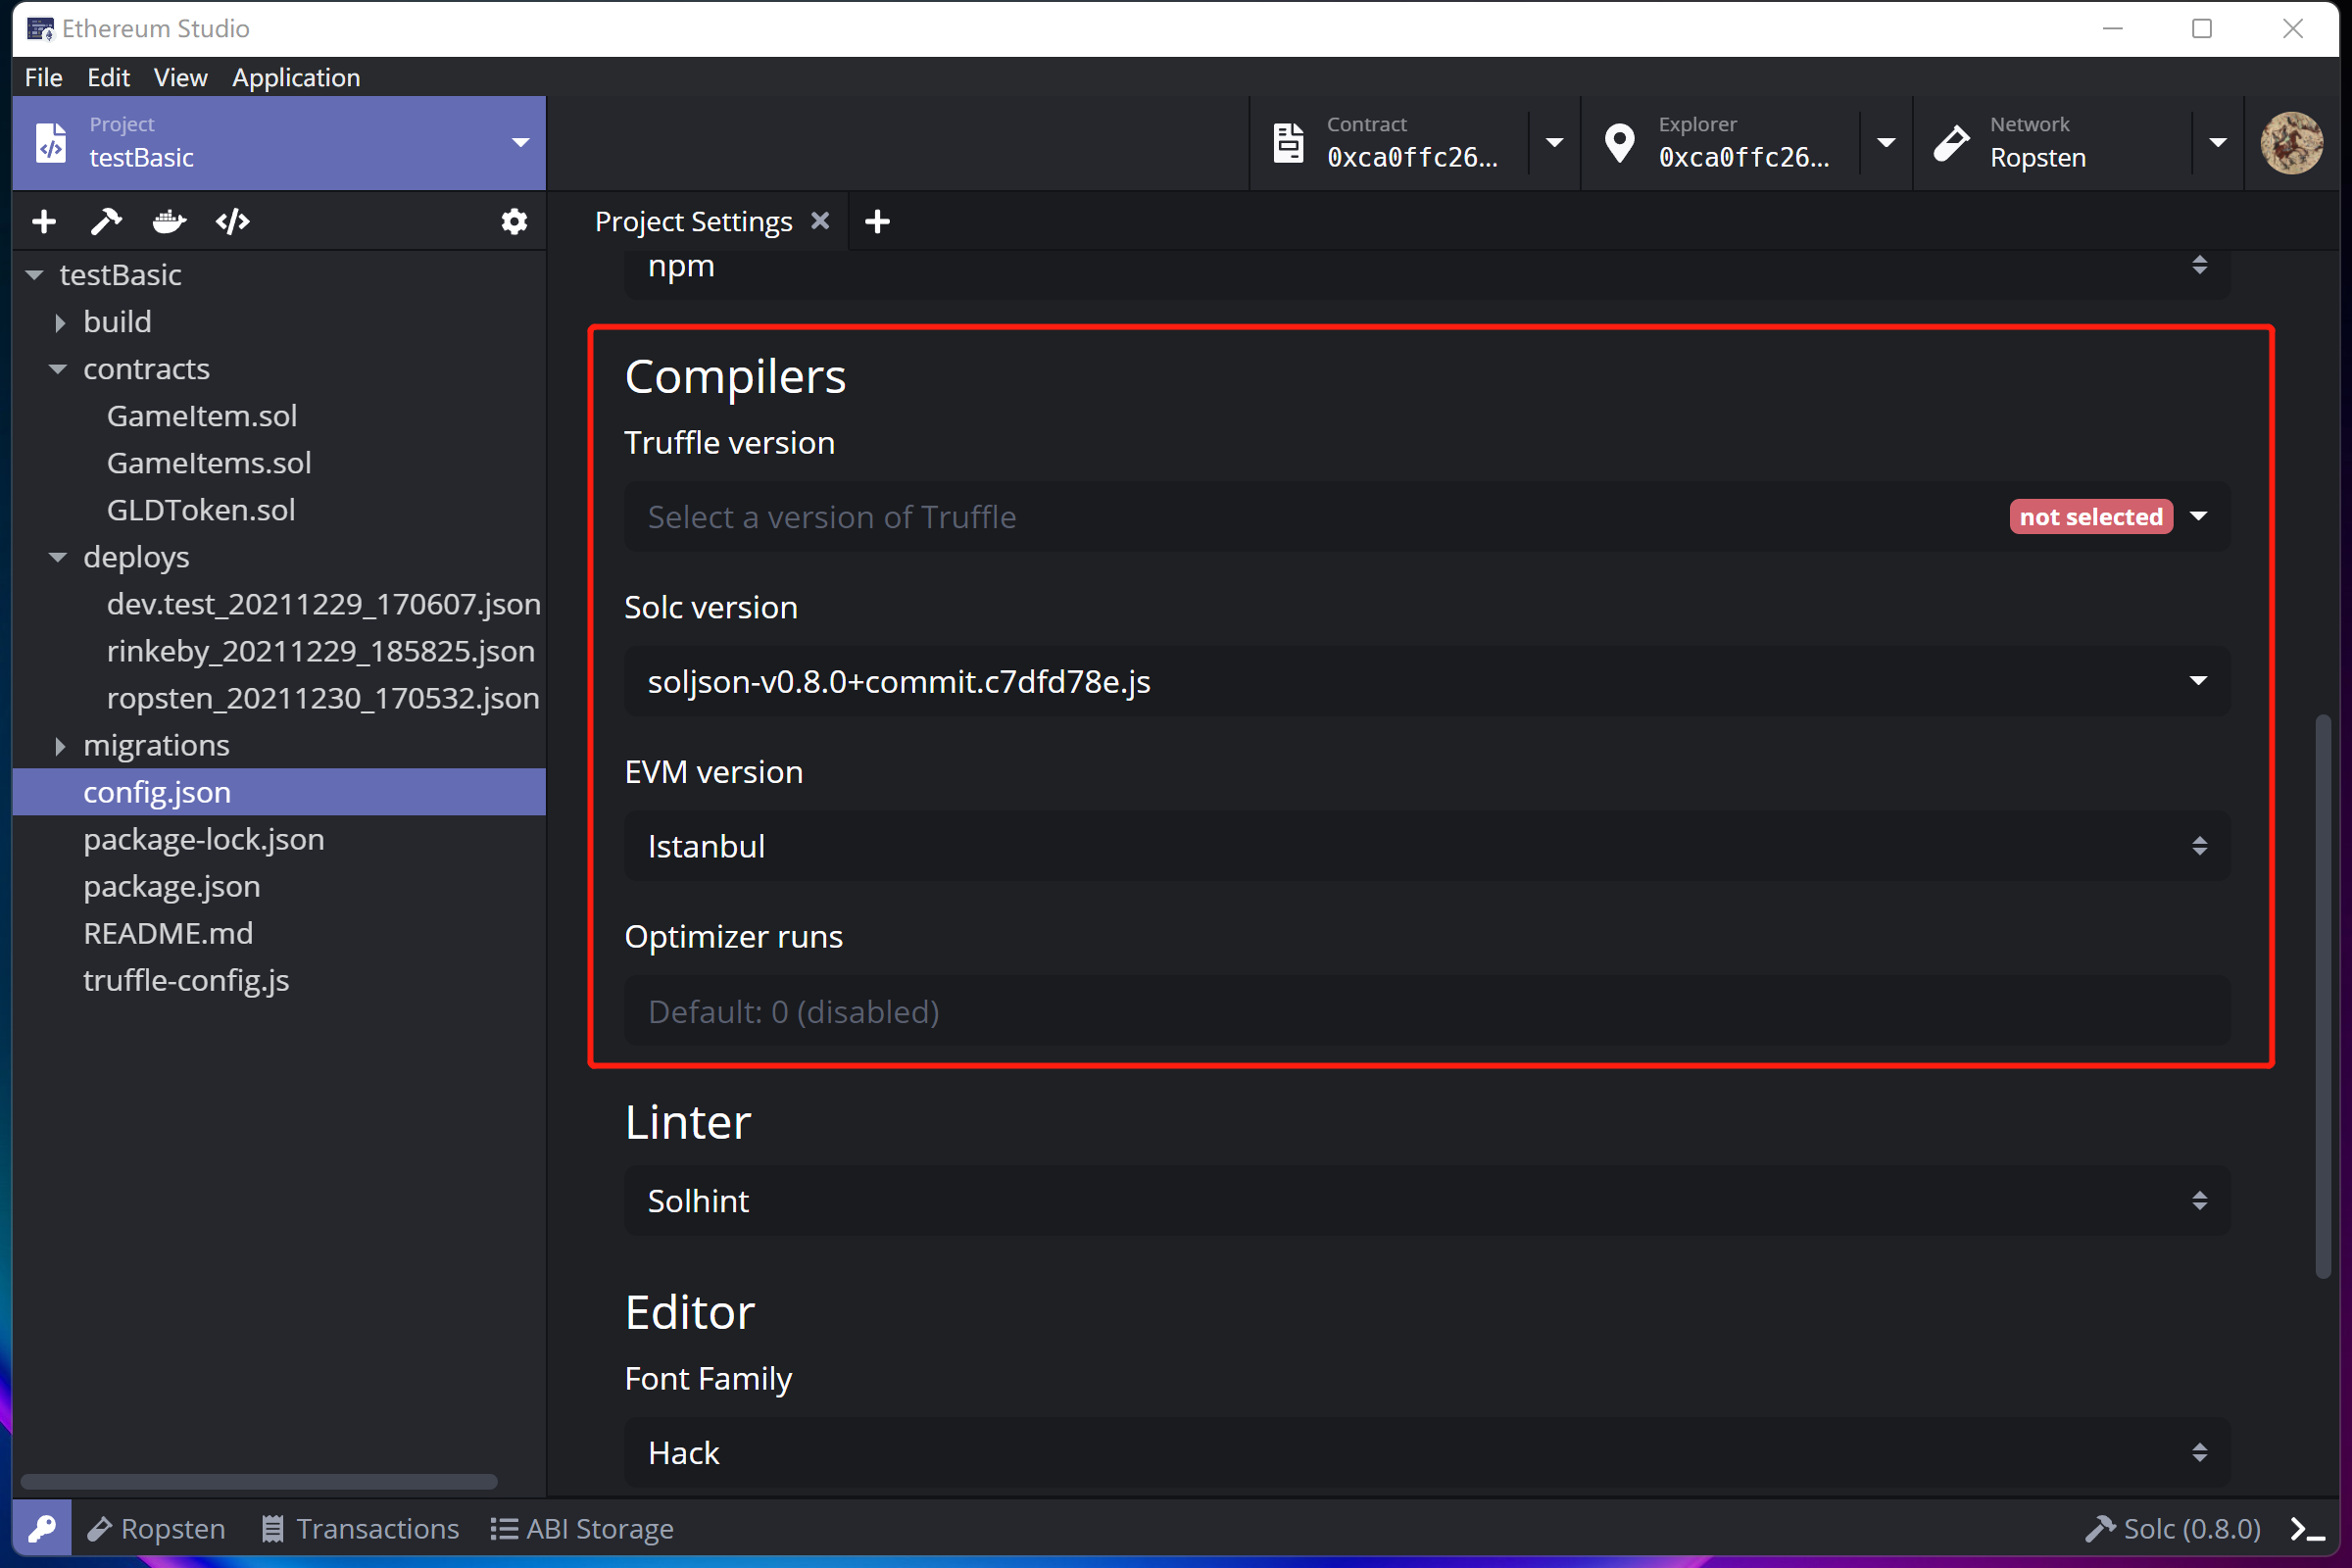
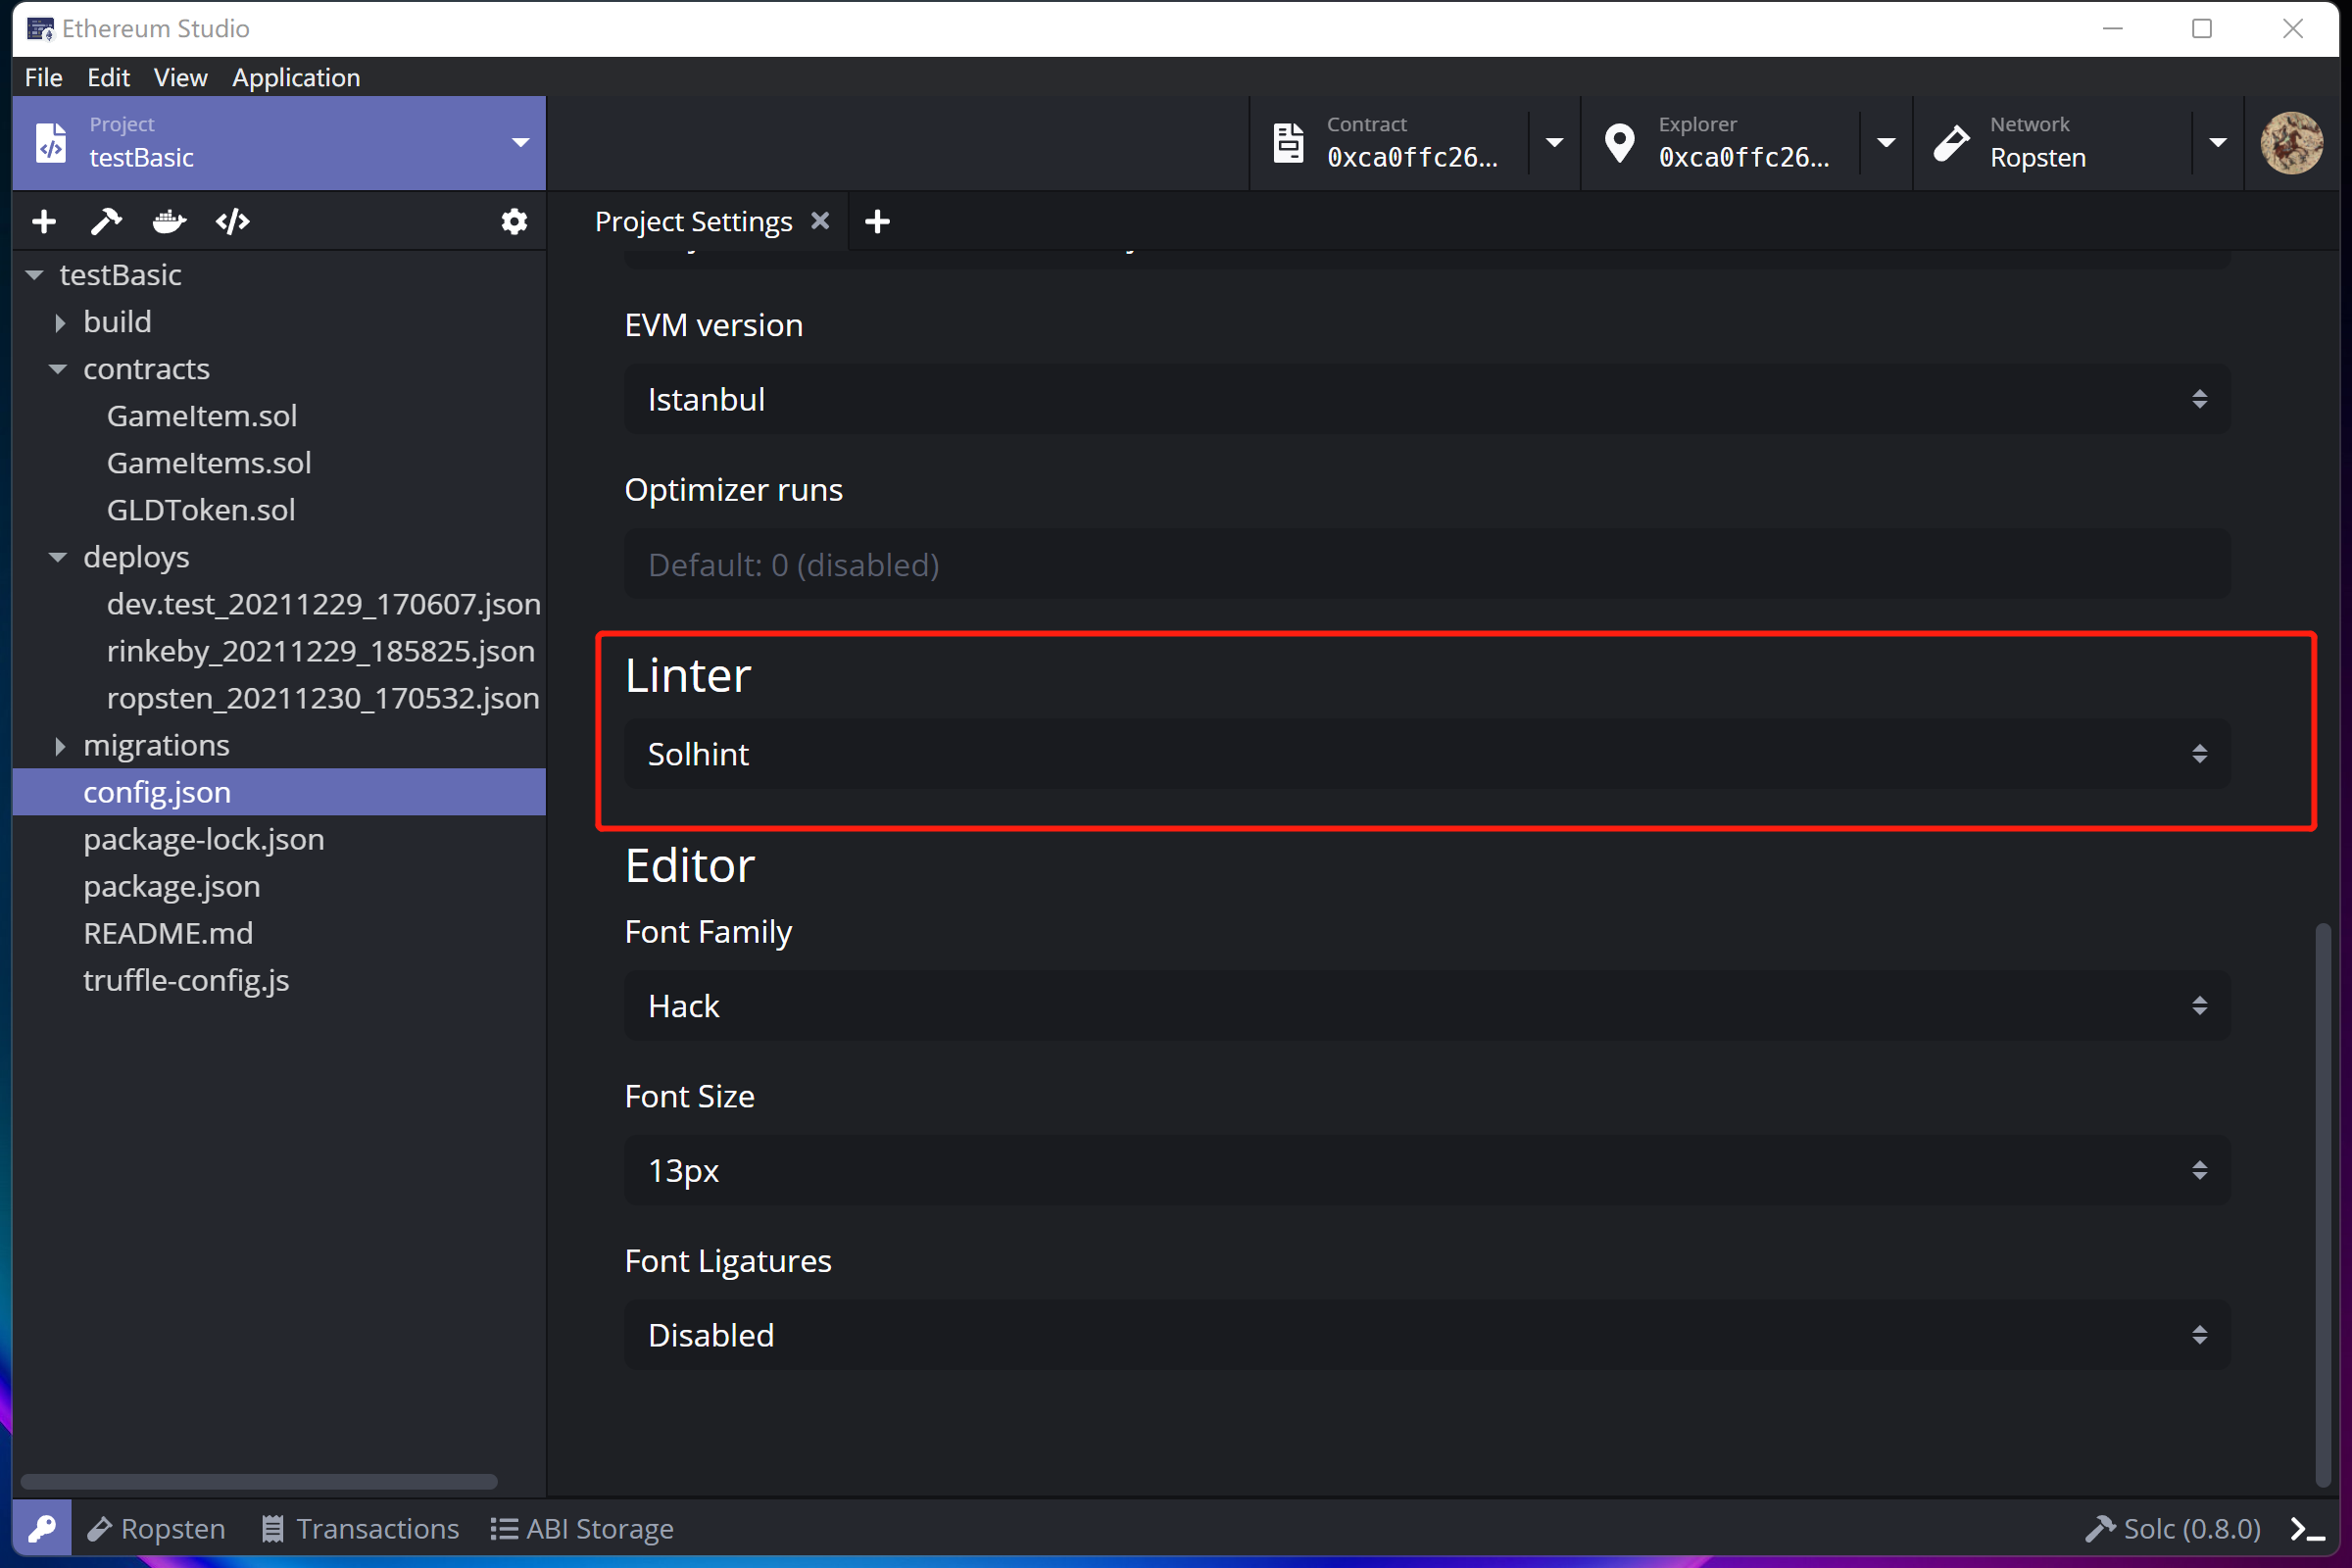
Linter
Linters analyze code for possible programmatic and styling errors automatically. In “Project Settings”, there are Solhint and Ethlint. Developers can choose a familiar lint to complete codes.
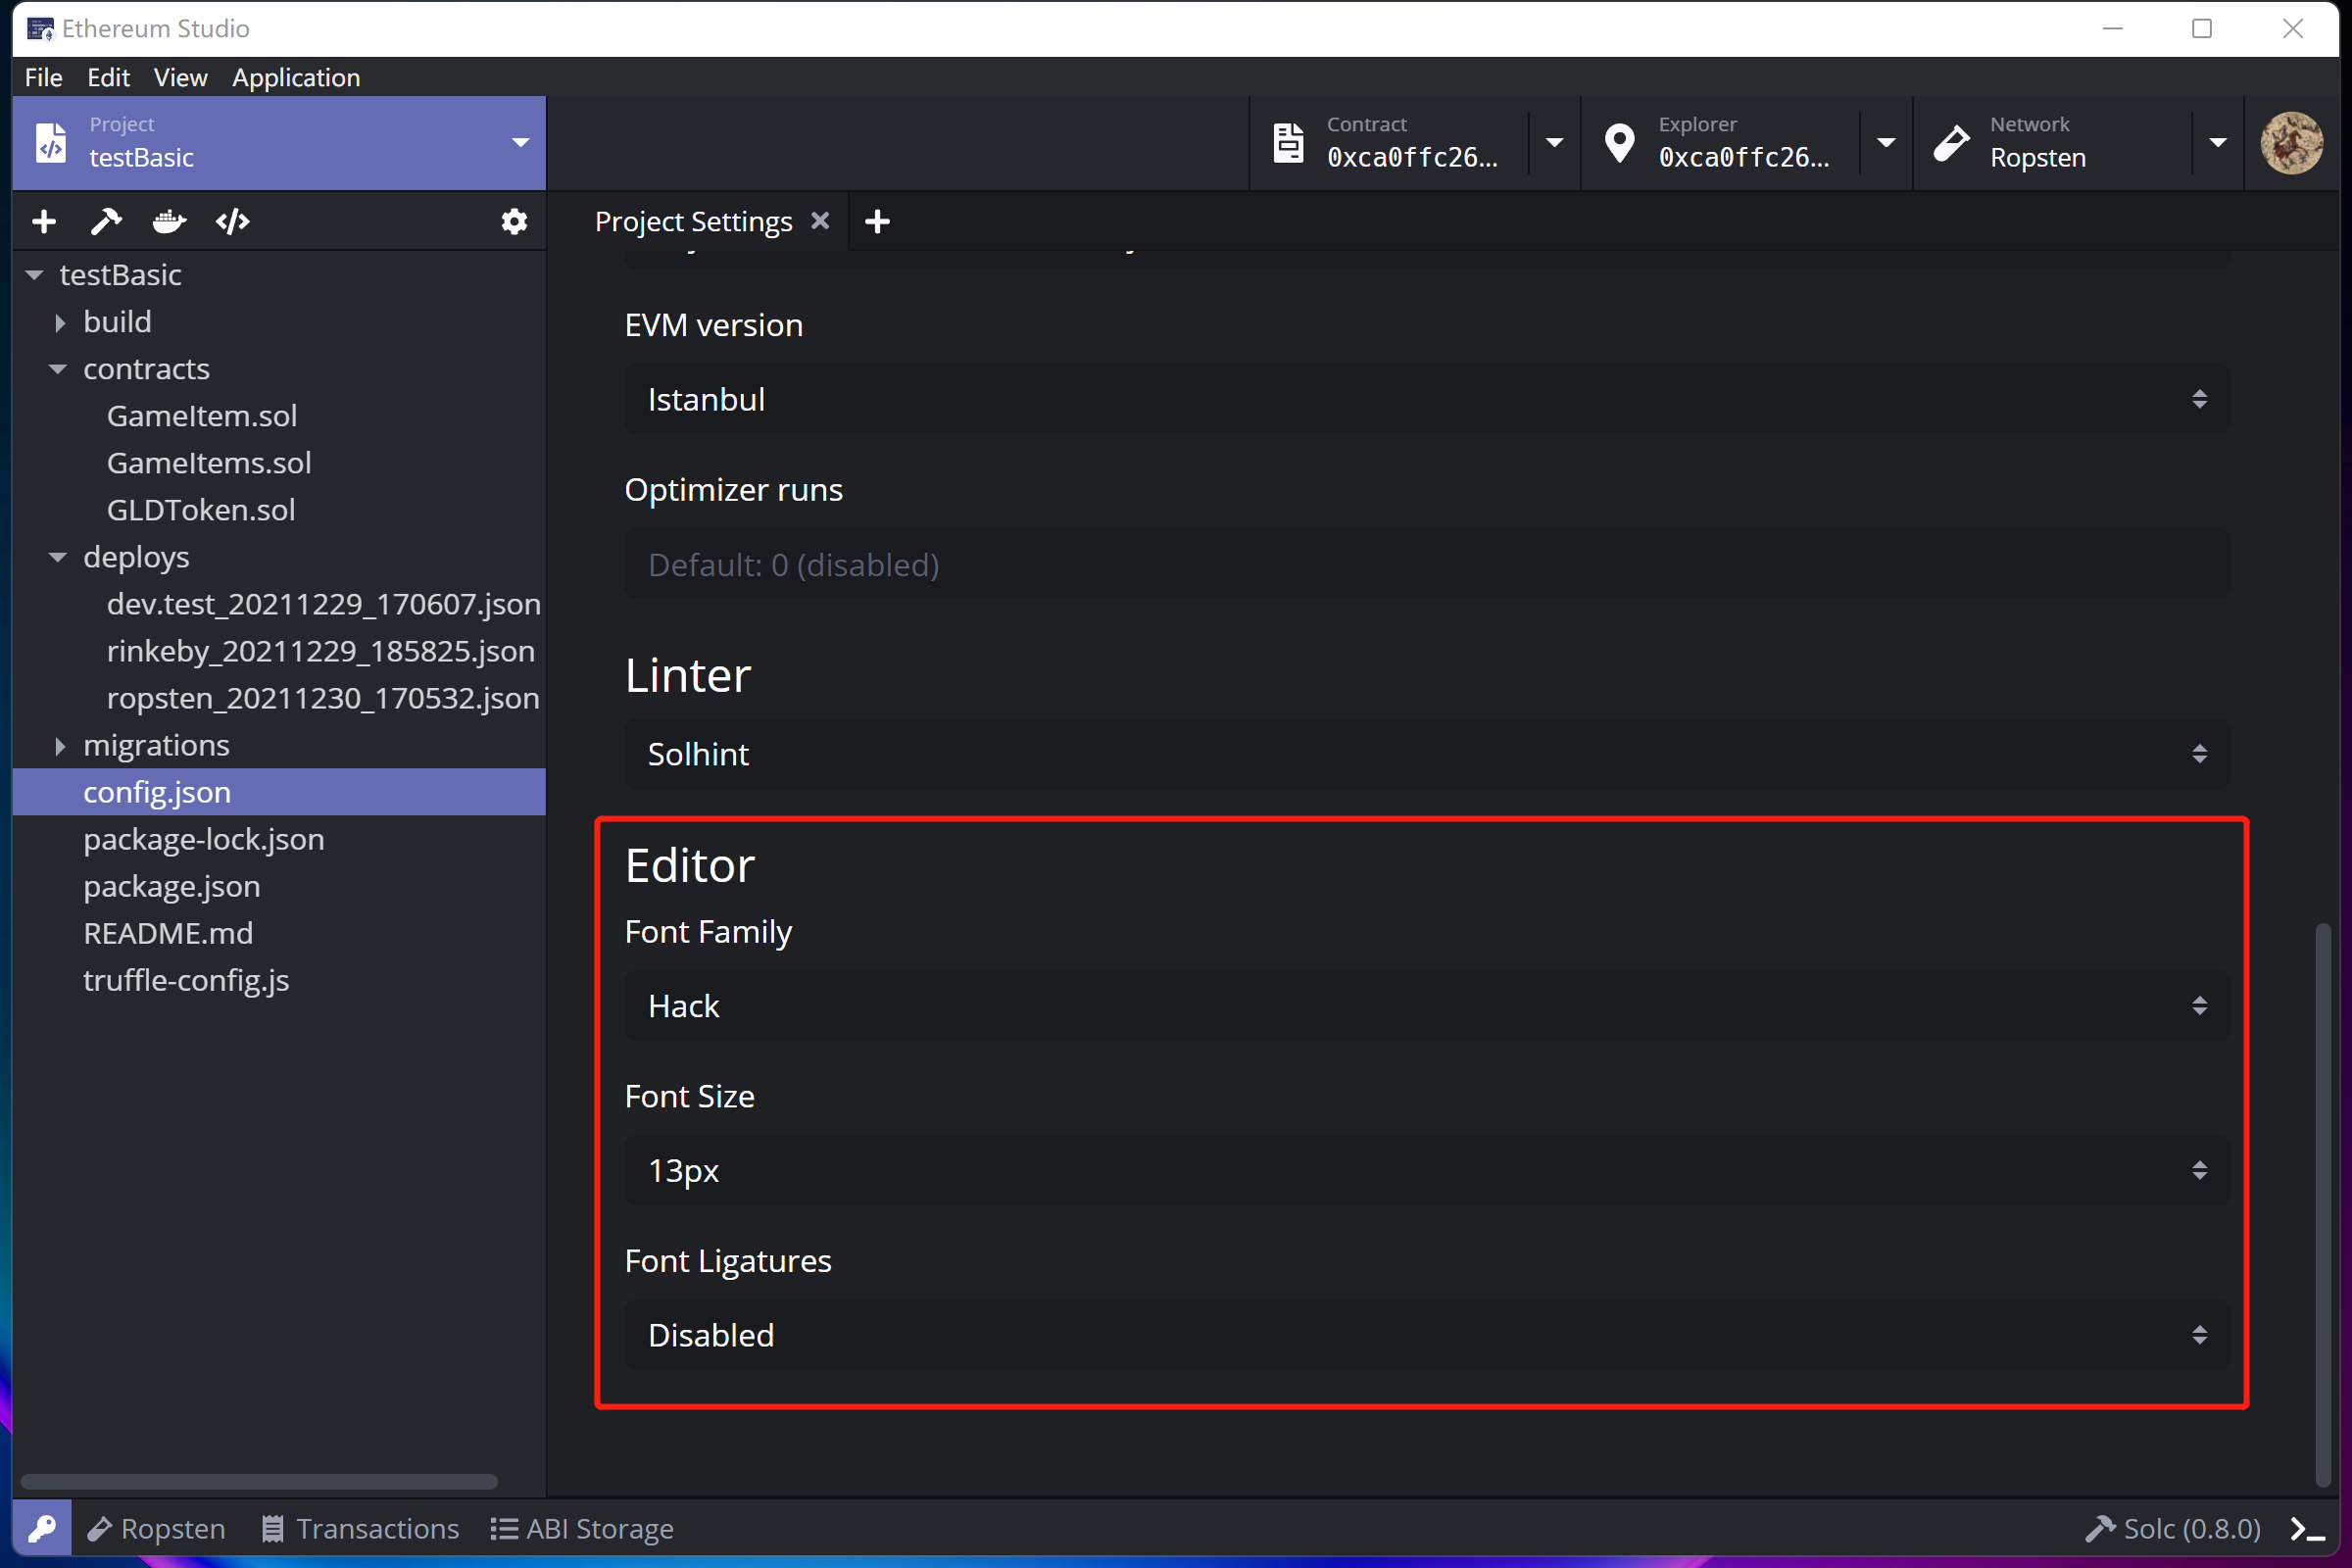
Editor
In “Editor”, developers can choose a font-related configuration to make code more specific and direct as desired.
Tool Bar
Between “Project” panel and fill tree, tool bar has several quick functions for developers.
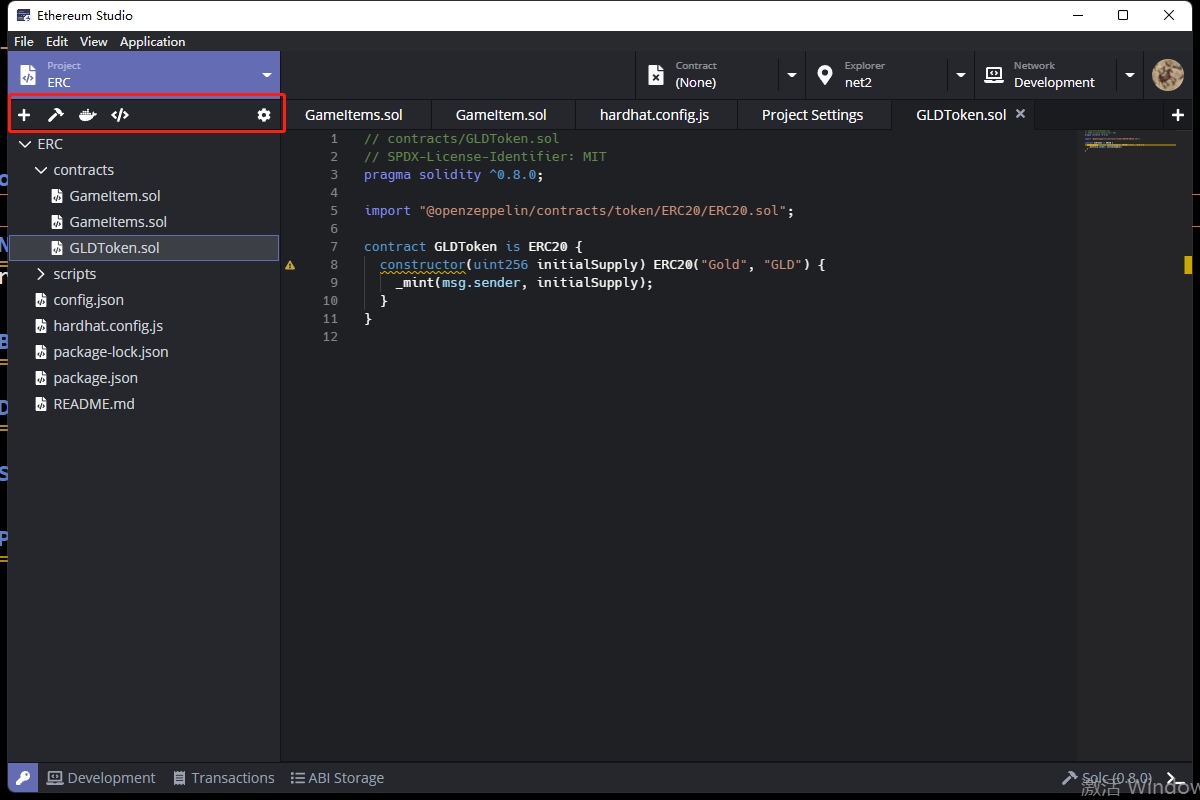
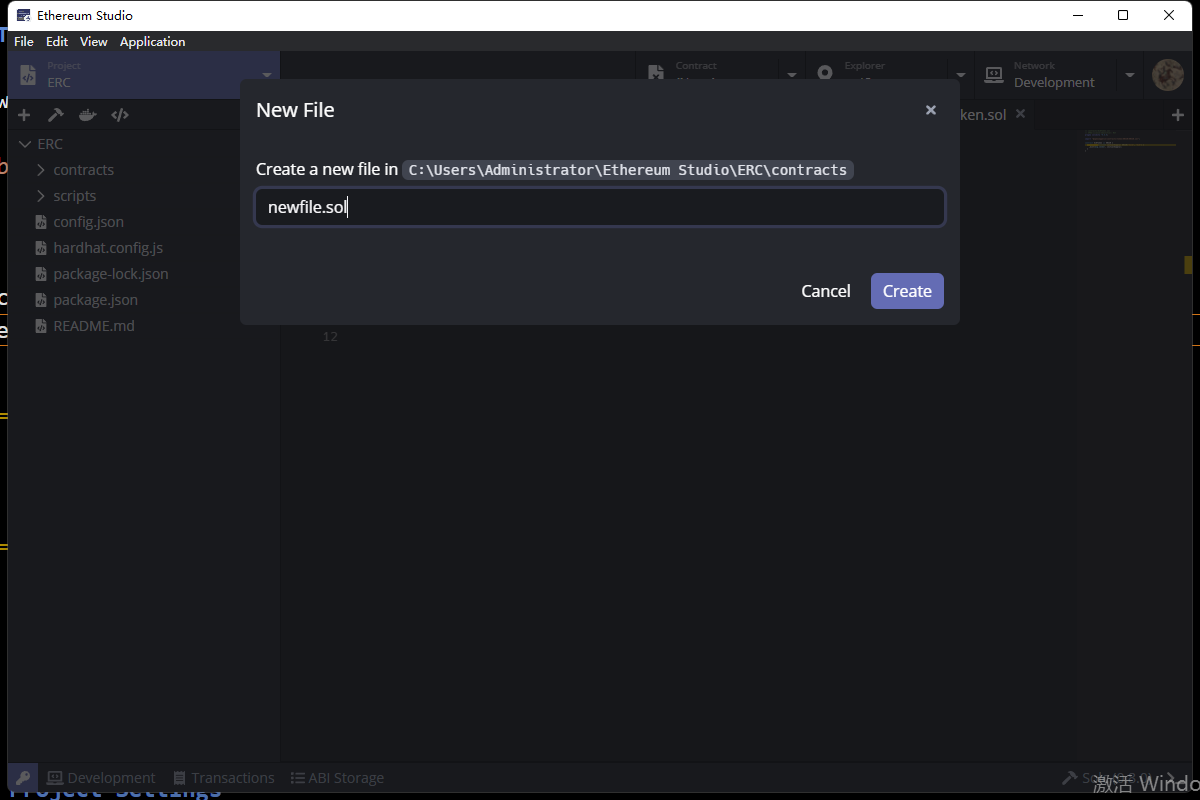
New File
Clicking “plus” icon named “New File”, developers can create a new file in the current path. Developers can define both name and type of the new file in the input box. Then, click the purple “Create” button and the new file will be generated successfully.
Build
Developers can build all the contracts together quickly by clicking the “hammer” icon. The detail information for buidling can be checked in “Build” section above.
Deploy
Developers can deploy the contract by clicking the “docker” icon. The detail information for buidling can be checked in “Deploy” section above.
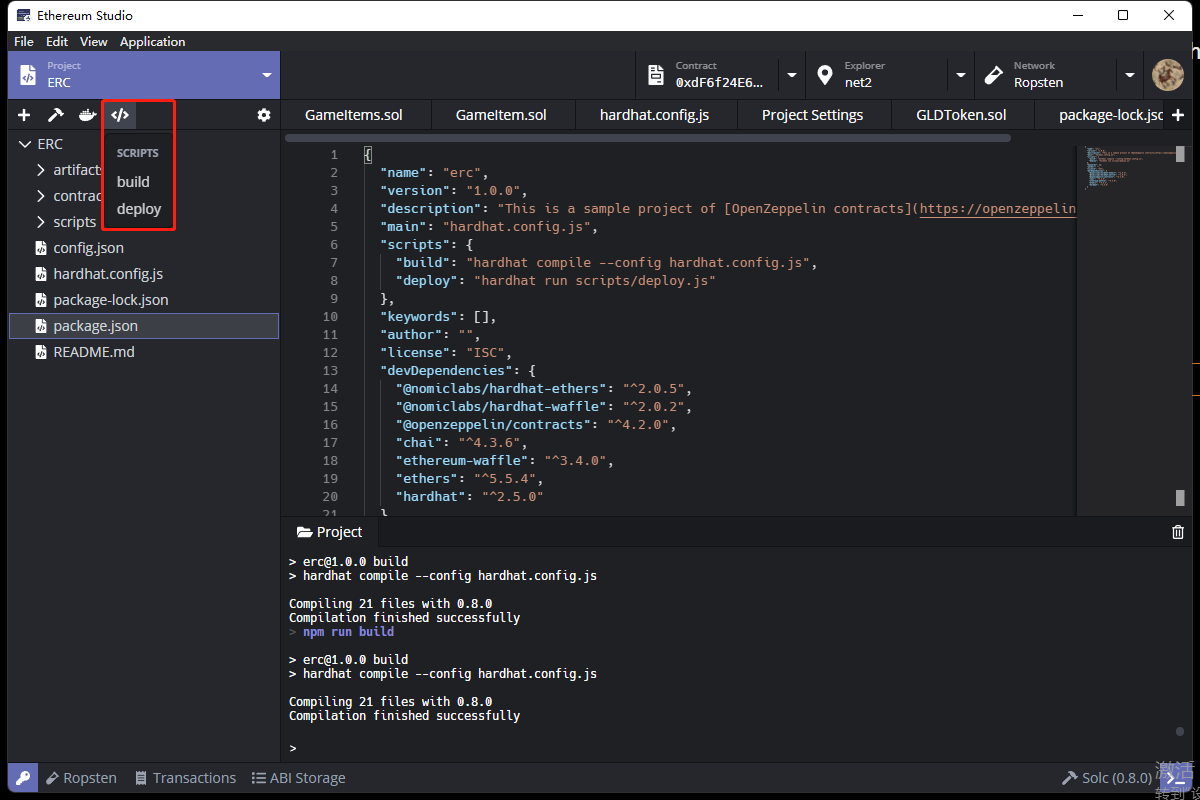
Script
Click the “code” icon and select “build” or “deploy” in “Script”. Then there would be corresponding command line in “script” part of “package.json” inputted in the terminal and excuted automatically.
Project Settings
Click the “code” icon and select “build” or “deploy” in “Script”. Then there would be corresponding command line in “script” part of “package.json” inputted in the terminal and excuted automatically.
